

A paint calculator is a simple tool that converts your room or exterior measurements into the amount of paint required per coat. For Milton projects and nearby Mississauga homes on Nighthawk Trail, Home Painter Services uses calculators during on-site estimates to right‑size materials, reduce waste, and keep schedules tight.
By ZIKRIA MUJAHID — Home Painter Services
Last updated: 2026-06-13
Quick Summary
Use a paint calculator to translate wall, ceiling, trim, and exterior dimensions into gallons (or liters) per coat. Measure length × height, subtract doors and windows, apply coverage from the product label, then add 5–10% contingency. Accurate inputs prevent shortages, protect finish quality, and minimize leftover cans.
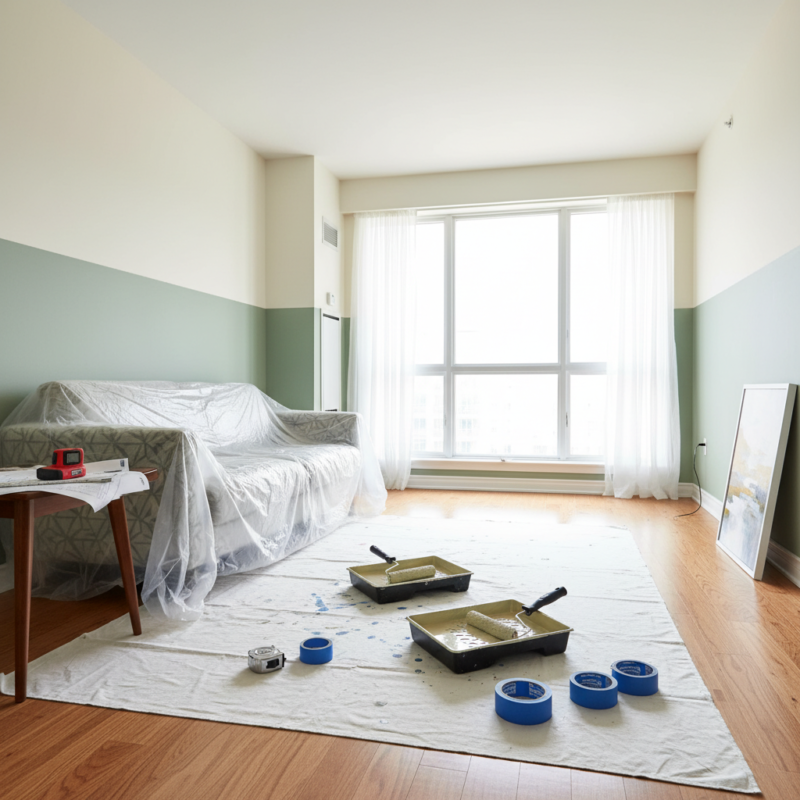
This complete guide shows how pros at Home Painter Services measure, log, and calculate so you can plan like a painter. You’ll see where calculators shine, when to bring in a pro walk‑through, and how prep steps—like power washing, sanding, priming, and caulking—change the numbers.
- What a paint calculator is and the math it uses
- Why calculators improve finish quality, speed, and sustainability
- Step‑by‑step measuring workflow for walls, ceilings, trim, and exteriors
- Types of calculators for interiors, cabinets, decks/fences, and siding
- Milton and Regional Municipality of Halton field tips that keep estimates honest
What Is a Paint Calculator?
A paint calculator estimates how much paint you need by converting measured surface areas into coverage units per coat. It accounts for openings, number of coats, surface texture, primer, and manufacturer spread rate. With clean inputs, it predicts quantities that protect uniform color and film build.
In practice, a paint calculator is a bridge between your tape measure and the paint counter. It normalizes decisions—coverage per gallon, typical door/window areas, and number of coats—so every room is comparable and you aren’t guessing aisle-side.
Key facts that guide most projects:
- Typical interior wall coverage: about 350–400 sq ft per gallon per coat on smooth drywall.
- Standard deductions: an interior door often approximates 21 sq ft; a medium window 12–15 sq ft.
- Ceilings: calculate length × width; many get one to two coats depending on staining and sheen.
- Contingency: rounding up 5–10% helps maintain even film thickness and color consistency.
Here’s the thing: calculators don’t remove judgment. They highlight where judgment matters—texture, porosity, and strong color changes all increase consumption. We factor those in before any can is opened.
Why Paint Calculators Matter
Paint calculators align materials with scope so crews paint, not scramble. Accurate quantities limit store runs, avoid thin, patchy coats from rationing, and reduce leftovers. They also prompt better prep planning—primers, caulking, and sanding—so projects finish cleanly and on time.
We’ve found three wins repeat across Milton and Mississauga homes:
- Fewer surprises: Predictable quantities support color continuity across rooms and batches.
- Better finishes: Enough product creates proper film build, which improves durability and washability.
- Greener choices: Buying close to need reduces partial cans and disposal headaches.
Numbers help drive decisions. Two coats on 800 sq ft of wall surface at 375 sq ft/gal/coat projects to roughly 4.3 gallons—round to 5 gallons for even rolling and touch‑ups. That small overage keeps your finish uniform instead of starved.
How a Paint Calculator Works (Step‑by‑Step)
Multiply each wall’s length by height, subtract doors and windows, and total the remaining area. Add ceilings if included. Multiply by coats, then divide by the product’s labeled coverage per coat. Increase 10–25% for texture, raw substrates, or drastic color shifts, and round up.
Here’s the field workflow we use on free estimate visits:
- Map the room: Label walls A–D. Note height at multiple points; vaulted areas change totals.
- Measure walls: Length × height per wall; sum all walls for total wall area.
- Deduct openings: Subtract doors (~21 sq ft) and typical windows (~12–15 sq ft each) or measure precisely.
- Add ceilings: Length × width if you’re painting the lid; note texture (smooth, popcorn, knockdown).
- Assign coats: Most walls take two; ceilings and trim vary; cabinets often involve primer plus multiple light passes.
- Use label spread rate: Divide each surface area by the paint’s stated coverage per coat.
- Adjust + round: Add 5–10% contingency. Increase up to 25% for new drywall, raw wood, or heavy texture.
Process example: A 12×15 ft room with 8 ft walls has 2 × (12 + 15) × 8 = 432 sq ft of wall area. Deduct one door (21) and one window (15) to get 396 sq ft. Two coats at 375 sq ft/gal/coat needs ~2.1 gallons—round to 3 for touch‑ups and roller load loss.
| Method | Speed | Accuracy | Best For |
|---|---|---|---|
| Online calculator | Fast | Good | Simple rooms; standard repaints |
| Manual worksheet | Moderate | Good–Great | Unique layouts; vaulted ceilings |
| Pro assessment | Fast–Moderate | Great | Exteriors, cabinet spraying, epoxy floors |
Types of Paint Calculators and When to Use Them
Choose a wall-and-ceiling calculator for bedrooms and hallways, a trim/doors tool for enamel work, and an exterior calculator for siding or stucco. Specialty estimators cover cabinets, decks/fences, and concrete floors, which absorb and build differently than walls.
Surfaces behave differently, so your calculator should, too. Here are common use cases we see on projects around Milton and Mississauga:
- Interior walls/ceilings: Bedrooms, basements, and stairwells. Watch stair stringers and sloped walls—tape and measure directly.
- Trim/doors: Smaller but detail‑heavy. Enamels have different spread rates; doors and casings add up fast.
- Cabinets (spray): Factory‑like finishes use primer plus multiple light passes of lacquer or polyurethane. Count doors and drawers.
- Decks and fences: UV‑protective stains soak into wood; board width and spacing matter. Deck sanding before staining changes absorption.
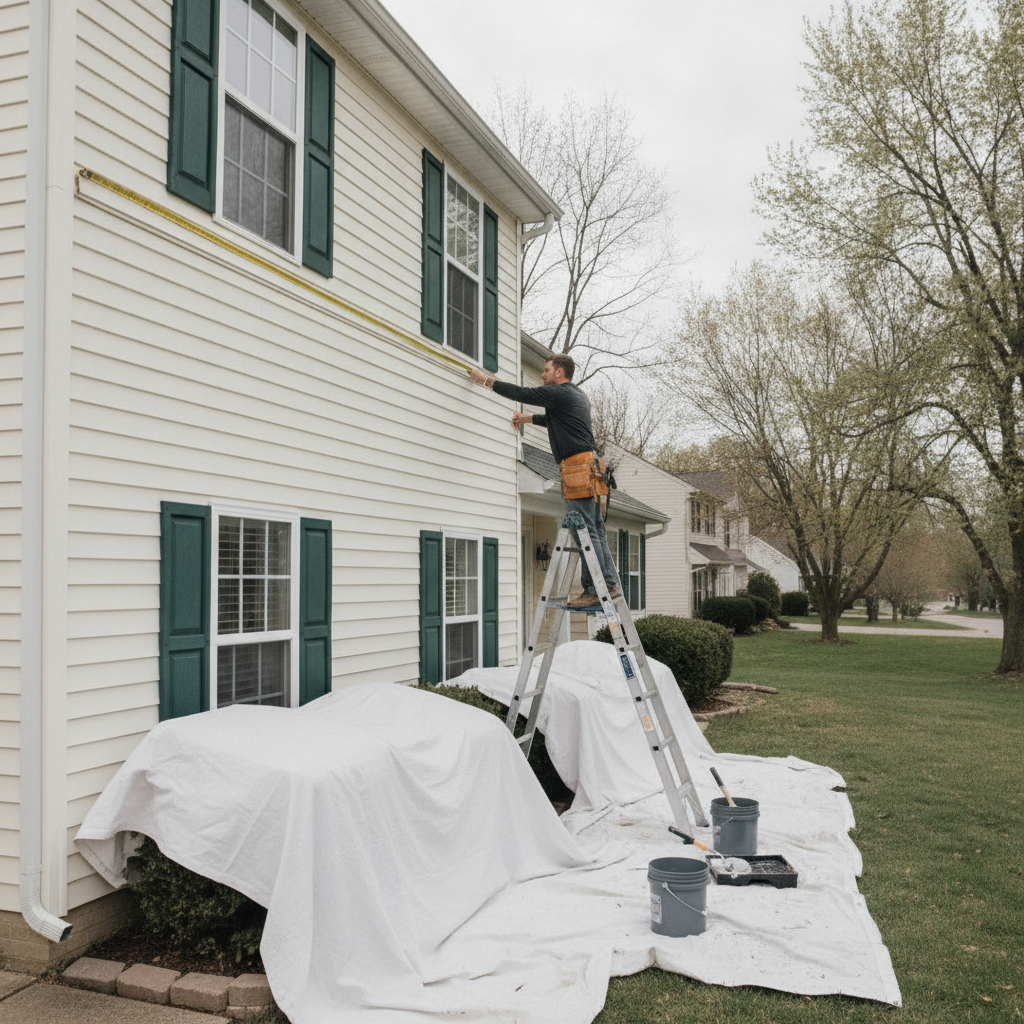
- Exterior siding/stucco: Texture and weathering increase consumption. Power washing and caulking affect primer and topcoat needs.
- Concrete floors (epoxy): Systems include primer/base and build coats; flake or metallic effects alter material volume.
We often split calculators by surface so trim, cabinets, and walls don’t cannibalize each other’s material budgets. That preserves finish pride items—like cabinet doors—without starving large walls.
Best Practices for Accurate Estimates (Milton & Halton)
Measure twice and log everything. In Milton and the Regional Municipality of Halton, factor humidity swings, exterior porosity, and prep steps like power washing and priming. Verify label coverage, count openings carefully, and round up 5–10% to protect film build and timelines.
Our field checklist keeps calculations consistent across homes:
- Standardize openings: If you can’t measure every pane, use a consistent 12–15 sq ft for typical windows and 21 sq ft for doors.
- Note porosity early: New drywall, bare wood, and chalky stucco can add 10–25% to expected consumption.
- Plan prep as product: Power washing, sanding, and priming behave like materials—log them so time and paint match reality.
- Color shifts: Dark‑to‑light (or vice versa) often requires a primer and can add a coat. Expect at least 1 extra pass in bold changes.
- Weather windows: Exteriors typically like 50–85°F with surface temps a few degrees above dew point; aim for low wind and dry afternoons.
Small details compound. Rolling loss can eat 5–10%, ceilings with light texture absorb more, and trim enamels are less forgiving of thin coats. Build these margins in up front and the finish tells the story.
Local considerations for Milton
- Midday exterior readings are steadier; morning dew near Walker Park can skew moisture checks on siding and decks.
- Spring and fall offer wider drying windows; summer humidity and winter cold compress schedules across Halton.
- Around Tremaine at Bergamot, plan ladder staging and parking with bus traffic in mind to reduce setup delays.
Tools and Resources (What We Actually Use)
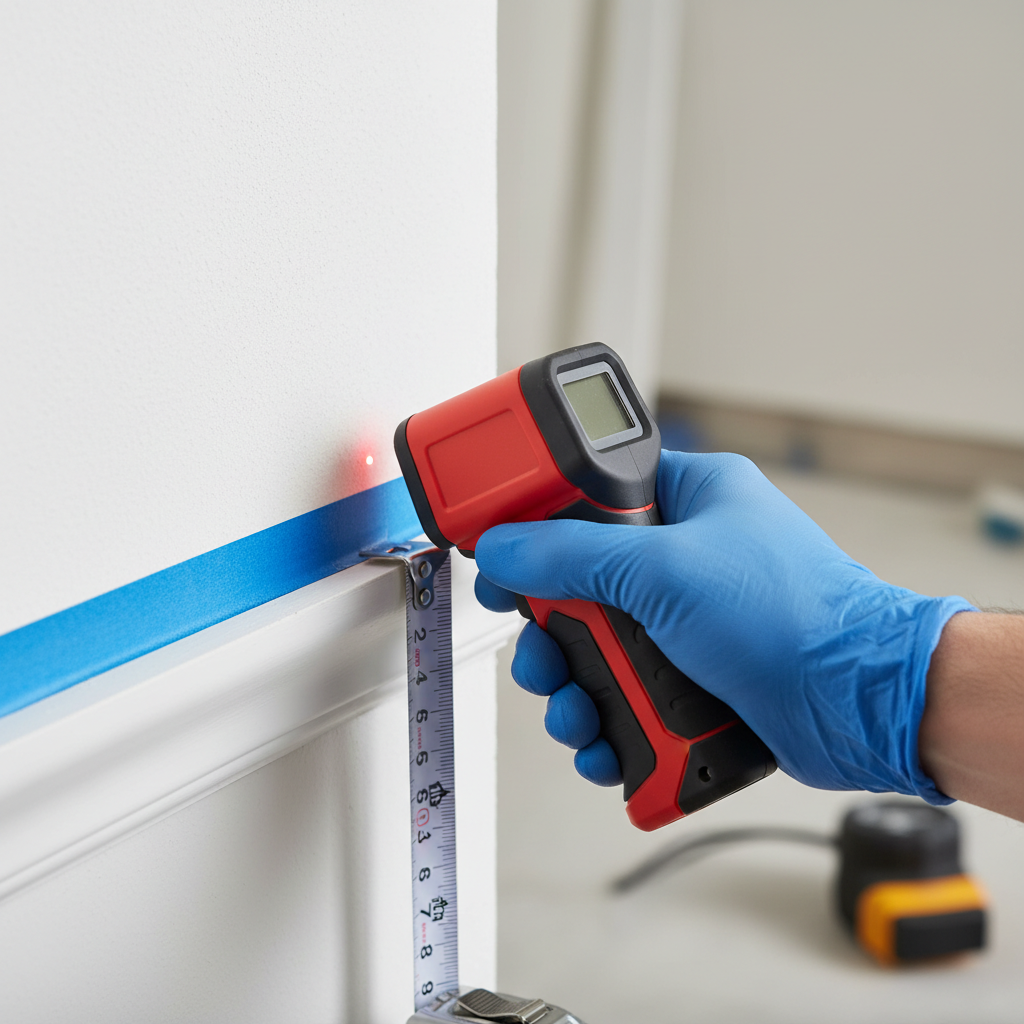
Bring a 25–30 ft tape, a laser measurer, a notebook or worksheet, and the product’s coverage data. Add a moisture meter for exteriors, plus painter’s tape to label walls while measuring. Consistent tools make consistent math—and cleaner paint days.
Our crews and homeowners get reliable numbers with a tight kit:
- Measuring: Long tape + laser for tall foyers; measure at least twice per wall.
- Marking: Painter’s tape to mark walls A–D; jot heights at corners and mid‑spans.
- Recording: A reusable worksheet with rows for area, openings, coats, primer, and notes.
- Validation: Product label spread rates and recommended film builds.
- Prep aids: Sanding sponges, scrapers, caulking gun, and a small moisture meter for wood/stucco.
Want the worksheet we use on estimates? Ask during your free visit; we’ll leave a one‑pager you can reuse for every room and surface in your home.
For additional context on seasonal prep, see this practical outdoor prep checklist. For cabinet projects, this cabinet painting process overview explains why primers and multiple light passes matter. If you’re new to room refreshes, skim an interior painting guide for baseline steps.
Case Studies and Real‑World Examples
Calculators shine where complexity hides: openings‑heavy kitchens, two‑story foyers, and weathered exteriors. Right‑sized quantities prevent mid‑project shortages and keep film thickness uniform on cabinets, trim, and broad walls for a professional, durable finish.
Examples from local projects we serve:
- Milton bedroom repaint: Two wall coats and one ceiling coat. The calculator flagged 0.4 gallons for patch‑primed skim coat areas—rounding up to 1 gallon kept the lid even.
- Mississauga kitchen cabinet spray: Door/drawer counts plus primer and topcoat passes prevented starving the last bank. Factory‑like sheen stayed consistent.
- Deck staining after sanding: Board width (5.5 in) and stair treads increased stain needs by roughly one extra can; the calculator saved a Saturday run.
- Exterior siding + trim: Power washing and window caulking notes added primer. Rounding up maintained color match between elevations.
- Garage epoxy floor: Square footage, flake broadcast rate, and clear build coat were pre‑planned—no thin spots at the apron.
If you want to walk through a room or two together, we’re happy to measure on site and leave you with a full material plan. That includes prep steps and a sequencing map so painting day is plug‑and‑play.
Free Color Consultation + On‑Time Completion: Book a fast estimate and we’ll measure, calculate, and stage your project so day one is clean, safe, and efficient. Start on our Services page.
Advanced Tips: Ceilings, Cabinets, Decks, and Exteriors
Treat ceilings, cabinets, decks, and exteriors as distinct calculators. Texture, absorbency, and coating build vary widely. Count components (doors, drawers, rail spans), log primers separately, and adjust for prep like deck sanding or power washing that changes absorption.
Where homeowners underestimate most often—and how to correct it:
- Ceilings: Light texture can add 10–15% product. Water stains call for stain‑blocking primer before the ceiling paint.
- Cabinets: Count every door and drawer front. Sprayed lacquers need primer plus multiple light passes—add 10% for staging/touchups.
- Decks/Fences: After deck sanding, thirsty boards soak the first coat. Add 15–25% on raw or heavily weathered wood; note rail/picket counts.
- Exteriors: Chalky siding or failed trim paint needs a bonding or stain‑blocking primer. Caulking replacement changes your material plan.
Connect the dots: accurate calculators depend on honest prep. If you power wash, sand, prime, or re‑caulk, log those steps first and let the math follow. It’s how we keep our on‑time completion promise realistic.
How Paint Calculations Power Our Services
Accurate paint math anchors our interior and exterior painting, cabinet spraying, epoxy floors, deck/fence staining, driveway sealing, window re‑caulking, and power washing. Clean estimates set the stage for safer ZERO‑VOC interiors and long‑lasting, weather‑ready exteriors.
Real touchpoints you can expect from Home Painter Services:
- Interior Painting: ZERO‑VOC products and careful floor/furniture protection. We calculator‑check rooms before we prep.
- Exterior Painting: Power washing, surface repairs, and primer planning based on siding/stucco condition.
- Kitchen Cabinets (Spray): Factory‑like lacquer or polyurethane finishes, doors/drawers tracked for even film build.
- Garage Epoxy Flooring: Diamond grinding, primer/base, and topcoat quantities planned off square footage and system build.
- Decks & Fences Staining: Deck sanding, UV‑protective stains, and rail math so first and second coats don’t come up short.
- Exterior Window Caulking Replacement: Linear‑foot logging ensures full reseal with proper weather windows.
- Power Washing: Treated as pre‑paint prep; recorded to keep timelines, dry times, and primer needs aligned.
Every service benefits from right‑sized materials and sequencing. That’s how we deliver smooth finishes and predictable schedules—backed by our free color consultation, free estimate, and an on‑time completion promise on the Services page.
Frequently Asked Questions
Most calculator issues trace to measurement gaps and ignoring product coverage. Measure carefully, subtract openings, read the label, and add a small contingency. For vaulted ceilings, cabinets, or exteriors, pair an online tool with a pro walk‑through.
How many coats should I plan for?
Most interior walls take two coats over spot‑primed repairs; ceilings often need one to two. Raw wood, new drywall, stained areas, or bold color changes usually add a dedicated primer and sometimes an extra finish coat. Always follow the label’s coverage and recoat timing.
Do paint calculators work for cabinets and trim?
Yes—treat them as separate surfaces. Cabinet and trim enamels or lacquers build differently than wall paints. Count doors and drawers, include primers, and favor multiple light spray passes for a factory‑like finish. Round up for touch‑ups and staging loss.
What coverage should I use per gallon?
A common baseline is 350–400 sq ft per gallon per coat on smooth interior walls. Expect less on textured surfaces, new drywall, or bare wood. Prioritize the specific label’s spread rate and recommended film build for accurate results.
How do I measure a room fast without missing details?
Label walls A–D with painter’s tape, record length × height for each, and mark door/window deductions as you go. Measure ceiling length × width separately. Log the number of coats per surface and note any texture or primer needs. Then run the totals through your calculator.
Key Takeaways and Next Steps
Measure cleanly, subtract openings, use the product’s coverage, and add 5–10% contingency. Treat ceilings, cabinets, decks, and exteriors as separate calculators. For complex spaces, book a professional walk‑through to lock in schedule, materials, and finish quality.
- Map, measure, and log per surface; don’t mix walls, trim, and cabinets.
- Plan primers, caulking, and prep—they change yield and timelines.
- Round up to maintain film build and color continuity across rooms.
- For Milton and Mississauga homes, we’ll measure on site and leave a reusable worksheet—start on our Services page.
Ready to plan like a pro? Book a walkthrough in Milton and the greater Halton area. We’ll measure, calculate, and schedule so painting day is straightforward and stress‑free.