


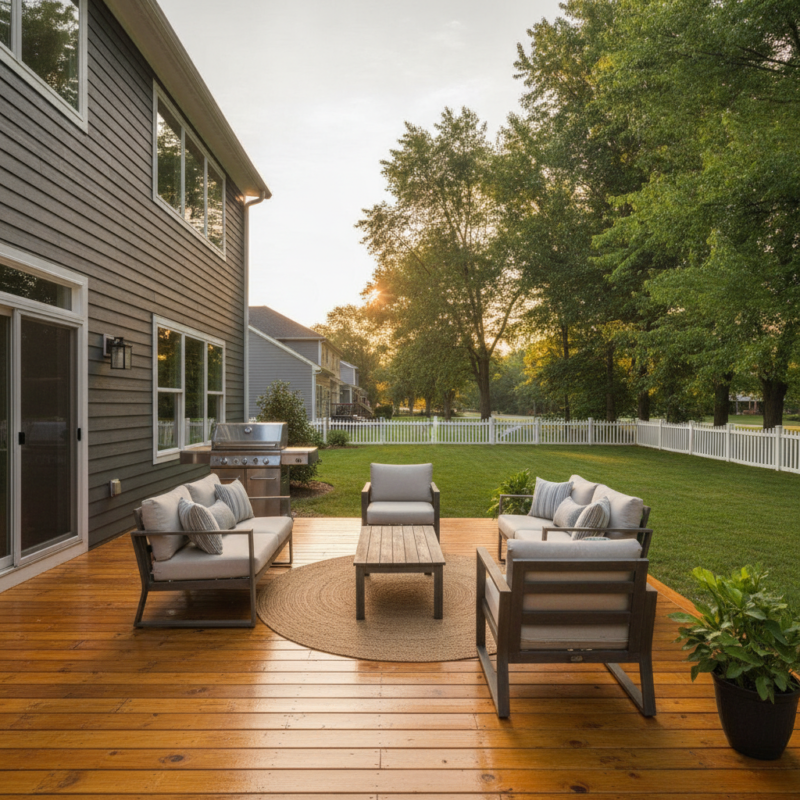
Deck staining services are the professional cleaning, sanding, staining, and sealing of exterior wood to restore color, block moisture, and resist UV damage. Done correctly every 2–3 years in the 316 Bergamot Ave area, staining extends deck life, improves safety underfoot, and boosts curb appeal. It’s the most efficient way to protect wood without a full rebuild.
By Home Painter Services • Last updated: 2026-07-02
Overview & Table of Contents
This complete guide explains what deck staining is, why it matters in our climate, and how a pro-grade process works from prep to maintenance. Use it to evaluate providers, understand stain types, and plan your timeline. We also include local considerations for 316 Bergamot Ave and nearby streets so your project runs smoothly.
We wrote this best-practices guide for homeowners who want long-lasting results without guesswork. You’ll learn how we prepare wood, choose the right stain, apply it under the right conditions, and maintain the finish with light annual care. You’ll also see examples that mirror typical homes near 316 Bergamot Ave.
- What deck staining services include (and don’t)
- Why timing, temperature, and moisture content decide outcomes
- How prep, power washing, and deck sanding work together
- Oil vs water-based stains; semi-transparent vs solid color
- Application methods and drying/curing timelines
- Maintenance cycles and simple homeowner checks
- Pricing factors without numbers, so you can scope the work
Local considerations for 316 Bergamot Ave
- Schedule washing and staining outside heavy bus traffic windows near Tremaine at Bergamot to simplify access and drying time.
- Late spring to early fall offers the best temperature and humidity window; aim to finish coats before fall rains common around Walker Park.
- If you’ve recently re-caulked windows or power washed siding, plan deck work after those tasks to avoid splash-back and dust landing on wet stain.
What Is Deck Staining?
Deck staining is the pro treatment of exterior wood to add color, repel water, resist UV, and slow wear. Services include washing, repairs, sanding, stain selection, application, and top-up sealing. The right film build and penetration reduce checking, splinters, and gray weathering while preserving the deck’s natural grain or delivering a uniform color.
At its core, staining balances appearance and protection. Transparent and semi-transparent products highlight grain; solid-color stains mask color variations and offer stronger UV shielding. Both can improve traction and reduce surface roughness when paired with thorough prep. For most homes near 316 Bergamot Ave, a two-coat system on properly prepped wood provides the best durability-to-beauty ratio.
- Protection goals: slow UV breakdown, repel liquid water, allow vapor to escape.
- Appearance goals: enhance or even out wood tone, reduce blotchiness from past coatings.
- Safety goals: reduce raised fibers and splinters through deck sanding and controlled film build.
- Lifecycle goals: enable simple maintenance coats instead of full strip-and-recoat cycles.
Real-world example: a cedar deck with gray weathering and light mildew cleaned with commercial-grade power washing, oxidized fibers lightly sanded, and refinished with a semi-transparent UV-protective stain will typically look refreshed for multiple seasons with a quick wash each spring.
Why Deck Staining Matters (Durability, Safety, Curb Appeal)
Unprotected decks fade, absorb water, and shed fibers within a single season of sun and rain. Staining adds a moisture barrier and UV blockers that stabilize the surface. Expect better color retention, fewer splinters, and a deck that resists rot—often extending the maintenance cycle to 24–36 months with simple seasonal cleaning.
Here’s the thing: outdoor wood is under constant attack from sunlight, temperature swings, and wet-dry cycles. Without a protective finish, lignin breaks down, boards gray, and hairline checks widen. Smooth walking surfaces can turn rough enough to snag socks. A sound stain system interrupts that cycle by sealing out liquid water while letting vapor escape, which helps boards stay flatter and tighter.
- UV resistance: Pigments act like sunscreen, slowing color loss and fiber damage.
- Water repellency: Hydrophobic resins reduce swelling, shrinking, and cupping.
- Mildew resistance: Proper washing and dry-down before staining reduce organic growth.
- Traction and feel: Light sanding plus even film build cuts down on splinters.
Think of a well-stained deck near 316 Bergamot Ave as a system: correct prep, the right product for wood species and exposure, and application within a good temperature/humidity window. Miss one piece—say, stain too soon after rain—and adhesion drops fast. Aim for a surface moisture content under roughly 15% before coating and stable, dry weather through the cure.
How Deck Staining Services Work (Step-by-Step)
A professional deck staining service follows a sequenced workflow: inspect and test moisture, wash and rinse, dry, repair and sand, mask and protect, apply stain with controlled coverage, allow proper cure, and perform a final walkthrough. Each step protects adhesion, color uniformity, and long-term durability.
In our experience, outcomes are won or lost during prep. We build in drying time between washing and coating, verify moisture with a meter, and correct raised fibers through targeted deck sanding before any stain touches the boards. Here’s a clear, service-tested process you can expect from our crew.
| Step | What We Do | Why It Matters |
|---|---|---|
| 1) Site protection | Move/cover furniture, protect siding, windows, and planting beds. | Prevents overspray and ensures a clean, efficient workflow. |
| 2) Power washing | Wash to remove grime, mildew, and loose fibers; controlled PSI and fan tip. | Clean wood bonds better; a uniform surface avoids blotchy absorption. |
| 3) Dry-down | Allow full dry; confirm with a moisture meter before coating. | Too-wet wood traps moisture, causing premature failure. |
| 4) Repairs & sanding | Secure fasteners; sand raised grain and edges; spot-fill where needed. | Removes fuzz, improves feel, and promotes even stain uptake. |
| 5) Mask & mix | Mask adjacent areas; mechanically mix stain to disperse pigments. | Prevents lap marks and color variation across the deck. |
| 6) Application | Brush/roll/spray in workable sections; maintain a wet edge. | Ensures uniform film build and penetration without holidays. |
| 7) Cure & check | Respect cure times; back-check for drips; remove masking; tidy site. | Locks in performance and the finished look you approved. |
Below is a detail from the application phase that shows proper brush technique and wet-edge control.
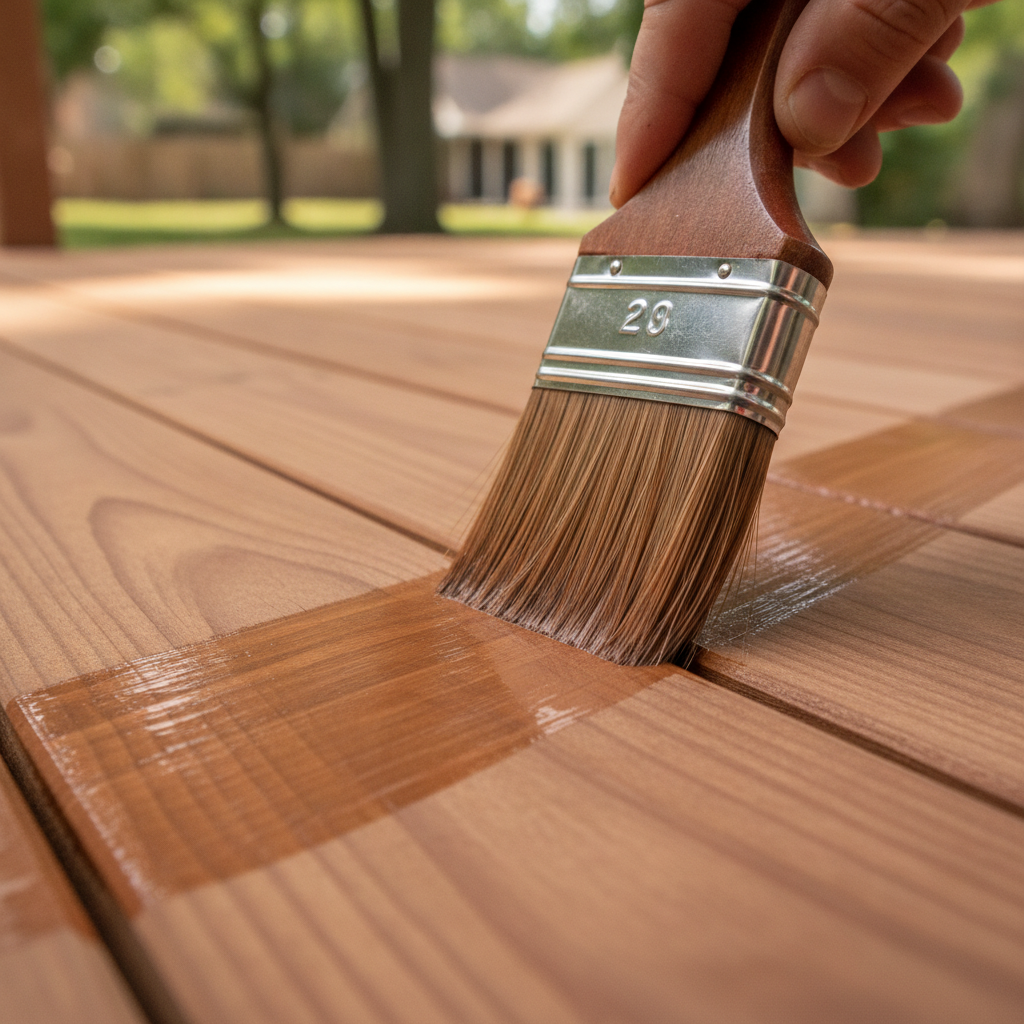
- Timing tip: Work in shade when possible; direct sun speeds solvent/water evaporation and can flash-dry the surface.
- Coverage control: Two thin coats often outperform one heavy coat by reducing puddling and improving cure.
- Edge management: Always maintain a visible wet edge to avoid lap marks.
If your deck also needs rail painting or nearby exterior painting touch-ups, we schedule those after staining cures to avoid dust settling on fresh coatings. Coordination reduces callbacks and keeps your project on our Guaranteed On-Time Completion track.
Types, Methods, and Approaches (Choosing the Right System)
Select stain by wood species, exposure, and desired look. Semi-transparent stains showcase grain; solid-color options maximize UV resistance. Oil-based formulas penetrate deeply; water-based systems dry faster and clean up with soap and water. Application methods—brush, roller, or spray—depend on deck details and access.
Choosing the right product isn’t about brand loyalty; it’s about fit. A shady deck near trees fights mildew more than UV, while a sun-baked platform needs stronger pigments and film build. Here’s a practical breakdown to match products and methods to your deck.
Semi-Transparent vs. Solid-Color
- Semi-transparent: Enhances wood figure; hides light imperfections; requires even prep for best results.
- Solid-color: Uniform appearance; superior UV shielding; great for older, patchy boards.
Oil-Based vs. Water-Based
- Oil-based: Deep penetration; forgiving open time; longer dry; strong water repellency.
- Water-based: Faster dry and recoat; low odor; good color retention; easier cleanup.
Application Methods
- Brush and back-brush: Best control on rails, edges, and end grain.
- Roller and brush: Efficient on flat boards; back-brush to work stain into pores.
- Spray and back-brush: Rapid coverage on complex railings; requires masking and technique.
Don’t skip deck sanding. Even after a careful wash, UV-damaged fibers can leave a fuzzy texture that soaks stain unevenly. A quick pass with the right grit on handrails and traffic lanes transforms feel and longevity. When boards are uneven or cupped, targeted sanding evens absorption and reduces puddling.
Best Practices Our Pros Follow
Professional results come from discipline: measure moisture, stage the job, clean meticulously, sand to remove raised grain, apply stain in thin, even coats, and protect the cure window. We also schedule around weather, shade, and foot traffic so the deck sets up perfectly before you entertain again.
- Moisture target: Coat only when wood is dry enough for strong adhesion.
- Weather window: Avoid rain threats and high winds; check hourly forecasts.
- Stirring: Mechanically mix stains before and during use to keep pigments suspended.
- End-grain care: Seal cut ends; they act like straws for water.
- Footfall plan: Establish no-walk zones and staged access during cure.
- Cleanup discipline: Final site check for drips, holidays, and masking removal.
Example from our crews: on a multi-level deck near 316 Bergamot Ave, we split the job across days to let upper levels cure before moving ladders onto lower platforms. That sequencing kept edges clean and prevented debris from tracking onto tacky boards.
Tools and Resources We Use
Expect commercial-grade washing equipment, moisture meters, orbital sanders, quality brushes and rollers, and premium stains with UV protection. These tools, plus professional masking and mixing gear, control every variable that decides color uniformity, adhesion, and film build—key drivers of long-term performance.
- Power washing system: Adjustable PSI, proper nozzles, and detergents as needed.
- Moisture meters: Verify dry-down before coating.
- Orbital sanders and pads: For fuzz removal and edge refinement.
- Applicators: Shed-resistant rollers, flagged-tip brushes, and spray rigs where beneficial.
- Mixing and strainers: Consistent pigment distribution prevents lap marks.
- Protective gear and masking: Clean lines at posts, siding, and stonework.
The wash phase deserves its own look. Here’s a different-angle view that captures surface prep with controlled pressure and technique—the foundation of durable deck staining services.
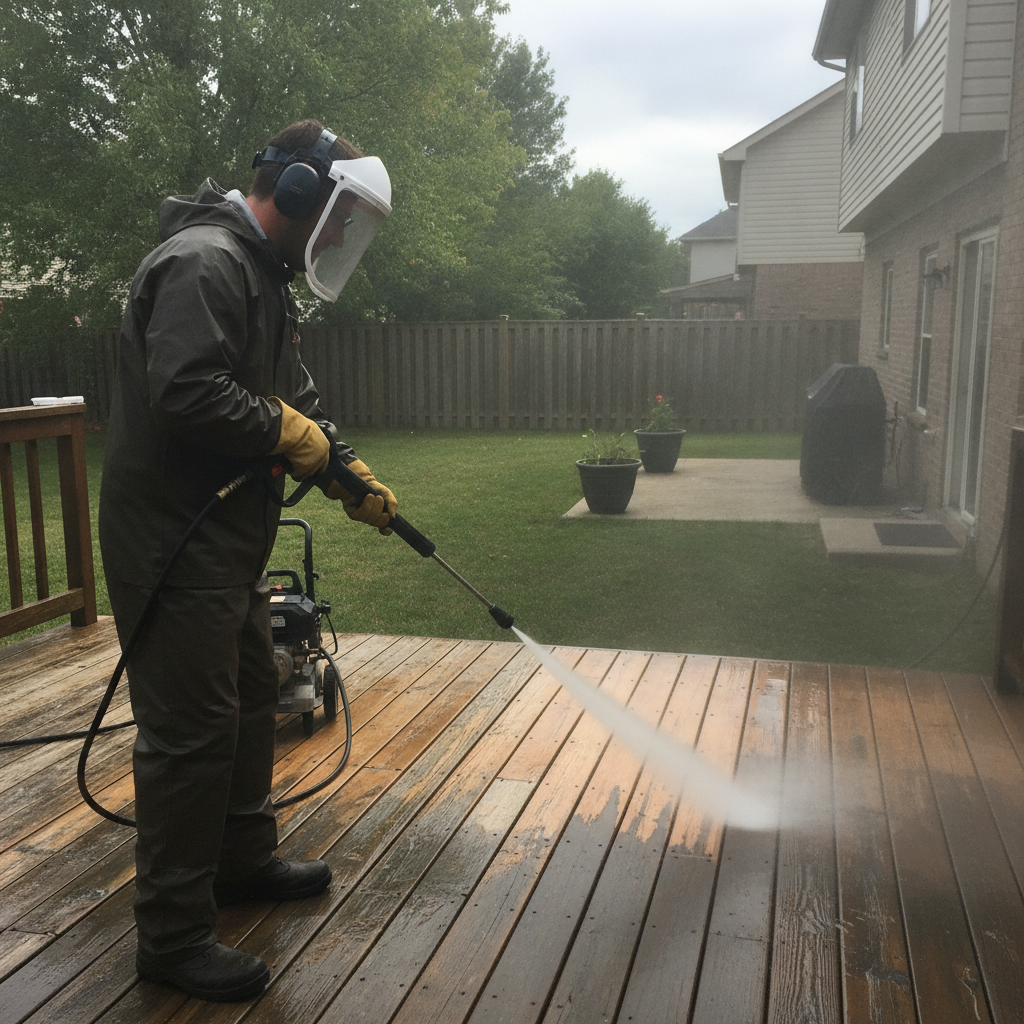
Pre-paint power washing is also how we stage exterior painting or fence staining projects. When services are bundled, we schedule washing once, then sequence staining and painting to minimize disruptions.
Case Studies & Examples Near 316 Bergamot Ave
Here are realistic scenarios from homes like yours: a sun-exposed cedar platform revived with semi-transparent stain; an older pressure-treated deck unified with a solid color; and a rail-and-stair refresh coordinated with exterior painting. Each example shows how prep, product choice, and timing drive results.
- Cedar refresh: Light gray fibers removed by washing and sanding, then two thin coats of semi-transparent stain. Outcome: richer figure, smoother handrails, easy spring rinse to maintain.
- Pressure-treated rescue: Patchy boards made uniform with a solid-color stain. Outcome: stronger UV holdout and cohesive color despite former mismatches.
- Workflow win: We washed siding, deck, and fence same day; stained the deck first, then painted trim after cure. Outcome: one setup, minimal downtime.
In our area, decks over planting beds often collect soil splatter. We edge-tarp beds during washing and keep rinse water moving to prevent spotting. Small touches like these preserve landscaping while delivering a cleaner finish.
Pricing Factors (Without Numbers)
Deck staining investment depends on deck size and complexity, wood condition, prep needs (washing, repairs, sanding), railing and stair details, stain type, and access. Bundling services like fence staining or exterior painting can streamline setup and reduce repeat site visits, which often improves overall efficiency.
- Condition and prep: Heavier washing, repairs, or deck sanding add steps before stain can go down.
- Design complexity: Rails, balusters, and stairs increase detailed labor.
- Product choices: Semi-transparent vs solid-color; oil vs water-based; premium UV packages.
- Access and logistics: Tight lots, landscaping protection, or limited parking shape the schedule.
- Add-on work: Coordinating fence staining or exterior painting can consolidate mobilization.
Our project-based model starts with a free on-site estimate. We document any repairs, confirm your finish goals, and map the sequence so you know exactly what happens on each day of the job—right down to when furniture returns to the deck.
Maintenance & Care After Staining
Plan light washing each spring, spot-clean organic stains early, and inspect traffic lanes for wear. Most decks benefit from a maintenance coat every 24–36 months depending on sun exposure and use. Quick touch-ups on handrails and stair treads can extend the full recoat timeline.
- Seasonal wash: Low-pressure rinse and mild cleaner keep the surface bright.
- Spot vigilance: Remove leaves and planters that trap moisture; wipe up spills.
- Traffic tracking: Watch treads and board edges; these show wear first.
- Fast recoat: When water stops beading or color looks dull, schedule a maintenance coat.
Want to make upkeep even easier? Pair deck staining with periodic power washing and fence staining so your yard presents as one cohesive, protected space. Coordinated timelines save you return visits and keep everything looking fresh together.
Soft CTA — Free Outdoor Finish Check: Book a quick deck-and-fence assessment. We’ll confirm moisture readiness, identify repairs, and suggest a stain system that fits your wood species and sun exposure. Ask about scheduling around family events in the 316 Bergamot Ave area.
Tools, Checklists, and Quick Planner
Use this mini planner to organize your project: confirm deck readiness, pick a stain type, and map the weather window. A simple checklist reduces surprises, shortens downtime, and increases the odds your first coat cures in clean, calm conditions.
Quick Deck Readiness Checklist
- Boards are clean and fully dry (water beads or absorbs evenly).
- No loose fasteners; squeaks and wobbles corrected.
- Handrails feel smooth; fuzz removed with sanding.
- Stain sample on a test board matches your target look.
- Forecast is dry and mild for the application and cure window.
Simple Project Planner
- Choose finish: semi-transparent for grain, solid color for uniformity.
- Pick method: brush/roll for control; spray + back-brush for complex rails.
- Bundle services: add fence staining or exterior painting if needed.
- Block calendar: allow for wash, dry-down, application, and cure.
If you’re also considering garage epoxy flooring or exterior window caulking replacement, we can stage those around your deck schedule to keep crews efficient and your yard accessible.
Frequently Asked Questions
These concise answers address the questions we hear most about deck staining services—from timing and weather to stain choices and walk-on readiness. If your situation is unique, we’re happy to assess your deck on-site and tailor the plan.
How often should a deck be stained?
Most decks benefit from a maintenance coat every 2–3 years, depending on sun exposure, traffic, and product type. South- or west-facing decks may need attention sooner, while shaded decks can often go a bit longer if kept clean and dry.
Is power washing always required before staining?
Yes for weathered decks. Washing removes grime, mildew, and loose fibers so stain can penetrate or adhere. On newer or previously well-maintained surfaces, a lighter clean may suffice, but a truly clean, dry deck is essential for durable results.
Which is better, oil-based or water-based stain?
It depends. Oil-based products penetrate deeply and are forgiving during application. Water-based options dry faster, have lower odor, and hold color well. We match the system to your wood species, exposure, and desired look after a brief site assessment.
When can we walk on the deck again?
Light foot traffic is usually fine after initial dry—often the next day in mild conditions. Full cure and furniture reset typically follow after the product’s recommended window. We’ll confirm timing based on temperature, humidity, and shade.
Conclusion & Key Takeaways
Great deck staining services combine clean, dry wood; smart stain selection; methodical application; and a maintenance plan. Follow the sequence—wash, dry, sand, stain, cure—and your deck will resist sun and rain, feel smoother underfoot, and look intentional from the curb for seasons to come.
- Prep wins durability: Washing and deck sanding decide adhesion and feel.
- Right product, right spot: Semi-transparent for grain, solid for uniformity.
- Thin coats cure better: Two controlled passes beat one heavy coat.
- Plan the window: Dry, mild weather and shade boost outcomes.
- Maintain lightly: Annual wash and timely touch-ups extend recoat intervals.
Ready to protect your deck in the 316 Bergamot Ave area? Our local team sequences washing, sanding, and staining with a Guaranteed On-Time Completion promise. We also coordinate fence staining, exterior painting, and power washing so everything finishes together.
For broader context on deck materials and planning, see this overview of deck wood selection, a planning guide for deck projects, and a local comparison of pressure-treated vs. composite decking. These resources provide helpful background when deciding stain opacity and color strategy.
