

Interior painting cost per sq ft is the area-based effort required to prep, prime, and paint walls, ceilings, and trim. For Milton and nearby Mississauga homeowners (from our base at 3435 Nighthawk Trail), this per‑square‑foot lens clarifies how prep level, coat count, room complexity, and paint quality shape value and timelines.
By Home Painter Services • Author: ZIKRIA MUJAHID • Last updated: 2026-06-12
Quick Summary
Per-square-foot interior painting is driven by four variables: surface preparation, primer and finish-coat system, room/access complexity, and paint quality (including zero-VOC options). Dial in prep, confirm colors and sheens early, plan room sequencing, and keep access clear to maximize finish quality and minimize disruptions.
Use this complete guide to understand how professional painters convert labor, materials, and setup into a simple square-foot planning unit. You’ll see exactly what changes pace, what improves durability, and how to prepare rooms so crews can deliver crisp, long-lasting results throughout your home.
What is “interior painting cost per square foot”?
Interior painting cost per square foot is a planning metric that blends prep effort, coating steps, and access complexity into one comparable unit. Heavier repairs, stain blocking, color changes, and intricate trim increase unit effort; smooth, well-prepped, same-color rooms reduce it and speed delivery.
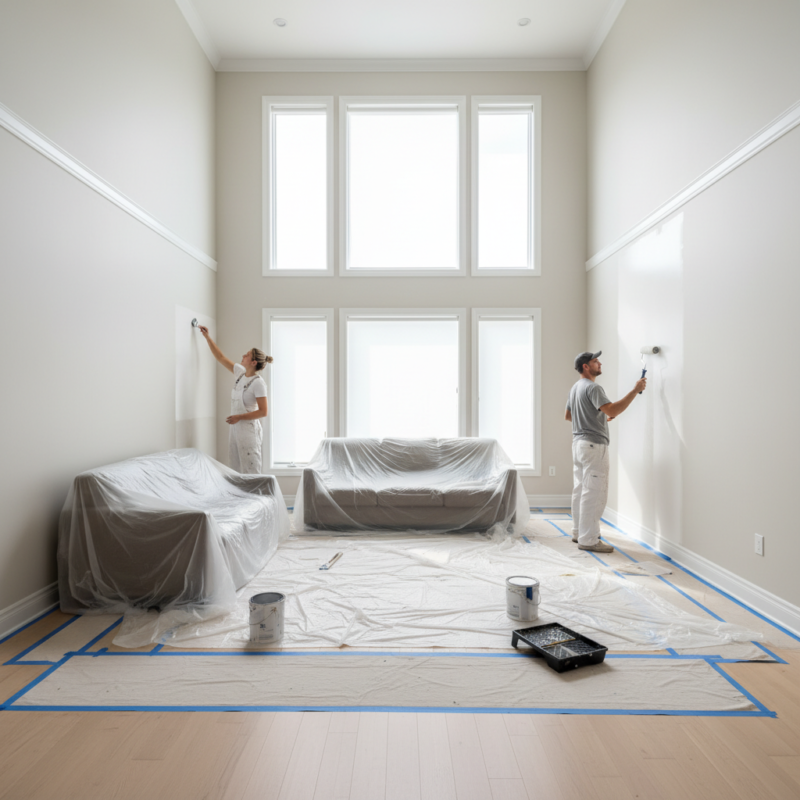
Think of it as a workload index. Pros translate time on surface prep, primer choice, coat counts, and access (ladders, stairwells, built-ins) into a single, repeatable way to scope rooms. That unit flexes by space: a lightly scuffed bedroom is not the same as a tall foyer with previous sheen buildup.
How the unit translates on site
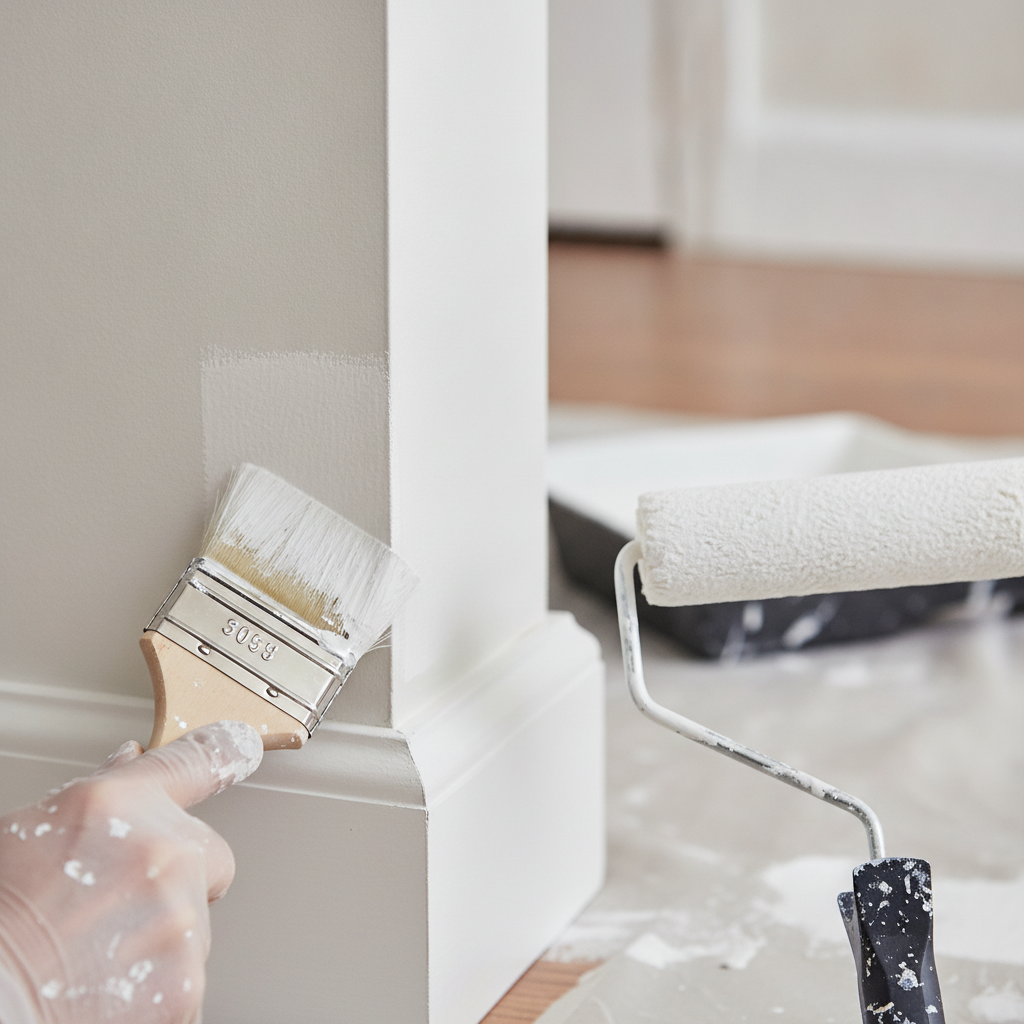
- Preparation steps: Cleaning, masking, floor and furniture protection, scuff-sanding, patching nail pops, caulking gaps.
- Coating system: Primer where needed, then one to two finish coats; trim often demands more precision for crisp lines.
- Access and geometry: 8–10 ft ceilings vs. tall foyers; open stairwells and tight hallways change setup time per square foot.
- Finish durability: Washable, zero‑VOC paints and enamel systems affect application pace and dry times.
Here’s the thing: when you view a project through this lens, it’s easier to align expectations, choose the right system, and understand why one room may take longer per square foot than another.
Why cost per sq ft matters for Milton and the Regional Municipality of Halton
Using a per-square-foot lens helps Milton homeowners compare rooms fairly and plan schedules. In the Regional Municipality of Halton, open-concept layouts, tall great rooms, and seasonal humidity swings influence prep time, dry times, and coat counts—changing the unit effort even when areas look similar on paper.
We routinely serve families in Milton, Mississauga, and Oakville. Open stairwells, high windows, and busy family zones can alter setup choreography. Grouping adjoining rooms and confirming sheens early reduces resets and improves uniformity under changing daylight and evening lighting.
Local considerations for Milton
- Plan interior work around humidity swings; steady conditions help coatings level and cure well in bedrooms and living areas near Walker Park.
- Allow added setup for tall foyers or open stair runs near Tremaine at Bergamot; safe access increases steps per square foot but protects finishes.
- Zero‑VOC interior paints support comfort during colder months when windows stay shut and families spend more time indoors.
Curious how this applies to your home? Our in‑home estimate and free color consultation walk you through prep standards, primer choices, and coat counts for each space.
How per-square-foot estimates are built
Estimators measure paintable surfaces, rate prep intensity, select a compatible primer/finish system, and assess access complexity. They convert those inputs into labor cycles per area and factor realistic coverage rates to create a reliable, apples‑to‑apples square‑foot plan tailored to your rooms and goals.
At Home Painter Services, we follow a consistent framework so every client understands what’s driving the plan—without getting lost in dollar figures.
Estimator checklist we actually use
- Measure surfaces: Walls and ceilings (length × height); trim as linear footage for doors, windows, baseboards, and crown.
- Assess prep: Smudges vs. scrapes, nail pops, previous roller texture, smoke or water staining, sheen buildup on trim.
- Choose coating system: Spot‑prime vs. full prime; one‑coat refresh vs. two‑coat coverage; specialty primers for stains or sheen jumps.
- Account for access: Furniture moving, ladders or scaffolding, stair geometry, built‑ins, or tight hallways.
- Confirm finish targets: Sheen selection (matte through semi‑gloss), washability, and zero‑VOC preferences by room.
Simple process map (room by room)
| Step | What we do | Impact on per sq ft |
|---|---|---|
| Protect & Prepare | Cover floors/furniture, clean, scuff‑sand, patch, caulk | Higher when damage, texture, or heavy trim is present |
| Prime (as needed) | Stain‑blocking, adhesion, or color‑change primer | Rises with dark‑to‑light shifts and prior glossy finishes |
| Finish Coats | One or two coats on walls/ceilings; detail‑focused trim | Two coats improve uniformity and scuff resistance |
| Detail & Clean | Edges refined, hardware reinstalled, site cleaned | Faster when masking and workflow are dialed‑in |
For a deeper look at common prep and patchwork before repainting, a field post from Mahal Concrete & Construction outlines how surface irregularities can ripple through paint outcomes.
Ready to map your rooms? Our free estimate visit includes a walkthrough checklist and a pairing of primer/finish systems by space.
Types, methods, and their effect on the per-square-foot unit
Application method, finish type, and specialty surfaces change the unit effort. Brush‑and‑roll on smooth walls moves predictably. Sprayed ceilings need careful protection but deliver evenness. Trim enameling adds sanding between coats. Cabinet spraying requires precision setups that trade time for factory‑like durability.
Because we also handle cabinet spray finishes, deck sanding and staining, power washing, and popcorn‑ceiling removal, we coordinate workflows so connected spaces finish faster with fewer disruptions. That orchestration can normalize pace across rooms and protect newly finished surfaces.
Common interior systems
- Brush & roll walls: Most living spaces; dependable coverage and control with minimal overspray risk.
- Ceiling repaints: Often sprayed for evenness; demands thorough masking and steady ventilation.
- Trim and doors: Higher‑build enamels; more sanding between coats to achieve glass‑smooth, scuff‑resistant edges.
- Cabinet spraying: Professional lacquer/polyurethane systems in controlled setups for lasting kitchen updates.
Finish selection and durability
- Matte/flat: Hides minor imperfections; best for low‑touch walls.
- Eggshell/satin: Balance of cleanability and appearance in busy rooms and hallways.
- Semi‑gloss: Great on trim and doors; showcases prep quality.
- Zero‑VOC options: Family‑friendly and low‑odor; pair with washable formulations where needed.
For a quick refresher on interior repaint planning, see the homeowner‑focused overview from SGRD Construction, which touches on room prep and sequencing basics.
You can explore all of our connected services—from interior paint to cabinet spraying—on our Services page to see how they align for smoother project schedules.
Best practices to improve value per square foot
To get more from each square foot, prioritize surface prep, choose compatible primer/paint systems, and lock in colors/sheens early. Group adjacent rooms to minimize masking resets, and clear access paths so crews keep a steady rhythm—consistency drives uniform coverage and durable results.
In our experience, decisive color approvals and clean, open rooms on day one create the most measurable gains. When rooms are grouped smartly, we reduce remasking and cut‑in repeats while improving uniformity at natural light angles.
Actionable tips homeowners use
- Use large sample boards: View colors in morning and evening light before start day.
- Consolidate spaces: Paint adjoining rooms back‑to‑back to avoid repeated masking and cleanup.
- Declutter ahead of time: Remove wall decor and small furniture; crews can protect larger items quickly.
- Match sheens to traffic: Satin in hallways and family rooms; semi‑gloss on trim and doors.
- Discuss primers: Full prime when moving dark‑to‑light or glossy‑to‑matte to achieve even color faster.
Tools and resources to plan your project
Bring a surface checklist, a finish‑selection guide, and a basic coverage calculator to your walkthrough. These tools help you align expectations with your painter, avoid rework, and plan room sequencing—especially helpful in open‑concept spaces and tall foyers.
Copy this checklist into your notes app before we arrive for your free estimate.
Room readiness checklist
- Wall/ceiling height and any vaulted or sloped areas
- Existing marks, nail pops, previous texture, or stains to address
- Trim count: doors, windows, baseboards, and any crown molding
- Access: heavy furniture, tight halls, open stairwells, built‑ins
- Color/sheens to keep or change; desire for zero‑VOC paints
Method comparison table
| Method | Best for | Per sq ft impact | Notes |
|---|---|---|---|
| Brush & Roll | Most walls/ceilings | Predictable and efficient | Steady pace with minimal overspray risk |
| Spray (ceilings) | Large, smooth ceilings | Fast once masked | Requires thorough protection and ventilation |
| Trim Enameling | Doors, casings, baseboards | Higher per‑area effort | More sanding between coats for crisp edges |
| Cabinet Spraying | Kitchens and built‑ins | Precision setup time | Factory‑like finishes with lacquer/polyurethane |
For cabinet considerations that can intersect with room sequencing, Paint 2 Decor’s cabinet painting guide explains finish options and common preparation steps that impact timelines.

Mini case studies: what changes the square‑foot unit
Surface condition, color change, sheen jumps, and room geometry move the unit most. Smooth repaints in the same color run quickly; dark‑to‑light shifts, glossy predecessors, stairwells, and extensive trim slow pace. Coordinating related services (e.g., popcorn removal) helps normalize rhythm across rooms.
Here are anonymized, typical scenarios we see in Milton and across the GTA.
Great room with tall ceilings
- Extra access setup (ladders/scaffolding) increases time per square foot.
- Two‑coat systems improve uniformity at oblique light angles.
- Sequencing the adjoining hallway reduces masking resets.
Kids’ bedrooms, same color refresh
- Light scuff‑sand and spot‑prime address minor wear quickly.
- Consistent sheen across rooms keeps crews in rhythm.
- Removing decor and small furniture ahead of time maintains pace.
Kitchen with cabinet spraying nearby
- Cabinet spray setup adds precision time but delivers factory‑like durability.
- Coordinating wall repaint with spray schedule reduces total disruption days.
- Zero‑VOC wall paints support comfort when windows are closed.
Explore how multiple services can be sequenced together on our Services page, including deck and fence staining, popcorn‑ceiling removal with skim coat, and power washing for pre‑paint prep.
Pricing without numbers: questions to ask
Skip dollar talk early. Ask how prep, primer choice, coat count, and access shape the square‑foot plan. A transparent estimator will explain each driver so the final figure reflects your finish priorities, indoor air goals, and room‑by‑room complexity—no surprises on scope or quality.
Use these prompts on your walkthrough to align scope with value:
- What prep is essential vs. optional for my goals?
- Should we full‑prime or spot‑prime given the color change?
- Which sheen balances appearance and cleanability for this room?
- How will you sequence adjacent spaces to reduce resets?
- Can we group trim work to minimize masking cycles?
Want help shaping these answers? Request a free estimate and color consultation so we can tailor the plan to your home.
Frequently Asked Questions
Homeowners often ask about coat counts, coverage, dry times, and when to choose zero‑VOC paints. These quick answers keep the focus on scope, durability, comfort, and sequencing—so you can move forward confidently without fixating on dollar figures.
How many coats do most rooms need?
Most refreshes use two finish coats on walls after any required priming. Dark‑to‑light changes, glossy previous finishes, or high‑contrast colors benefit from an appropriate primer step to improve uniformity and cut‑in crispness.
What affects paint coverage per gallon?
Coverage depends on surface texture, porosity, application method, and paint quality. Smooth, previously painted walls usually cover more area per gallon than raw or heavily textured surfaces—especially when primed correctly.
Is zero‑VOC paint worth it for families?
Yes for many homes. Zero‑VOC formulas reduce odor and support indoor air quality goals, which is helpful during colder months when windows stay closed. Pair with durable, washable finishes for busy rooms.
When should ceilings be repainted?
Repaint ceilings when wall colors change, when lighting reveals roller shadows, or after any leak repairs. Smooth, bright ceilings increase room brightness and help wall colors read true.
Conclusion and next steps
Treat “interior painting cost per sq ft” as a planning lens—not a price tag. Align prep quality, primer choice, coat counts, access strategy, and finish selection with your goals. With a clear square‑foot plan, you’ll achieve durable, consistent results and a smoother project experience.
- Key takeaways: Prep quality drives outcomes; confirm colors/sheens early; group rooms smartly; choose durable, low‑odor paints.
- Next step: Book your free estimate and color consult. We’ll map every square foot so you know exactly what’s included and why.