


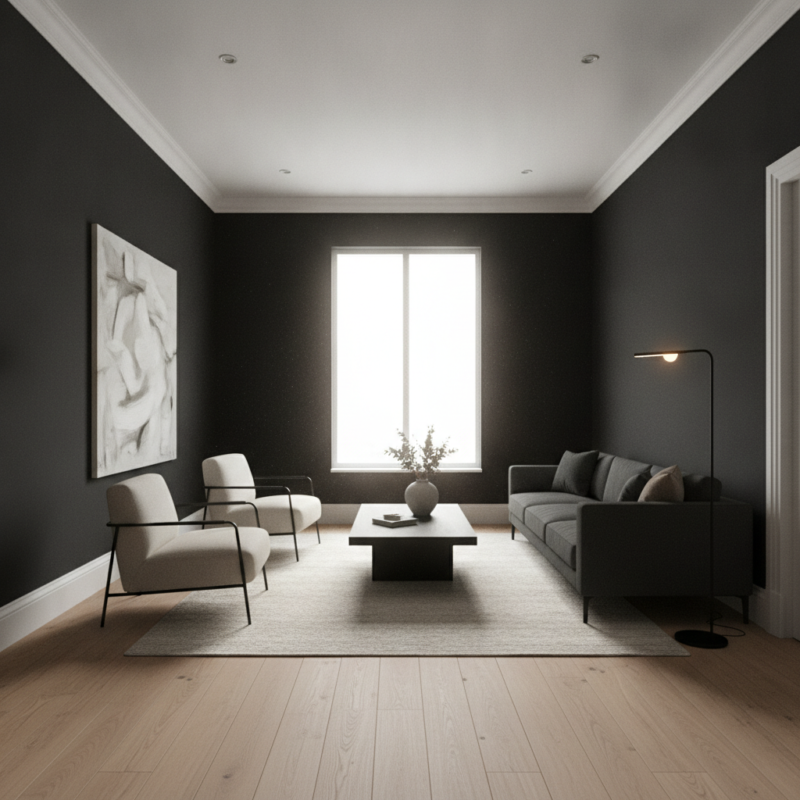
Painting a room black is the intentional use of near-black paint on walls, trim, or ceilings to create high contrast and a cozy, modern atmosphere. Because black paint has a low light reflectance value (often under 5), it absorbs most light—so success depends on prep, sheen choice, and layered lighting, especially in the 316 Bergamot Ave area homes we serve.
By ZIKRIA MUJAHID — Home Painter Services • Last updated: 2026-06-24
Overview
Black rooms work when you balance absorption with reflection: prep surfaces flawlessly, prime for coverage, pick an appropriate sheen, and layer ambient, task, and accent lighting. Done right, black elevates art, trims sightlines, and adds quiet drama without feeling gloomy.
If you’re considering a dramatic shift, this complete guide distills our on-site experience across interior painting, cabinet spraying, and finishing work into clear, practical steps.
- What painting a room black means, with pros, cons, and timing
- Step-by-step preparation, priming, cutting-in, and rolling for flawless finishes
- Best sheens, primers, and lighting temperatures for depth and clarity
- Approaches: accent walls, full rooms, and black ceilings (“the fifth wall”)
- Real examples from homes near 316 Bergamot Ave, plus local tips
What Is Painting a Room Black?
Painting a room black refers to finishing one or more planes—walls, trim, or the ceiling—with near‑black paint to increase contrast and reduce visual clutter. Because low-LRV colors absorb light, the result hinges on smooth prep, crisp edges, and strategic lighting to keep the space inviting.
In simple terms, black is a tool to control light and sightlines. It can make ceilings recede, showcase artwork, and sharpen white trim. It can also reveal every roller lap and drywall flaw. That’s why we emphasize meticulous prep, premium primers, and disciplined application on interior projects.
Core characteristics
- Low LRV (under ~5): Black absorbs most incoming light, muting glare and reflections.
- High contrast potential: White trim or light floors pop against dark walls.
- Edge sensitivity: Wavy cut lines are obvious; crisp tape technique matters.
- Texture revealing: Scratches, nail pops, and sanding swirls are easier to see.
In our experience, homeowners love black in bedrooms, media rooms, powder rooms, and dining rooms. Hallways and small dens near the 316 Bergamot Ave area often benefit from a single dark accent wall first, then a full-room decision once lighting is dialed in.
Why Black Walls Work (and When They Don’t)
Black walls succeed when you manage light, sheen, and contrast. The color adds intimacy and focus, but poor prep, weak lighting, or the wrong finish can look flat. Balance dark planes with bright trim, warm bulbs (2700–3000K), and reflective textures for comfort and clarity.
Here’s the thing: black isn’t just a color choice—it’s a lighting strategy. With strong ambient light and a few reflective surfaces, rooms feel calm and tailored. Without them, the same room can read dull. We plan lighting first, then proceed to paint, which reduces rework by a large margin.
When black shines
- Defined light layers: Overhead + sconces + task lamps reduce shadows and hot spots.
- Contrasting elements: White ceilings/trim, oak floors, mirrors, or brass hardware add lift.
- Purpose-built spaces: Media rooms and bedrooms tolerate lower brightness well.
- Clean architecture: Simple moldings and straight runs amplify the tailored look.
When black disappoints
- Uneven walls: Texture telegraphs; skim coating may be required for a seamless finish.
- Insufficient lumens: One ceiling fixture leaves corners starved of light.
- Wrong sheen: Too shiny highlights defects; too flat scuffs easily in high-traffic zones.
- Rushed prep: Missed nail pops and poor caulk lines are twice as visible on black.
We routinely recommend warm-white bulbs at 2700–3000K with a color rendering index (CRI) of 90+ to keep skin tones and wood grains natural. Dimmer switches extend flexibility for day and night use.
How to Paint a Room Black the Right Way (Step-by-Step)
Success with black paint comes from discipline: repair surfaces, sand to a uniform profile, prime for holdout, then apply two controlled coats with proper cut lines. Work top-to-bottom, maintain wet edges, and verify coverage under task lighting before cleanup.
Below is our field-tested sequence. It mirrors the interior painting workflow we use in occupied homes: protect, repair, prime, and finish with ZERO-VOC options when families request low-odor solutions.
- Protect and stage — Move or mask furniture, drop-cloth floors, remove plates and hardware, and set bright work lights.
- Repair — Fill nail pops and dents; address seams; let cure; then sand smooth. For heavy texture, consider skim coating.
- Caulk and detail — Re-cut failing caulk lines on trim and at the ceiling. Consistent beads prevent light from catching gaps.
- Sand and dust control — Sand patched areas and lightly scuff existing paint; vacuum and tack-cloth to remove fine dust.
- Prime strategically — Spot-prime repairs and consider a full gray-tinted primer for deeper blacks; it improves color holdout.
- Cut-in with care — Use an angled brush to establish razor-straight lines at ceilings, corners, and trim.
- Roll in sections — Roll from ceiling to floor in manageable widths, maintaining a wet edge to avoid lap marks.
- Second coat — After full dry, repeat cut and roll. Two coats typically deliver uniform depth and about 95% coverage of minor variations.
- Light check — With side-lighting, inspect for misses or roller stipple; touch up before demasking.
- Reassemble — Clean lines, reinstall plates, and reset the room under final lighting to confirm the look.
Pro tip: we stage accent pieces—white frames, pale linens, brushed metal fixtures—before final cleanup. Seeing contrast in place helps you confirm the vibe. If you’re pairing black walls with cabinet changes, our factory-like kitchen cabinet spray process creates a sharp, durable counterpoint.

Types, Methods, and Approaches to Dark Interiors
Choose between an accent wall, a full black enclosure, or a black ceiling to tune drama and depth. Accent walls offer low risk; full rooms maximize immersion; black ceilings lower the perceived height and sharpen sightlines with lighter walls.
Not every space needs full commitment on day one. We often test a single wall opposite a window to balance daylight and monitor reflection before proceeding room-wide. In compact powder rooms, a 360-degree dark wrap can feel like a jewel box—especially with a bright vanity and mirror.
Common approaches
- Accent wall: A safe trial. It frames a bed, TV, or sideboard and sets the mood without overwhelming the room.
- Full room: Four walls in black minimize visual clutter and make trim, art, and lighting take center stage.
- Black ceiling: The “fifth wall.” Great in bedrooms and media rooms to reduce glare and visually lower height.
- Two-tone trim: Black walls with white trim (or vice versa) for crisp architectural outlines.
Finish and sheen selection
Finish controls how light plays on the surface. Lower sheens hide imperfections; higher sheens reflect more and clean easier. For family spaces, scrubbable matte or eggshell strikes a strong balance; in baths, a satin enamel resists moisture better. On trim and doors, satin or semi-gloss reads tailored and durable.
| Application | Recommended Sheen | Why It Works |
|---|---|---|
| Main walls | Matte or Eggshell | Soft look, fewer visible defects, decent cleanability with modern formulas. |
| Bathrooms/Kitchens | Satin | More moisture resistance and wipe-ability; still controlled reflection. |
| Doors/Trim | Satin or Semi‑Gloss | Durable, crisp edges; highlights profiles without spotlighting wall flaws. |
| Ceilings | Flat/Matte | Minimizes glare and roller texture overhead. |
If you’re mixing textures, consider woven rugs, matte ceramics, and brushed metals. They bounce just enough light to keep the room legible and warm, even as black absorbs glare.
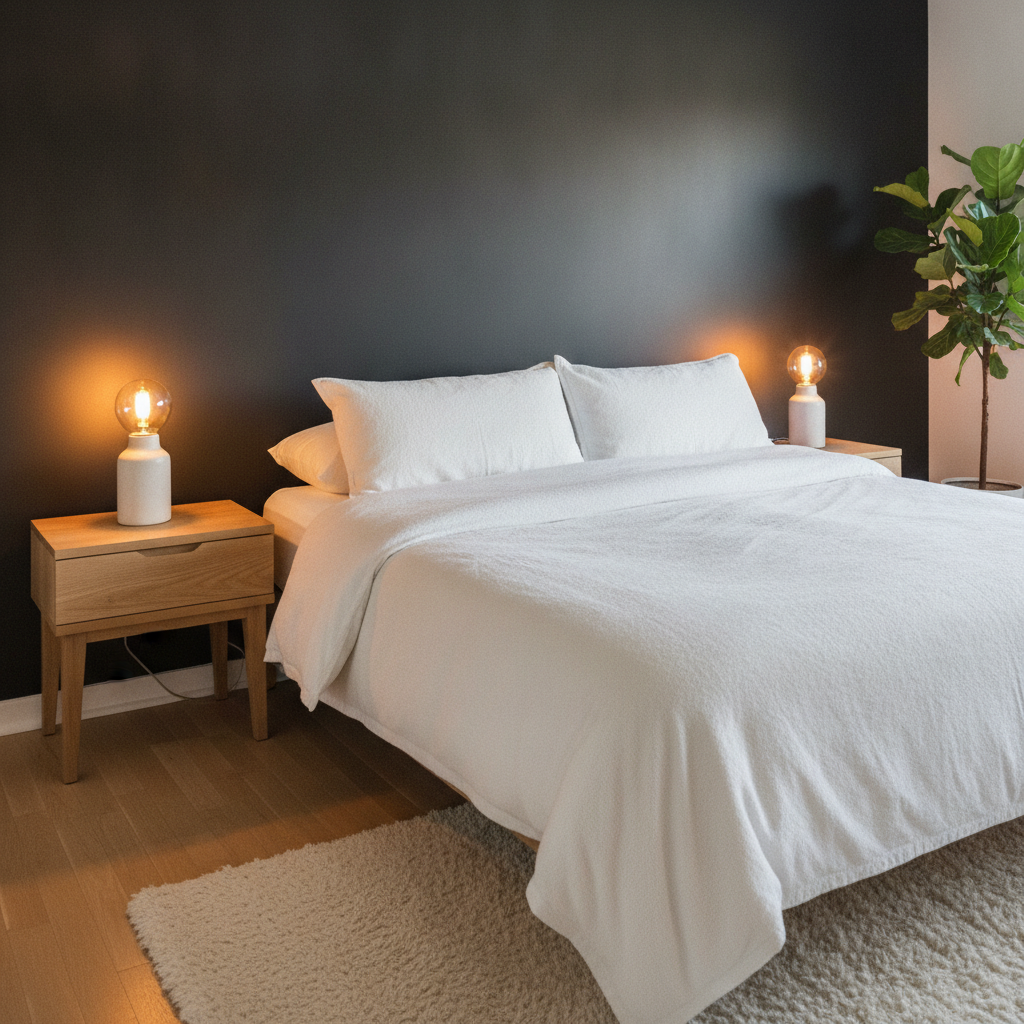
Best Practices for Black Paint Finishes in Homes
Prioritize surface prep, test lighting early, and select scrubbable low-sheen paints. Use gray-tinted primer, maintain wet edges, and plan three light sources per room. These habits prevent telegraphed defects and keep black finishes rich, even, and livable.
We approach dark rooms like we do fine cabinet spraying: every flaw is amplified. A few disciplined habits deliver consistently upscale results for families who want low-odor, safe interiors and reliable timelines.
Prep and protection
- Mask thoroughly: Floors, fixtures, and furniture. Clean rooms reduce touchups—and stress.
- Perfect the substrate: Feather sand patches; re‑caulk straight; vacuum and tack before priming.
- Prime smart: Gray-tint primer under deep blacks improves coverage and color holdout.
Application discipline
- Cut lines first: Establish clean, confident edges. Use sharp tape for glassy trim lines.
- Roll methodically: Work in columns, keep a wet edge, and back-roll lightly to even texture.
- Second coat timing: Respect recoat windows; premature recoats can lift or streak.
Lighting and styling
- Layered fixtures: Ambient + task + accent. Aim for warm 2700–3000K and CRI 90+ where possible.
- Contrast elements: White trim, pale linens, mirrors, and plants counterbalance absorption.
- Rug and fabric choices: Nubby textures add light scatter and tactile comfort.
Local considerations for 316 Bergamot Ave
- Plan deliveries around peak times near Tremaine at Bergamot to keep staging efficient for interior projects.
- Winter projects: black rooms feel cozier, but daylight is scarce. Add temporary work lights for accurate color reads.
- If you gather at Walker Park on weekends, schedule prep on weekdays to minimize disruption during family time.
If ceilings are still textured, we often start with popcorn ceiling removal and skim coating before any dark paint. Smooth ceilings dramatically improve the final read, especially under side-lighting from sconces.
Tools and Resources We Rely On
Professional results come from pro tools: sharp angled brushes, low‑nap microfiber rollers, gray‑tinted primers, bright task lights, and quality tape. A dustless sanding setup and VOC‑aware paint selection keep occupied homes clean and comfortable.
Our team carries a consistent kit for dark rooms, informed by cabinet spraying and epoxy-floor prep where surface profile and dust control are critical. Smooth, uniform substrates are non-negotiable for black finishes.
Painter’s kit for black rooms
- Angled brush (2–2.5 in): Crisp cut lines, especially at white ceilings and trim.
- Low-nap rollers (1/4–3/8 in): Minimize stipple and banding on smooth walls.
- Bright work lights: Catch misses and roller laps before they dry.
- Gray-tinted primer: Improves holdout for deep pigments.
- Sharpened taping tools: Clean mask lines on windows, doors, and built-ins.
- Dust management: Vacuum sanding and tack cloths before primer.
Materials we specify often
- ZERO-VOC interior paints: Keep odor low for families and pets.
- Moisture-resistant enamels: For baths and kitchens that still want a black statement.
- Durable trim enamels: For doors, casings, and baseboards in satin or semi-gloss.
For broader painting context, see these perspectives on interior painting services, a set of common painting mistakes, and how to weigh wallpaper vs. paint in certain rooms.
Case Studies and Local Examples
Small, strategic pilots lead to confident full-room decisions. We begin with one dark wall, confirm lighting and sheen, then expand. This minimizes disruption, verifies edge quality, and ensures the final space reads tailored—not heavy.
Bedroom accent to full wrap: A homeowner near 316 Bergamot Ave wanted a calmer sleep space. We started with a black headboard wall in matte, added two warm bedside lamps, and swapped in a higher-CRI ceiling fixture. After a week of living with it, they greenlit all four walls. White trim and pale bedding kept the look fresh.
Powder room jewel box: In a compact bath, we used a scrubbable satin black on walls and a matte black ceiling. Brass hardware, a bright mirror, and a white vanity produced a high-contrast, easy-clean space. The low-reflective ceiling reduced glare meaningfully.
Media room with ceiling focus: For movie nights, a black ceiling with deep charcoal walls reduced light bounce from the screen. With dimmers and a low-nap roller texture, the viewing experience felt richer and more immersive.
We often coordinate upgrades like cabinet spraying or exterior window caulking replacement in the same project window. For example, when a kitchen adjoins a newly dark dining room, lighter sprayed cabinets provide uplifting balance without a full renovation. Outdoors, a power-washed deck and fresh deck staining make the interior update feel part of a whole‑home refresh.
Frequently Asked Questions
Black paint can elevate or overwhelm. The best outcomes come from clean prep, balanced lighting, and practical sheen choices for the room’s use. Here are fast answers to common homeowner questions.
Will painting a room black make it feel smaller?
Not automatically. Black recedes visually and can reduce clutter, while good lighting and bright trim keep the room legible. In our projects, adding two or three light sources and crisp white details offsets the absorption so the space feels intentional, not cramped.
What sheen is best for black walls?
For most living spaces, matte or eggshell gives a soft, even look and hides minor imperfections. In bathrooms and kitchens, satin is more wipeable. For trim and doors, satin or semi‑gloss provides durable edges and a crisp profile without spotlighting wall texture.
Do I need a special primer before black paint?
Use a quality primer, ideally gray‑tinted, to improve color holdout and reduce the number of finish coats. Spot‑prime repairs at minimum, and consider a full prime if you’re covering light or glossy surfaces. Good primer saves time and yields more uniform depth.
Is black paint practical for families?
Yes—choose scrubbable modern formulas and low‑odor ZERO‑VOC options. Pair black walls with durable trim enamel and washable fabrics. We also recommend door and baseboard touchups during seasonal maintenance so high‑contact areas continue to look crisp.
Conclusion and Next Steps
Black rooms succeed when preparation, sheen choice, and lighting work together. Start with an accent wall, confirm the feel, then scale. With careful masking, gray primer, and layered fixtures, you’ll get drama without the gloom.
Here’s what to do next if you’re serious about painting a room black—and want it to feel elevated, not heavy.
- Assess lighting: Confirm at least two light sources; add dimmers if possible.
- Fix the substrate: Repair, sand, and recaulk so edges and textures read clean.
- Prime and test: Use gray‑tinted primer; sample sheen on a 2×2 ft area and view at night and day.
- Stage contrast: Lay out pale linens, frames, and metals to preview balance.
- Decide scope: Accent wall first or full room—with a plan for the ceiling.
Key takeaways
- Black controls glare and simplifies sightlines—but demands strong prep and lighting.
- Matte/eggshell on walls, satin in baths, satin/semi‑gloss for trim is a reliable baseline.
- Gray primer and disciplined rolling prevent lap marks and uneven depth.
- Contrast and texture keep dark rooms comfortable and practical.
