


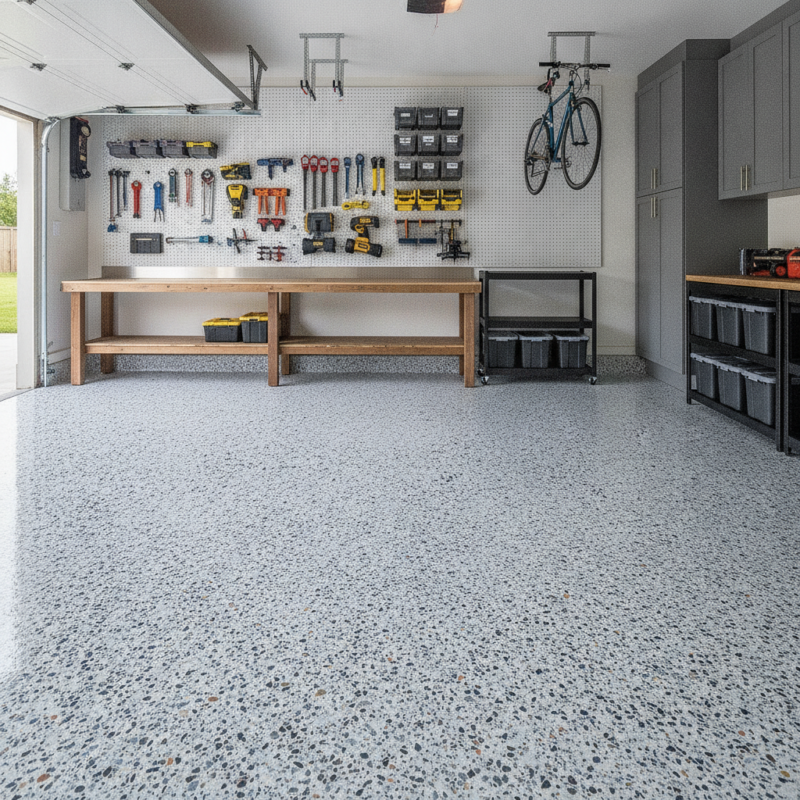
Epoxy garage floor installers are trained professionals who prepare concrete and apply multi-layer resin systems for a durable, stain‑resistant surface. A proper install includes moisture testing, diamond grinding, crack repair, primers, broadcast flakes or tints, and a protective topcoat. For homes near 316 Bergamot Ave in Milton, this finish turns a dusty garage into a clean, easy‑to‑maintain space.
By ZIKRIA MUJAHID • Last updated: 2026-06-30
Start Here: Quick Summary
A great epoxy garage floor comes from 80% preparation and 20% application. Hire installers who moisture-test concrete, diamond-grind, and build a system with primer, epoxy body coat, decorative flakes or color, and a chemical-resistant topcoat. Expect 2–3 workdays plus cure time, and maintain with gentle cleaners and periodic inspections.
Here’s what you’ll learn in this complete homeowner guide—written for families in the 316 Bergamot Ave area and the broader GTA—and aligned with how our crews at Home Painter Services actually work on live projects.
- What epoxy garage floors are and what installers really do on site
- Why epoxy is a smart upgrade for busy households and vehicles
- Step-by-step process: testing, grinding, repairs, coats, and curing
- System types: solid color, flake, quartz, and metallic looks
- How to choose epoxy garage floor installers with confidence
- Maintenance routines that keep shine and traction season after season
- Local considerations for Milton homes near Tremaine and Walker Park
Table of contents
- What is an epoxy garage floor?
- Why epoxy matters for homeowners
- How installation works (step-by-step)
- Types of epoxy systems and finishes
- How to choose epoxy garage floor installers
- Tools, materials, and resources
- Case studies and real scenarios
- Maintenance and troubleshooting
- Frequently Asked Questions
- Conclusion and next steps
What Is an Epoxy Garage Floor?
An epoxy garage floor is a multi-layer resin coating system built over prepared concrete to create a tough, sealed, and decorative surface. Installers use two‑part resins, primers, body coats, optional flakes or metallic pigments, and a topcoat that resists hot tires, salt, spills, and abrasion.
At Home Painter Services, “epoxy” usually means a resinous flooring system over concrete that’s primed, built up to the right thickness, and capped with a protective clear coat. While some projects use polyurea or polyaspartic topcoats, the core idea is the same: strong chemical bonds on a clean, profiled slab.
- Two-part chemistry: Resin + hardener cure into a single, durable surface.
- Concrete profile: Diamond grinding creates a mechanical “tooth” for adhesion.
- System layers: Primer, epoxy body coat, decorative element (optional), and topcoat.
- Finish options: Solid color, vinyl flake, quartz broadcast, or metallic effects.
Why this matters: garages see road salt, hot tires, and impact. A sealed system reduces dust, resists staining, and wipes clean fast—exactly what busy households near 316 Bergamot Ave ask us for during Free Estimate visits.
Why Epoxy Garage Floors Matter for Homeowners
Epoxy floors turn a dusty, porous slab into a sealed, easy-clean work zone with traction and style. Families get a brighter space, less tracked-in dust, and protection against salt and spills—all while boosting perceived home value and day-to-day usability.
From Mississauga to Milton, we see the same pattern: garages double as storage, gyms, or hobby zones. Bare concrete sheds dust. Epoxy seals that off, adds light reflectivity, and makes sweeping a quick task. The upgrade supports curb appeal when the garage door is open and complements interior improvements like cabinet repainting.
- Cleaner living: Less concrete dust migrating into mudrooms and vehicles.
- Durability: Resistance to hot-tire pickup, winter salt, drips, and dropped tools.
- Design control: Choose neutral grays, bold solids, or flake blends that hide dirt.
- Safety: Add anti-slip texture in high-traffic or sloped entries.
- Light bounce: Gloss coats increase visibility for projects and storage.
Local considerations for 316 Bergamot Ave
- Winter salt and meltwater: Near Tremaine at Bergamot, road slush is common. We recommend a textured topcoat and routine winter rinses.
- Busy parkside weekends: If you frequent Walker Park, flake systems hide dirt from sports gear and yardwork until you mop.
- Seasonal timing: Spring and early fall offer stable temperatures that help curing and airflow during installation.
How Professional Installation Works (Step-by-Step)
Pros follow a seven-step workflow: inspect and test, diamond‑grind the slab, repair cracks, apply primer, lay the epoxy body coat, add flakes or pigments, then seal with a chemical‑resistant topcoat. Cure fully before parking to lock in adhesion and long-term performance.
In our experience, consistent results come from a disciplined process our crews apply to every garage epoxy flooring project. The exact products vary by season and substrate condition, but the sequence stays tight.
- Assessment and testing: Map cracks, check previous coatings, and test for moisture.
- Diamond grinding: Profile the surface uniformly; edges are hand-ground for coverage.
- Repairs: Fill cracks, spalls, and control joints as specified for the system.
- Primer: Roll or squeegee to wet out the slab and promote bond.
- Body coat: Apply the main epoxy layer to target thickness and coverage.
- Decorative broadcast: Vinyl flakes, quartz, or metallic effects as desired.
- Topcoat: Seal with a UV-stable, chemical-resistant clear; add traction where needed.
| Phase | What Pros Do | Homeowner Tip |
|---|---|---|
| Prep & Testing | Moisture checks; tape test for existing coatings | Ask for written test results before coating |
| Grinding | Full mechanical profile, edges detailed | Confirm dust collection is used during grinding |
| Repairs | Cracks, pits, and joints rebuilt | Review repaired areas before primer |
| Primer & Body | Layered resin build to spec | Verify product data sheets are on site |
| Decorative | Flakes, quartz, or metallic pigments | Approve a sample board or blend first |
| Topcoat | Clear, UV-stable, traction optional | Request non-slip for sloped entries |
| Cure | No traffic until specified | Plan alternate parking for a few days |
Here’s a close-up of the surface prep that makes everything stick long-term.
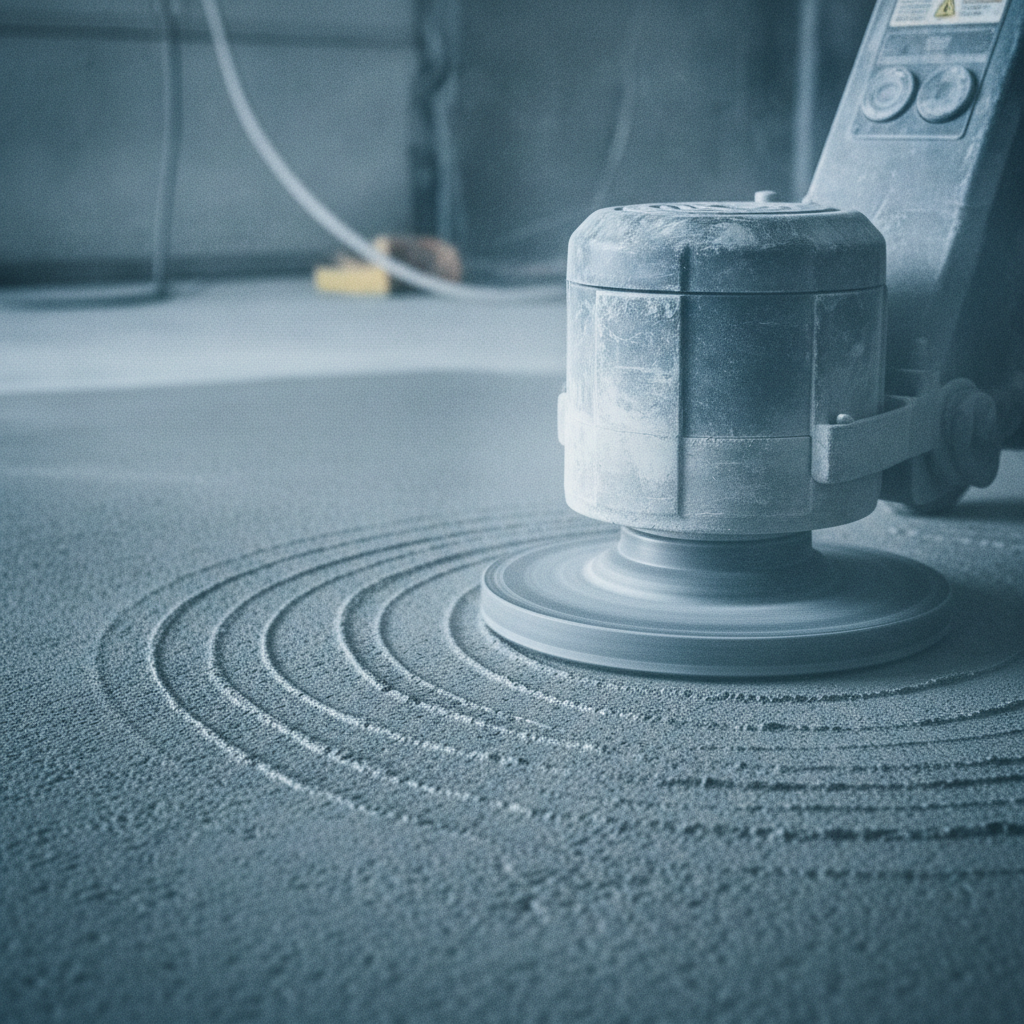
Most adhesion failures we’re called to fix trace back to skipped grinding or poor moisture control. That’s why our team sequences grinding, cleaning, and coating without long delays that risk dust settling onto the slab.
Types, Finishes, and Approaches
Home garages typically choose among solid-color epoxy, vinyl flake broadcasts, quartz systems, or metallic effects. Each balances traction, appearance, and hide-ability. Pair the build with a UV-stable topcoat and, where needed, a moisture-mitigating primer for challenging slabs.
System selection is about look, traction, and how you use the space. Families who haul sports gear or garden tools often pick a mid-gray flake blend to disguise grit. Tinkerers may prefer solid color for easier spotting of dropped screws. Metallic looks create a showpiece, especially near home gyms.
| System | Look | Traction | Great For |
|---|---|---|---|
| Solid Color Epoxy | Uniform, sleek | Adjustable with grit | Clean, modern garages and workshops |
| Vinyl Flake | Speckled, hides dirt | Naturally more texture | Busy family garages; pet traffic |
| Quartz Broadcast | Colored sand texture | High traction | Sloped entries, wet zones |
| Metallic Effects | Swirled, high-gloss depth | Moderate (add grit if needed) | Showpiece gyms, hobby studios |
Want a deeper primer on commercial epoxy systems and how they scale to residential projects? See this overview of commercial epoxy flooring for broader context on builds and use cases.
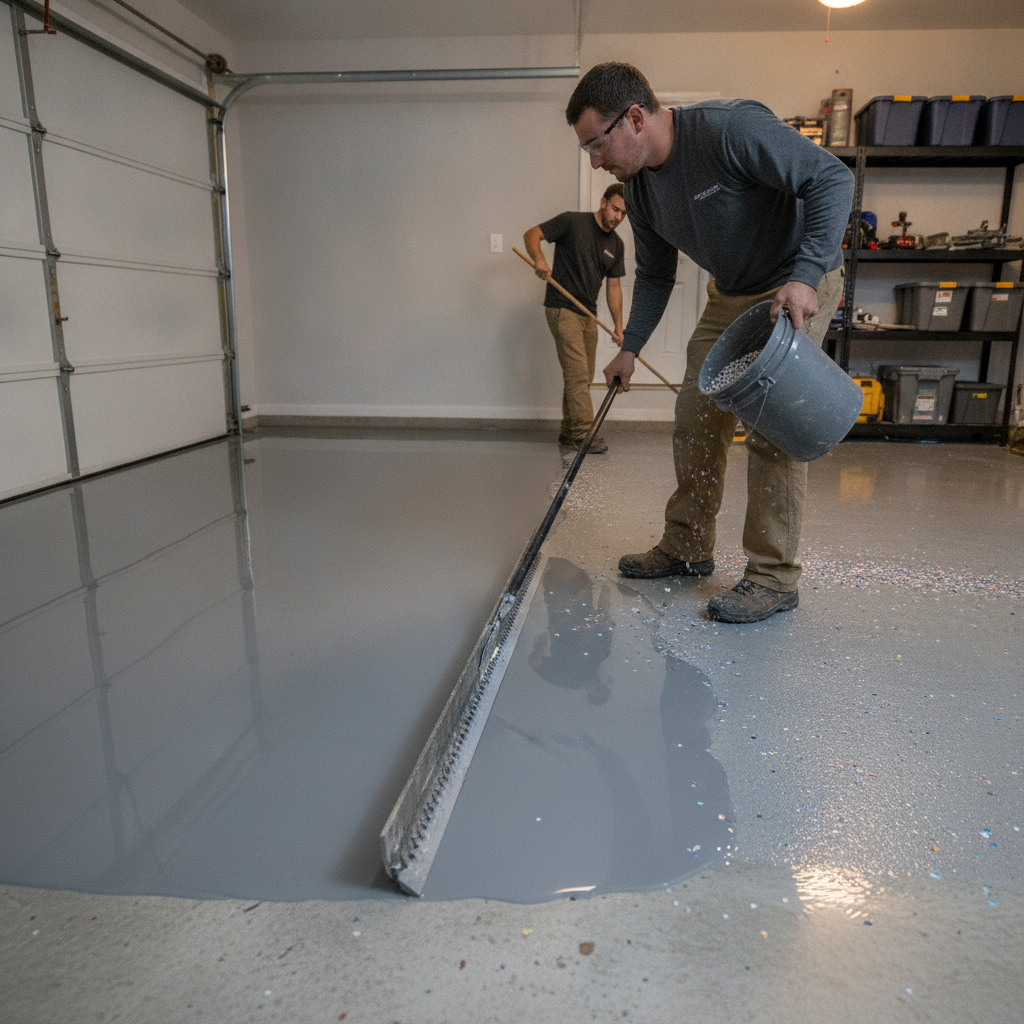
How to Choose Epoxy Garage Floor Installers
Vet installers by their prep protocol (moisture tests, diamond grinding), product data sheets, sample boards, and written timelines. Ask for photos of repairs, confirm non-slip options, and ensure they’ll protect adjacent walls, trim, and doors during application and cure.
Hiring well is the difference between a floor that performs for years and one that peels. Here’s our checklist—based on what we deliver on every Home Painter Services project and what you should expect from any pro you interview.
- Preparation proof: Request moisture readings and grinder passes per area. Photos help.
- System clarity: Get the layer stack in writing: primer, body coat, broadcast, topcoat.
- Traction plan: Confirm non-slip additives at doors and ramps.
- Protection steps: Masking for baseboards, doors, and adjacent rooms.
- Schedule: Start/finish dates plus re-entry and vehicle return timing.
- Local familiarity: Teams working near 316 Bergamot Ave understand seasonal swings and road salt realities.
You can also review regional directories to see how resin pros present their capabilities and projects, such as this epoxy pro listing used by GTA homeowners.
Tools, Materials, and Resources Pros Use
Installers rely on industrial grinders with dust extraction, moisture meters, repair mortars, squeegees, rollers, and calibrated mixers. The system includes a primer, pigmented epoxy body coat, optional flakes or quartz, and a UV-stable topcoat designed to resist chemicals and hot tires.
What separates pro crews from DIY attempts is control—of surface profile, mix ratios, spread rates, and timing. These are the core tools and materials we stage before a single gallon is opened.
- Surface prep: Planetary or hand grinders, edge tools, vacuums with HEPA filters.
- Testing and QC: Moisture meters, tape tests, and temperature/relative humidity checks.
- Application: Notched squeegees, shed-resistant rollers, spiked shoes for movement.
- Repairs: Fast-set crack fillers and patching compounds compatible with epoxy.
- System chemistry: Primer, pigmented epoxy body coat, decorative media, and clear topcoat.
For a generic primer on epoxy flooring service menus, you can scan this epoxy flooring overview to see how vendors define common options and finishes.
Case Studies and Real-World Scenarios
The best test of an installer is performance in familiar homes. We’ve delivered flake, solid, and metallic systems in Milton and the GTA, each tuned to how the space is used—storage, gym, hobby shop, or a bright, clean extension of the home.
Family garage, near Tremaine
- Challenge: Dusty slab and winter salt tracked into the hallway.
- Approach: Moisture test, full grind, gray flake broadcast, clear topcoat with anti-slip at the threshold.
- Result: Brighter space, fast sweep-ups, no more white dust on tires.
Hobby workshop, 316 Bergamot Ave area
- Challenge: Needed a surface that shows small parts and cleans easily.
- Approach: Solid medium-gray epoxy with traction additive only at the entry.
- Result: Tools and screws are visible; spills wipe clean with a mild detergent.
Home gym + storage, close to Walker Park
- Challenge: Wanted a showpiece look that still hides occasional dirt.
- Approach: Metallic effect body coat with a satin, UV-stable topcoat and light traction.
- Result: Striking visuals with safe footing on leg day.
Maintenance and Troubleshooting
Keep epoxy floors at their best by sweeping grit, mopping with a neutral cleaner, and rinsing winter salt. Avoid harsh acids. Address scratches with spot repairs and refresh worn traction at entries. Annual inspections catch small issues before they grow.
We design low-maintenance systems, but a few simple habits go far—especially through salty winters and spring thaws.
- Weekly: Quick sweep or vacuum to remove grit that can dull gloss.
- Monthly: Mop with a neutral pH cleaner; rinse well.
- Seasonal: Rinse salt and slush after storms; check for scuffs at the door line.
- As needed: Spot-repair scratches; renew non-slip media if foot traffic increases.
Planning broader home upgrades? Our crews can coordinate garage epoxy with related services like power washing before exterior painting, deck sanding ahead of staining, or exterior window caulking replacement to cut drafts. For a deeper dive into sealing and comfort, see how to cut energy bills by sealing windows.
Free Estimate + On-Time Completion: If you’re near the 316 Bergamot Ave corridor, we can schedule a quick on-site assessment and color consult for your garage epoxy flooring, then coordinate with interior or exterior painting if needed. Ask about flake blends that match your siding and trim.
Frequently Asked Questions
Homeowners ask about curing time, slip resistance, and long-term care. Plan a few days before parking, choose traction where needed, and clean with gentle products. A well-prepped system resists hot tires, salt, and spills for dependable everyday use.
How long before I can park on a new epoxy garage floor?
Allow foot traffic after initial cure, then wait additional time before parking vehicles so the coating can fully harden. Weather, ventilation, and the specific resin system influence timing. Your installer will set a schedule and confirm re-entry milestones in writing.
Will epoxy be slippery when wet?
Any smooth, sealed surface can be slick with water or slush. Add traction media in the topcoat, especially at entries, slopes, or where wet gear is stored. Flake and quartz systems naturally offer more texture than solid-color finishes.
Can epoxy cover cracks and pitting?
Minor defects are repaired before coating. Installers use compatible fillers and patching compounds, then grind flush. Larger structural issues need evaluation first. Proper prep prevents telegraphing and helps the finished surface look uniform.
How do I clean an epoxy garage floor in winter?
Rinse salt and slush promptly. Use a soft-bristle broom for grit and a neutral pH cleaner for mopping. Avoid harsh acids or strong solvents. Keep entry mats to catch debris before it spreads across the coating.
Conclusion and Next Steps
A durable epoxy garage floor depends on prep, a well-matched system, and disciplined application. Choose installers who test, grind, repair, and build the right stack for your slab. Maintain with simple cleaning, and your garage becomes a bright, resilient part of your home.
- Decide how you’ll use the space: storage, gym, workshop, or all three.
- Pick a finish: solid color for clarity, flake for camouflage, metallic for flair.
- Hire on process, not promises: testing, grinding, documented products, and timelines.
- Coordinate upgrades: interior painting, deck sanding and staining, exterior caulking, or power washing.
- Ready to plan? Book a free estimate near 316 Bergamot Ave and we’ll map your options.
