


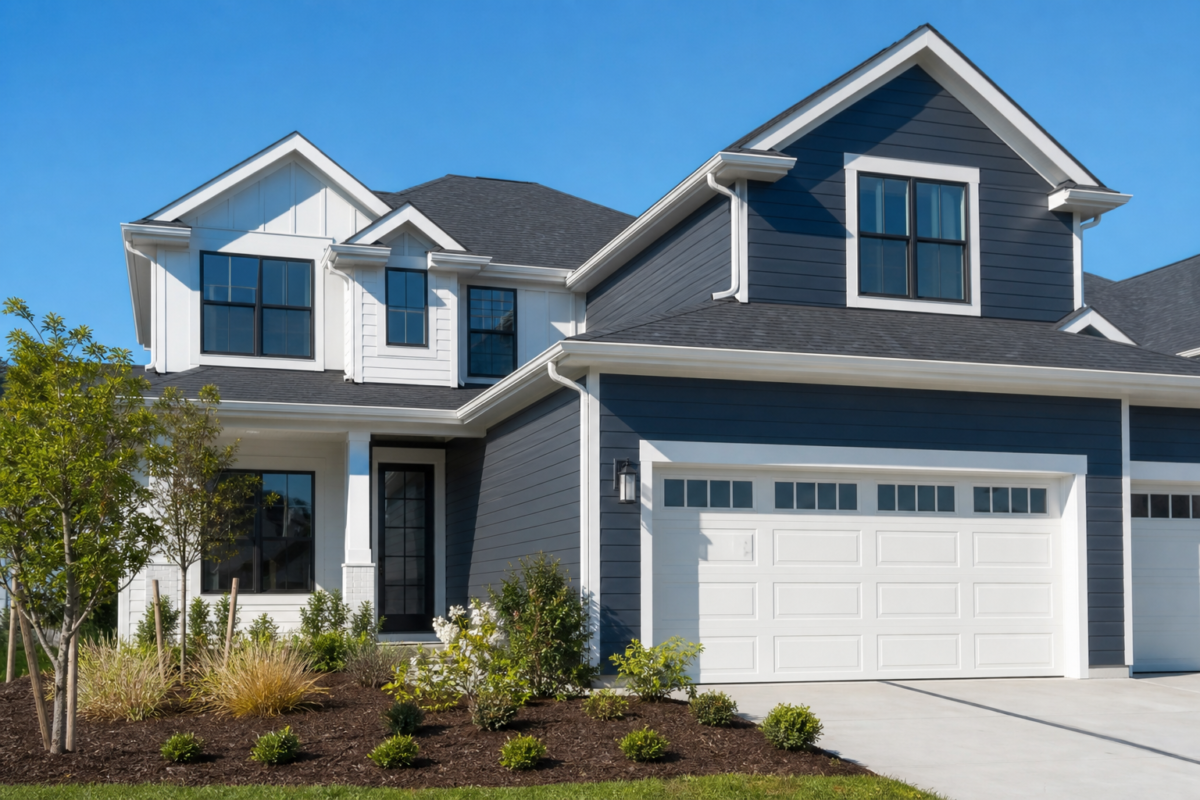
Outside house painters: a homeowner’s checklist for selection, prep, and upkeep
Hiring outside house painters is one of the fastest ways to refresh curb appeal and protect your home’s exterior. The best outcomes come from clear scope, the right paint system for each surface, proven preparation, and realistic timing. This checklist walks you through each decision so you can choose confidently, communicate clearly, and keep your exterior looking great longer.
Identify your scope and surface needs
Start by mapping everything you want painted and the condition of each surface. A precise scope helps outside house painters estimate accurately and align on expectations.
- Siding type and condition: wood, fiber cement, stucco, brick, vinyl, aluminum, or composite; note peeling, chalking, hairline cracks, efflorescence, or corrosion.
- Trim and details: fascia, soffits, window and door casings, columns, brackets, shutters, vents.
- High-touch areas: doors, railings, porch floors or concrete steps.
- Accessory structures: detached garage, shed, pergola, deck, and fence (if included).
- Special transitions: bare wood patches, new repairs, stained wood, previously coated masonry.
- Access and height: number of stories, steep grade, landscaping obstacles, limited set-backs.
Document with photos. Mark repairs you expect the crew to perform (e.g., minor carpentry, patching, or caulking) versus items you’ll handle separately. The clearer your inventory, the smoother your bid comparisons.
Compare paint systems and finishes
“Paint” is a system, not just a color. Matching primers and topcoats to each substrate is key to adhesion and durability.
- Wood siding/trim: look for exterior primers that block tannin bleed on species like cedar; topcoats formulated for flexibility and weather resistance.
- Masonry and stucco: breathable coatings designed for mineral surfaces; address hairline cracks with elastomeric patching where specified.
- Metal (railings, aluminum siding): rust-inhibitive or adhesion-promoting primers; compatible enamel or acrylic topcoats.
- Vinyl siding: coatings labeled as suitable for vinyl; confirm color restrictions to avoid heat-related distortion.
- Previously stained wood: determine if you’ll continue with stain (transparent, semi-transparent, or solid) or convert to paint; prep requirements differ.
Finish level affects look and cleanability:
- Flat/matte: hides surface irregularities; common for broad siding fields.
- Satin/low-sheen: a balanced, slightly more washable finish; often used for siding and trim.
- Semi-gloss: crisper look on trim/doors; emphasizes imperfections, so prep matters.
If color changes are dramatic (e.g., dark to light or vice versa), plan for additional coats or specialty primers for coverage. Ask bidders to specify exact primers and finishes by substrate so you can compare like-for-like.
How to evaluate outside house painters
Good painters welcome clarity and questions. Use this short list to assess alignment before you hire.
- Written scope: each surface included, repair responsibilities, primer/topcoat products, number of coats, and masking/protection plan.
- Surface preparation steps: washing method, scraping/sanding strategy, feathering edges, spot-priming bare areas, and caulking at specific joints.
- Application method: brush-and-roll, spray-and-back-roll, or a combination; where and why each is chosen.
- Weather plan: minimum temperatures, rain/wind thresholds, and rescheduling process if conditions shift.
- Site protection: landscaping coverage, overspray controls, window/fixture masking, and daily cleanup approach.
- Communication: daily start/stop times, point of contact, and change-order procedure if hidden damage appears.
Request a sample section outline: “If you find peeling down to bare wood on the north wall, what will you do, how will you prime it, and does that affect cost or schedule?” Clear answers reveal process maturity.
Planning timelines and weather windows
Exterior results depend on giving products time to cure under suitable conditions. A realistic timeline helps you and your painter avoid last‑minute compromises.
- Dry days: washing, repairs, and each coat need dry windows; plan buffers between steps.
- Temperature: confirm minimum air and surface temperatures for primers and paints in the plan.
- Sun and shade: some sides are best tackled when shaded to reduce lap marks and maintain a wet edge.
- Dew and humidity: early morning moisture and high humidity can slow dry times; sequence work accordingly.
- Access coordination: trim back shrubs before start; move vehicles for ladder or lift access.
Ask bidders to include a sequence: wash day, drying interval, prep days by elevation, prime where needed, then topcoats. Sequencing demonstrates forethought and reduces surprises.
Surface preparation checklist
Preparation is where longevity is built. Use this checklist to confirm the essentials are included in your contract and carried out on site.
- Cleaning: exterior washing to remove dirt, chalk, and mildew prior to prep; rinse so residues don’t interfere with adhesion.
- Paint failure removal: scrape all loose/flaking paint; sand edges smooth to reduce telegraphing lines through topcoats.
- Feather sanding and scuffing: create profile for adhesion on glossy or previously painted areas; vacuum or wipe dust.
- Repairs: replace severely deteriorated wood; patch small dings; fill fastener divots where specified.
- Spot-priming: prime bare wood, metal, or masonry repairs; use stain-blocking primers where tannins or rust are a concern.
- Caulking: seal gaps and joints designed for sealant; avoid sealing intentional weep or ventilation paths.
- Masking and protection: cover windows, fixtures, walkways, landscaping, and hardscapes; place drop cloths before work begins each day.
Confirm who is responsible for disposal of debris, daily cleanup, and end‑of‑project touchups. An agreed punch list at the end keeps both sides focused.
Exterior paint application essentials
With prep complete, the application method should match the surface and conditions. The goal is consistent coverage and film build.
- Primer where needed: full prime on new or heavily prepped surfaces; spot prime for isolated bare areas as specified.
- Number of coats: verify whether the system calls for one or two finish coats on each surface; deep color shifts often need additional coverage.
- Method selection: brushing and rolling can improve penetration on rough sawn wood; spraying can speed uniform coverage on broad, smooth areas when properly masked; back-brushing or back-rolling helps work paint into textured substrates.
- Wet edge management: work in manageable sections, especially in sun or wind, to avoid lap marks.
- Cut-ins and sequencing: complete cut-ins and trim details methodically so sheen and color remain consistent around the home.
Ask for a small, representative test area to confirm color, sheen, and edge detail before large‑scale application proceeds.
Post-paint care and maintenance
Once your project wraps, simple habits preserve the finish and help you spot issues early.
- Initial curing: avoid pressure washing or abrasive cleaning until coatings have fully cured per product guidance.
- Gentle cleaning: wash away dirt and pollutants periodically with a light detergent solution and soft brush; rinse thoroughly.
- Touchups: keep a labeled, sealed sample of each finish; note location and date; address chips promptly to prevent moisture intrusion.
- Vegetation clearance: trim plantings away from siding and trim to reduce trapped moisture and abrasion.
- Water management: keep gutters and downspouts clear; check splashback zones at grade for early wear.
- Annual walkthrough: inspect sun‑baked elevations and horizontal surfaces (sills, rails) for early signs of stress so you can schedule targeted maintenance.
Proactive care often extends the interval between full repaints by focusing on vulnerable spots before they spread.
Smart questions to ask before you sign
Use these prompts to keep proposals comparable and comprehensive when hiring outside house painters.
- Which surfaces are included or excluded, and who handles repairs?
- What washing method will be used, and how will nearby areas be protected?
- How will failing paint be removed and edges feathered?
- Which primers and finish coats will be used on each substrate?
- How many coats are planned, and how are color‑change challenges handled?
- What are the temperature/humidity limits and rescheduling rules if weather shifts?
- What is the plan for daily cleanup, debris removal, and a final punch list?
- Who is the on‑site lead, and how will updates or changes be communicated?
Budgeting and scope tradeoffs
When bids differ, look for scope, sequence, and product details that explain the gap. If you need to adjust the budget, consider targeted tradeoffs that protect the most vulnerable elements first.
- Prioritize protection: address failing trim, sills, and horizontal surfaces even if you defer accent items.
- Phase by elevation: complete the worst‑weathered sides now; schedule remaining elevations later.
- Keep prep standards intact: scaling back prep often shortens the life of the finish; reduce decorative scope before reducing preparation.
Ask bidders to price alternates and add‑ons (e.g., additional coat on the sunniest elevation) so you can make informed choices without re‑quoting the entire job.
Color selection and samples
Exterior color shifts with light, orientation, and surrounding materials. Manage expectations with real‑world samples before approving the palette.
- Large test patches: view colors on each elevation and at different times of day.
- Coordinate elements: confirm contrast between siding, trim, and front door; consider roof, masonry, and landscaping tones.
- Sheen impacts: higher sheen on trim can sharpen lines; flat on siding can soften texture.
- Door details: test the door color on a removable panel or sample board to preview in different lighting.
When samples are approved, document manufacturer, color name/number, and sheen in the contract so the finish matches your expectations.
Safety, access, and neighborliness
Thoughtful planning prevents hazards and friction during exterior work.
- Access plan: move vehicles, secure pets, and clear patios before workdays.
- Ladders and lifts: discuss placement, ground protection, and any site constraints.
- Notification: let neighbors know start dates and expected duration to minimize disruptions.
- Daily wrap: confirm how the site will be left each evening—materials secured, walkways clear.
FAQ
How long should an exterior paint job last?
Lifespan varies by surface exposure, product selection, prep quality, and climate conditions. Sun‑intense elevations and horizontal details usually show wear first. Plan annual checkups and address small issues early to extend time between full repaints.
Do I always need primer before painting outside?
Primer is essential on bare wood, new repairs, rust‑prone metals, and many masonry patches. On sound, previously painted surfaces, thorough cleaning and scuff sanding may allow direct topcoating with compatible products. Your contract should specify exactly where primer will be used and which type it will be.
Is washing the exterior required before painting?
Yes. Removing dirt, chalk, and biological growth helps new coatings bond. The method can range from gentle washing with detergent to more forceful cleaning, depending on surface condition. The key is rinsing thoroughly and allowing adequate dry time before prep and paint.
What causes peeling soon after painting?
Common culprits include painting over loose material, residual chalk or dust, trapped moisture, incompatible products, or coating in temperatures outside recommended ranges. Solid preparation, correct primers, and weather‑aware scheduling reduce these risks.
Which sheen is best for doors and trim?
Semi‑gloss is frequently chosen for its crisper look and easier cleaning on doors and trim. If your surfaces are uneven, a satin sheen can be more forgiving while still offering a defined appearance.
