

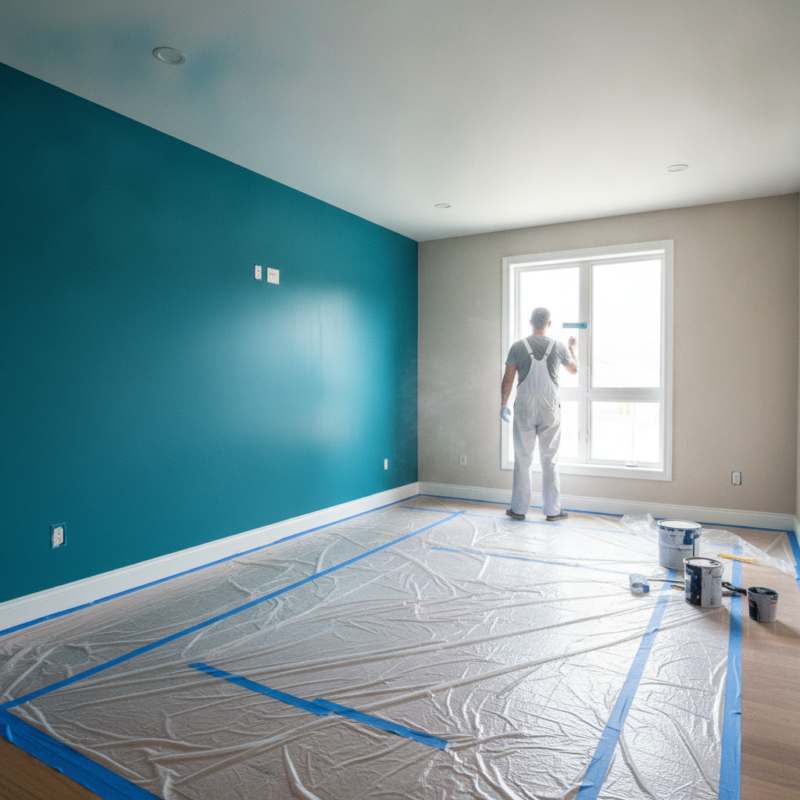
Painting a feature wall is the focused application of a contrasting color or finish to one wall to create a strong focal point. It takes 1–2 coats on a single surface, not the whole room, and delivers a fast style upgrade. In Milton and nearby Mississauga, we use ZERO VOC paints for low-odor, family-friendly results.
By ZIKRIA MUJAHID — Home Painter Services • Last updated: 2026-06-16
At a Glance: Your Feature Wall Plan
A successful feature wall starts with the right wall choice, a tested color, and pro-level prep. Map your focal point, sample at full scale, mask clean lines, then brush-and-roll two thin coats. Finish by unmasking while paint is tacky and styling the wall with balanced art or furniture.
Want the short version you can act on today? Use this quick plan, then dive into the deeper sections for details, options, and pro tips from our interior painting team.
- Pick the correct wall: the first wall your eyes hit when entering, ideally behind a bed, sofa, or fireplace.
- Test 2–3 colors: paint 2-by-2-inch swatches (actually 2-by-2 feet is better) and observe morning, afternoon, and evening light.
- Prep like a pro: patch, sand, caulk small gaps, and spot-prime repairs for a uniform finish.
- Mask, cut in, roll: use fresh low-tack tape; brush edges first, then roll in overlapping passes.
- Two coats win: most accent hues cover in two thin coats; unmask when paint is slightly tacky.
- Style the focal point: rehang centered art or mount a headboard; keep visual clutter low.
What Is a Feature Wall?
A feature wall is one wall finished in a contrasting color, sheen, texture, or pattern to create a focal point. It frames furniture, anchors a room’s layout, and adds depth without repainting every surface, making it an efficient, low-disruption interior upgrade.
Think of it as the room’s headline. One wall gets a bolder move—deeper color, a different sheen, a subtle texture, or a geometric pattern—so the rest of the space feels organized around it.
- Common placements: behind a bed, sofa, dining buffet, TV/fireplace, or along a long hallway that needs emphasis.
- Popular finishes: matte or eggshell solids; two-tone splits; color blocking; taped geometric designs; tone-on-tone stripes.
- Typical timeline: one afternoon for prep and first coat; a second session for the final coat and styling.
- Odor control: ZERO VOC interior paints keep projects comfortable for families and pets.
In our experience, the best feature walls don’t just “go darker.” They coordinate undertones with adjacent walls, trim, and key fabrics so the entire scheme feels intentional.
Why a Feature Wall Matters
Feature walls add depth, zone open layouts, and boost perceived value fast. In Milton homes across the Regional Municipality of Halton, a single accent can visually widen tight rooms, balance natural light, and refresh spaces with minimal disruption when paired with low-odor, ZERO VOC interior paints.
Here’s why homeowners love them—and why they work so well in real rooms, not just mood boards.
- Creates instant focus: one wall “catches” the eye and calms visual noise elsewhere.
- Balances proportions: deeper hues can make long rooms feel cozier; lighter accents bounce light to brighten nooks.
- Family-friendly: modern acrylics are dry to touch in about 1–2 hours, and many reach a durable cure in roughly 7 days.
- Low-lift upgrade: one wall equals fewer surfaces to patch, sand, and coat—less mess, less downtime.
- Plays well with décor: easier to match pillows, art, and rugs to one confident hue than to re-theme an entire room.
We’ve found that accenting the wall opposite the main window deepens the view and makes daylight feel richer. Conversely, accenting a window wall can silhouette trim and drapery for a crisp, architectural effect.
How Painting a Feature Wall Works (Step-by-Step)
Choose the right wall, sample 2–3 colors at full scale, prep meticulously, then brush-and-roll two thin coats. Use fresh low-tack tape for crisp lines, maintain a wet edge, and unmask while paint is tacky. Finish by centering art or furniture to reinforce the focal point.
Follow this process to get pro results without guesswork. Each step removes common pitfalls that lead to uneven sheen, ragged edges, or color regret.
- Choose the wall: pick the wall you see first when entering. Avoid heavy doors/vents that break up the canvas.
- Mock up the layout: center the bed, sofa, or console; tape a paper template for art or a TV to verify scale.
- Sample like a pro: apply 2–3 test swatches at 2-by-2 feet; view morning, afternoon, and night lighting. Note how warm bulbs vs. daylight shift the hue.
- Prep thoroughly: clean, fill nail holes, sand flush, spot-prime repairs; caulk hairline gaps at trim for a seamless edge.
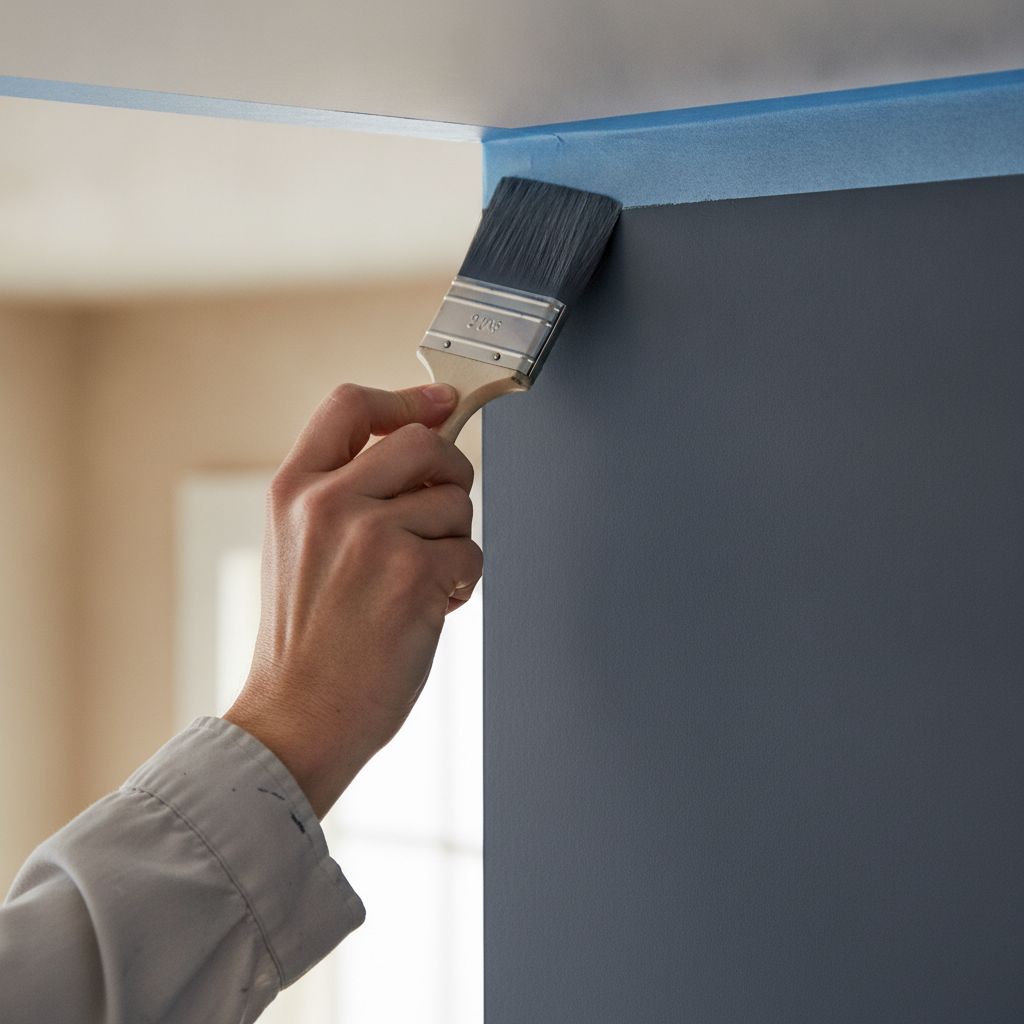
- Mask clean lines: use fresh low-tack tape; run a plastic putty knife along the edge to seal it. For patterns, snap level lines or use a laser.
- Cut in first: use a 2–2.5 inch angled sash brush for ceilings, corners, and trim edges.
- Roll in sections: use a quality 3/8″ microfiber roller; work in a W pattern; keep a wet edge to avoid lap marks.
- Apply a second coat: most accents need two thin coats for uniform color and sheen consistency.
- Unmask at tacky stage: score the paint line and remove tape while paint is slightly tacky for the sharpest edge.
- Style the focal point: rehang art at 57–60 inches on center; keep accessories simple so the wall can breathe.
Remember: thin coats level better than heavy ones. A second, lighter pass does more for smoothness and color depth than one overloaded coat.
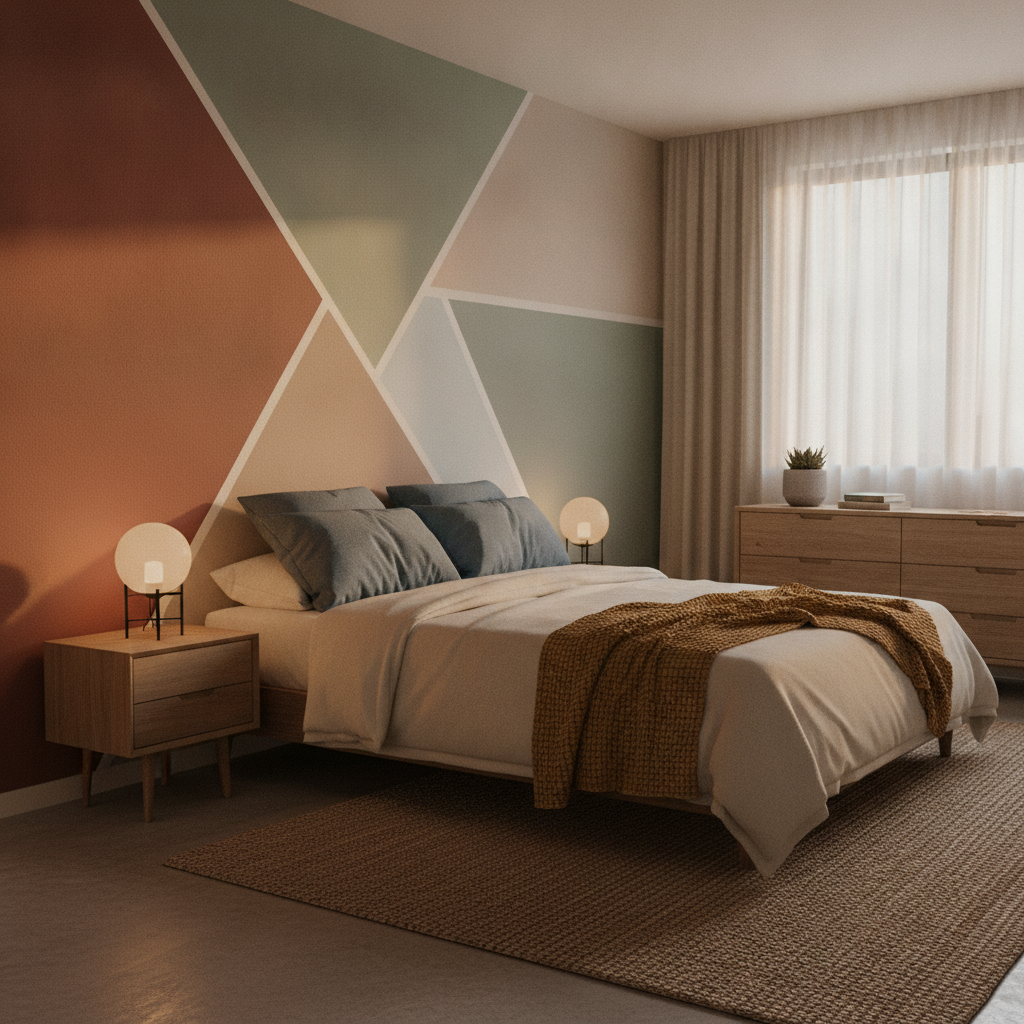
Types, Styles, and Approaches
Choose from solid color accents, two-tone splits, color blocking, geometric tape designs, tone-on-tone stripes, or subtle textures. Match the approach to your architecture and décor so the feature wall enhances, not competes with, the room’s proportions and natural light.
Not sure what direction fits your space? Use these patterns as a menu, then test small mockups with painter’s tape or sample boards.
- Solid color: the timeless move. Matte or eggshell in a deeper related hue to your main walls.
- Two-tone split: a horizontal divide at 36–42 inches anchors dining rooms and kids’ spaces.
- Color blocking: rectangles or bands that align with windows, doors, or built-ins for a gallery feel.
- Geometric designs: chevrons, herringbone, or diagonals created with precise taping and a level.
- Tone-on-tone stripes: same color, two sheens (matte + satin) for a whisper of pattern without busy visuals.
- Texture effects: subtle limewash aesthetics or brushed finishes that add movement without heavy texture.
We like to tie patterns to existing lines—window heads, mantel heights, or shelf tops—so the design feels built-in. If your home includes wood slat walls or wainscoting, consider painting the backing surface as the “feature” and leaving the wood neutral.
Best Practices from Pros
Keep undertones consistent, sample in real light, and respect a 60-30-10 palette balance. Use low-odor, ZERO VOC paint, seal tape edges, and apply two thin coats. Center art and furniture afterward to reinforce the focal point and avoid visual clutter.
These habits separate a “nice try” from a crisp, calm, magazine-ready wall.
- Work with undertones: warm with warm (beige, cream, clay) and cool with cool (grays, blues, charcoals).
- Mind sheen: matte hides flaws; eggshell/satin improve cleanability in kids’ rooms and hallways.
- Use fresh tape: older tape bleeds; press edges firmly with a plastic blade for razor-sharp lines.
- Rollers matter: a 3/8″ microfiber cover releases enough paint without orange peel in most interiors.
- Let it cure: scuff resistance improves significantly after the first 48–72 hours; avoid scrubbing until day 7.
- Style simply: 1–3 art pieces or a centered headboard; too many items weaken the focal point.
Here’s the thing: the boldest color isn’t always the best color. A related, deeper version of your main wall color often looks richer and calmer.
Local considerations for Milton
- North-facing rooms near Walker Park can skew cool; test warmer undertones to offset blue-daylight cast.
- Winter projects benefit from low-odor, quick-dry paints; ventilate briefly between coats even when windows are shut.
- Open-concept homes in the Regional Municipality of Halton read best when the feature wall aligns with your main seating zone.
Tools and Resources You’ll Use
You need ZERO VOC interior paint, quality primer, a 2–2.5 inch angled brush, 3/8″ microfiber roller, low-tack tape, drop cloths, patch, caulk, sanding block, a level or laser, and good lighting. These basics deliver crisp lines and smooth coverage on most interior walls.
Gather everything up front so you can keep a steady rhythm once you start painting a feature wall.
- Prep kit: cleaner/deglosser, patch compound, putty knife, sanding block (120–220 grit), vacuum, microfiber cloth.
- Painting tools: 2–2.5 inch angled sash brush, 3/8″ microfiber roller, tray + liners, extension pole, ladder.
- Taping and layout: fresh low-tack tape, level or laser, pencil, and measuring tape.
- Materials: quality primer for patches and a durable ZERO VOC wall paint in your chosen sheen.
Sheen guide for feature walls
| Sheen | Best for | Pros | Watch-outs |
|---|---|---|---|
| Matte | Bedrooms, media rooms | Hides imperfections; soft look | Less washable; avoid heavy scrubbing |
| Eggshell | Living rooms, hallways | Good balance of cleanability and elegance | Can highlight roller marks if overworked |
| Satin | Kids’ rooms, high-traffic areas | More washable and scuff resistant | Shows wall flaws; prep carefully |
| Semi-gloss | Trim specials or patterns | Crisp contrast in tone-on-tone designs | Unforgiving on patched areas |
If you’re pairing a feature wall with a cabinetry refresh, our spray-painted cabinet finishes (lacquer or polyurethane) deliver a factory-like look that complements your new accent color. Planning an outdoor refresh too? Deck sanding and staining, or even a driveway sealing tune-up, keeps curb appeal consistent with your updated interiors.
Free help, zero risk: Ask us for a free color consultation and a free estimate visit. We bring large swatches, lay out a fast schedule, and honor our On-Time Completion promise.
Case Studies and Real-World Examples
In nearby homes, feature walls routinely transform rooms in a single day. With thorough prep, ZERO VOC paint, and crisp masking, results look intentional and last. These Milton, Mississauga, and Oakville examples highlight layout, sheen, and styling choices you can model.
Here are a few quick snapshots that show how choices on color, placement, and sheen play out.
- Milton living room: We centered a sectional on a deep blue-green wall, used eggshell sheen for light bounce, and rehung art in a simple 2-by-2 grid. The room read wider on entry.
- Mississauga nursery near our Nighthawk Trail base: Soft pastel accent in eggshell kept cleanup easy. We scheduled during nap-friendly hours to minimize disruption.
- Oakville condo hallway: A moody, desaturated blue at the end wall stretched the sightline, while reflective satin lacquer on nearby cabinet doors tied the scheme together.
- Open-plan kitchen-dining: A toned-down charcoal behind floating shelves unified white walls elsewhere and framed a wood dining table for warmth.
- Media room: Matte charcoal behind the TV reduced glare; adjacent walls stayed lighter to avoid cave effect.
When rooms also need surface corrections—old popcorn ceiling remnants or minor drywall waves—we skim coat first so the accent sheen reads consistently from corner to corner.
Feature Wall FAQ
Choose the first-seen wall, sample 2–3 colors in real light, prep thoroughly, and use two thin coats. Matte hides flaws; eggshell or satin cleans easier. Unmask tape while tacky, then center art or furniture to complete the focal point.
Which wall should I choose for a feature?
Pick the wall your eyes land on when you enter. It should frame a bed, sofa, or fireplace if possible. Avoid walls chopped up by doors or large vents. The goal is a clean canvas that naturally anchors the room’s layout.
Is matte, eggshell, or satin best for an accent?
Matte hides imperfections and reduces glare, great for media rooms and bedrooms. Eggshell balances elegance and cleanability. Satin is more washable for kids’ spaces and hallways but shows wall flaws if prep is rushed.
Do I need a primer for painting a feature wall?
Spot-prime patches, stains, or repaired areas so sheen and color look even. If you’re changing from very dark to light (or vice versa), a full prime helps with coverage and consistency across coats.
How long before I can move furniture back?
Latex interior paints are typically dry to touch in 1–2 hours. Let the wall set for several hours before pushing furniture close, and avoid aggressive cleaning until the finish cures—usually around day 7.
Notes and Sources
Independent guides and product overviews can help you compare wall finishes and prep methods. Cross-check advice with your room’s light and layout. When in doubt, sample at full scale and prioritize prep quality over speed.
Wallpaper can be a worthy alternative to paint in some rooms. For a balanced view on both paths, see this wallpaper vs. paint guide. For moisture-prone areas, this kitchen and bath paint overview outlines common considerations. Broader interior repaint checklists like this interior painting guide can also inform your prep.
Conclusion and Next Steps
A great feature wall comes from smart wall selection, full-scale sampling, meticulous prep, and two thin coats in the right sheen. Style it simply and let the color lead. If you want help, our Milton-area crew delivers crisp lines with low-odor, ZERO VOC paints.
- Key takeaways:
- Pick a natural focal wall; avoid chopped-up surfaces.
- Test 2–3 colors at 2-by-2 feet under your real lighting.
- Prep, mask, cut in, roll two thin coats, unmask when tacky.
- Match sheen to room use; style with restraint to amplify impact.
- Next steps: Book a free color consultation, get an in-home estimate, and reserve your On-Time Completion window.
- Complementary services: kitchen cabinet spray painting, popcorn ceiling removal and skim coat, garage epoxy floors, deck and fence staining, driveway sealing, exterior window caulking, and seasonal power washing.
Ready to refresh one wall—or your whole space? Our interior painting team serves Milton, Mississauga, and Oakville with careful prep, premium materials, and a punctual schedule.