Interior home painting services are the end-to-end professional process of preparing, priming, and finishing interior surfaces to refresh appearance and improve durability. At 316 Bergamot Ave in Milton, our crews deliver low-odor, ZERO VOC options and meticulous prep for consistent results homeowners can trust. This guide explains the full workflow, benefits, and best practices.
By ZIKRIA MUJAHID • Last updated: 2026-06-17
Quick Summary
Interior home painting services cover consultation, surface repairs, priming, and multi-coat finishes with clean site protection. Expect ZERO VOC options, careful masking, skilled cutting-in, and a punch-list walkthrough. Professional painters streamline scheduling, protect furnishings, and leave smooth, durable finishes ready for daily living.
Here’s what you’ll learn and get from this complete guide:
- Clear definitions of interior painting services and how each step works
- Why ZERO VOC paints, surface prep, and sheen choice impact longevity
- Step-by-step process your crew should follow—no surprises
- Methods for walls, trim, ceilings, and kitchen cabinet spray finishing
- Best practices, tools, and safety tips for family-friendly projects
- Real examples from Mississauga–Halton area homes to show outcomes
What Are Interior Home Painting Services?
Interior home painting services are professional packages that prepare and refinish walls, ceilings, trim, and built-ins using tested methods: assessment, repairs, sanding, priming, and controlled application of low-odor coatings. Done right, they restore beauty, improve cleanability, and protect surfaces from daily wear.
Interior service is more than new color. It’s a coordinated workflow designed to minimize disruption while maximizing finish quality. For family homes, we emphasize ZERO VOC interior paints, careful dust control, and furniture protection. For accent walls, stairwells, or two-story foyers, pro equipment and staging keep work safe and efficient.
Core inclusions you should expect
- Consultation and color support: Align palette, sheen, and scheduling around your routines.
- Surface preparation: Cleaning, patching, sanding (typically 120–220 grit), and priming.
- Controlled application: Cut-in, roll, and back-roll for even coverage and crisp lines.
- Site protection: Plastic sheeting, rosin paper, and reusable drop cloths.
- Quality checks: Flashlight and raking-light inspections between coats.
In our experience across GTA homes, the best outcomes come from disciplined prep and consistent film build. That means the right primer for the substrate, correct roller nap for texture, and proper dry times (often 2–4 hours between coats; full cure 7–30 days depending on product and conditions).
Why Interior Painting Matters for Modern Homes
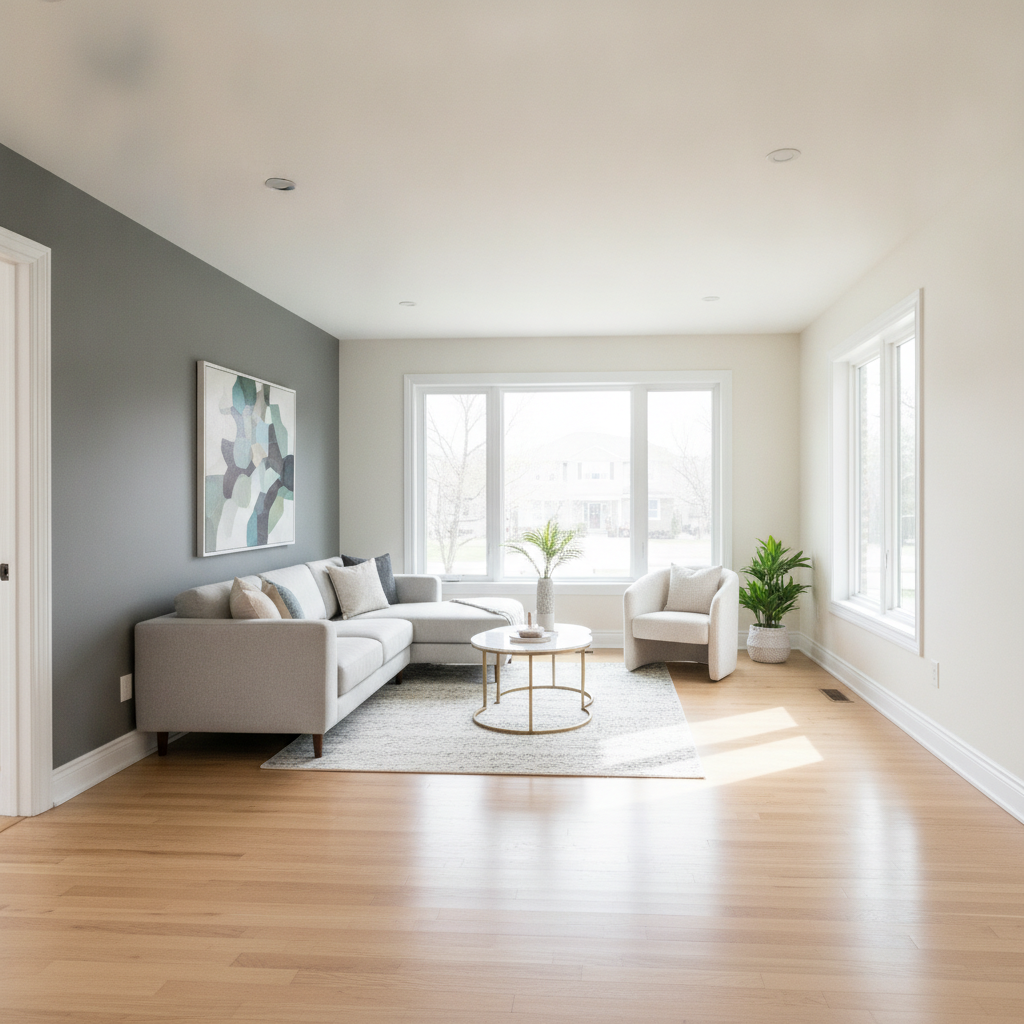
Fresh interior paint boosts home value, protects high-use surfaces, and improves indoor comfort. With ZERO VOC options and moisture- or scuff-resistant formulas, finishes now clean easier and last longer—especially in kitchens, baths, and kids’ rooms where durability and air quality matter every day.
Paint is a protective system. Beyond color, it seals porous drywall, reduces dusting on baseboards, and shields trim from scuffs. In humid rooms, specialty coatings limit swelling and peeling. On the wellness side, low- and zero-VOC formulas help reduce odor and support healthier indoor air when used with adequate ventilation (target 40–60% RH; 50–77°F application range per most labels).
- Value and curb-to-core continuity: Matching interior palettes to refreshed exteriors creates a cohesive feel from entry to living spaces.
- Ease of cleaning: Satin and semi-gloss enamels on trim and doors resist fingerprints and wipe clean with mild soap.
- Light and space: Lighter neutrals bounce more daylight, making rooms feel larger and brighter.
Homeowners also use interior home painting services to synchronize upgrades. We often pair wall and ceiling repainting with kitchen cabinet spray finishing and new caulking around trim for a factory-tight look.
How Interior Painting Works: The Pro Process
A professional interior painting process follows a predictable sequence: assess, protect, repair, sand, prime, apply two finish coats, and complete a joint walkthrough. This controlled workflow delivers coverage, adhesion, and clean lines while keeping your home livable during the project.
Step-by-step workflow you can count on
- Assessment and planning: Measure areas, inspect substrates, discuss colors and sheens, map the schedule.
- Site protection: Move/cover furnishings, mask edges, set dust containment where needed.
- Repairs: Fill holes, skim minor defects, sand flush (120–150 grit walls; 180–220 grit trim).
- Priming: Spot-prime repairs; use bonding or stain-blocking primers when required.
- Cut and roll: Cut ceilings, corners, and trim lines; roll balanced sections; back-roll to even stipple.
- Second coat: After proper dry time, repeat for color uniformity and film build.
- Detailing: Caulk interior gaps, paint doors and trim, reassemble hardware, tidy work areas.
- Walkthrough: Punch list with raking light, touch-ups, and care guidance for the cure period.
| Stage | Target Conditions | Typical Tools | Quality Checks |
|---|---|---|---|
| Prep & Repairs | Dust control; smooth patches | HEPA vac, 120–220 grit, mud knives | Hand-sweep surfaces; no ridges |
| Priming | Clean, dry, dull substrate | Bonding/stain-block primer, mini-rollers | Uniform coverage; no bleed-through |
| Finish Coats | 50–77°F, 40–60% RH | High-build rollers, angled sash brushes | Even color; consistent sheen |
| Final QA | Good daylight or 400–800 lumen light | Raking light, blue tape markers | Punch list resolved; clean site |
For deeper context on scope planning and homeowner prep expectations, see this recent quick interior painting guide. While every home is unique, the disciplined flow above keeps outcomes predictable.
Types, Methods, and Approaches That Elevate Results
Different interior surfaces demand specific methods: rollers for walls, enamel brushing for trim, and HVLP spray for doors or cabinets. Matching tools, primers, and sheens to each substrate ensures adhesion, smooth texture, and durable, easy-to-clean finishes throughout the home.
Walls and ceilings
- Walls: Roller application with back-rolling evens stipple; matte/eggshell hides minor defects.
- Bathrooms: Mildew-resistant formulas reduce swelling and peeling in high humidity.
- Ceilings: Flat finishes minimize glare; after popcorn removal, a skim coat delivers a modern, smooth look.
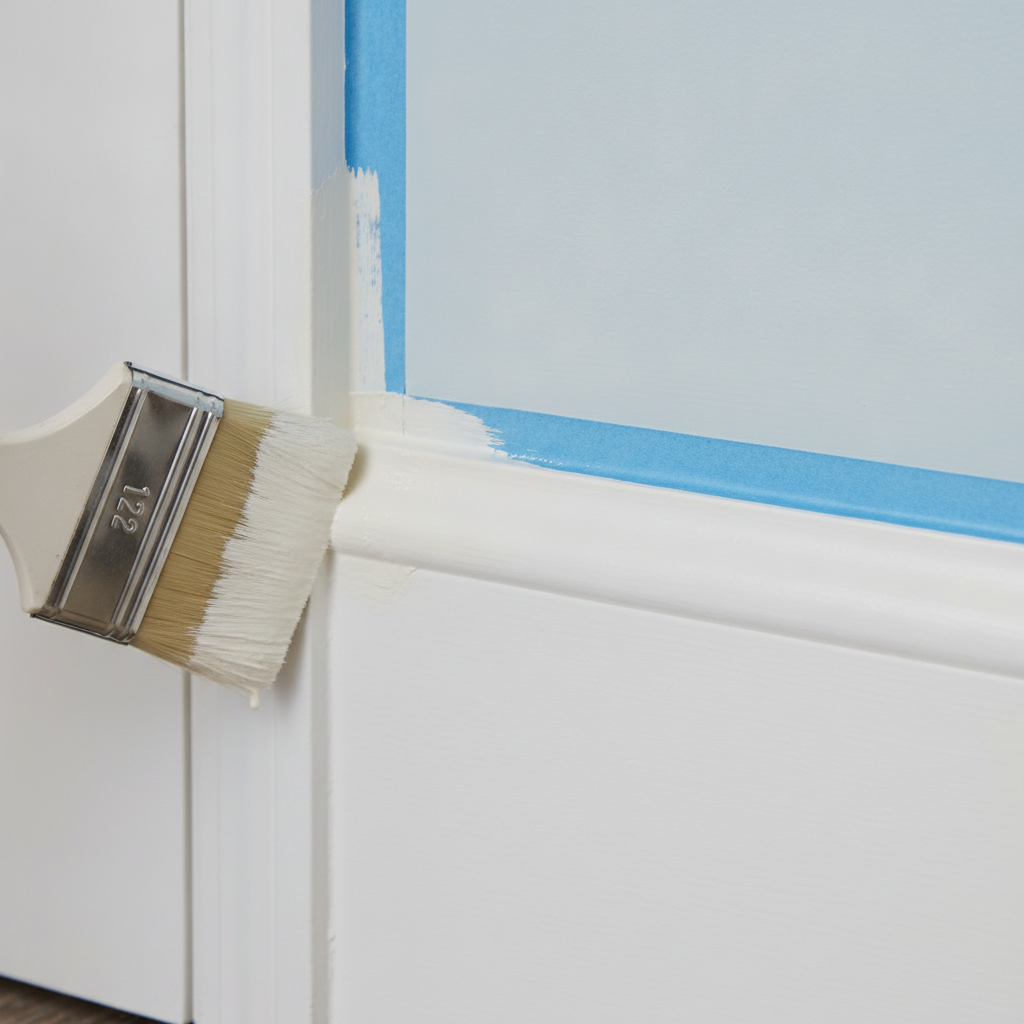
Trim, doors, and built-ins
- Trim and doors: Sand to de-gloss; use enamel undercoater; apply satin or semi-gloss for scrubbability.
- Caulking: Paintable acrylic-latex caulk closes hairline gaps for crisp lines and better insulation.
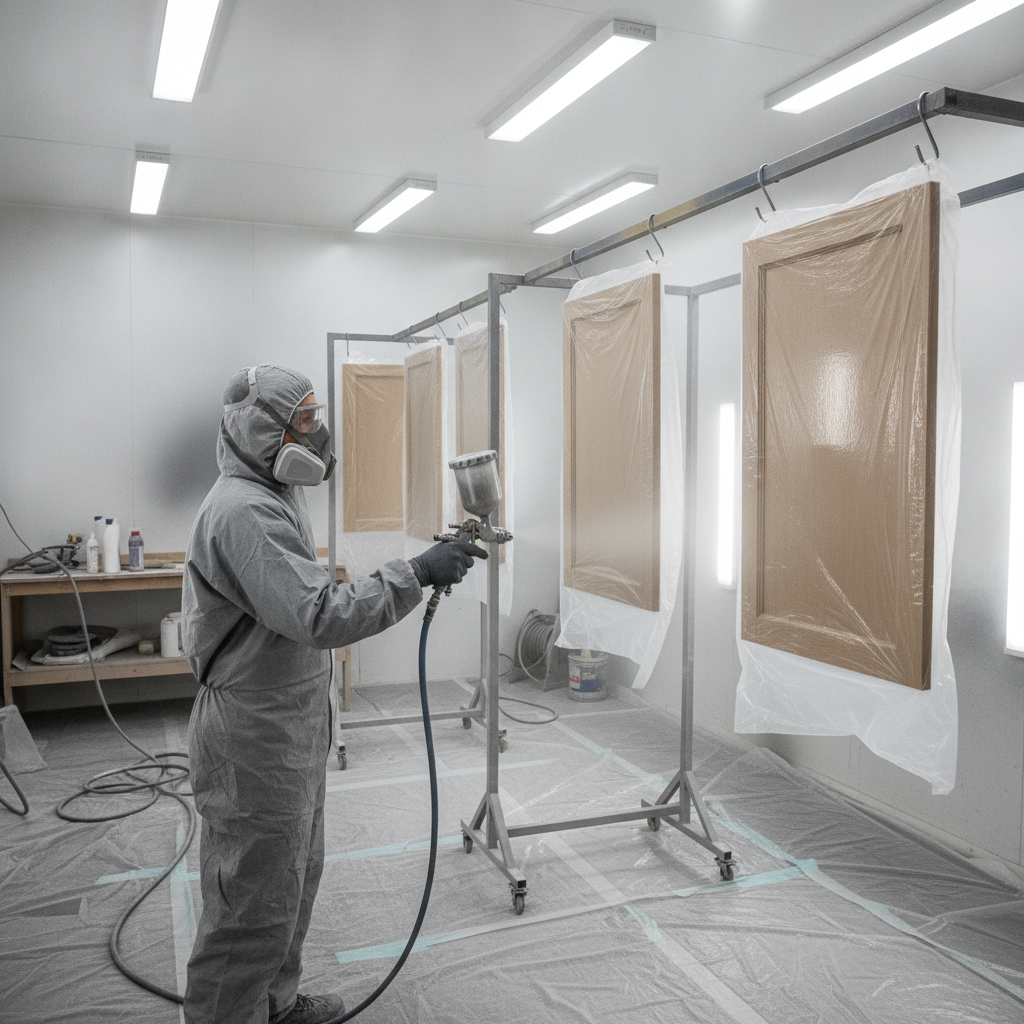
Kitchen cabinets (spray-applied)
- Professional spray finishing produces a factory-like surface with lacquer or polyurethane systems.
- Process: Label doors, degrease, sand/scuff (180–320 grit), prime, and apply 2–3 fine finish coats.
- Result: Durable, even sheen that resists fingerprints and routine kitchen cleaning.
For a deeper look at shop-style cabinet refinishing steps, this cabinet painting process overview outlines typical spray sequences and curing considerations that align with our own approach for Mississauga kitchens.
Best Practices for Cleaner, Longer-Lasting Finishes
The best interior results come from disciplined prep, the right primer, steady film build, and controlled environment. Maintain clean job sites, follow label dry times, ventilate well, and complete a joint punch-list walkthrough before wrap-up. These habits prevent telegraphing, flashing, and premature wear.
Prep and protection that pay off
- Mask methodically: Mask ceilings first, then trim, then baseboards; seal edges for sharp lines.
- Use the right abrasives: 120–150 grit for walls; 180–220 grit for trim and doors.
- Prime smart: Spot-prime patches; upgrade to bonding or stain-block where needed.
- Control climate: Aim for 50–77°F with 40–60% RH; avoid steam, showers, or cooking during cure.
Application discipline
- Maintain a wet edge to avoid lap marks; work in 3–4 foot sections.
- Roller choice matters: 3/8–1/2 inch nap for most walls; microfiber for ultra-smooth finishes.
- Two-coat standard: Expect two finish coats for uniform color and sheen; darker hues may require more.
Health and family-friendly practices
- Choose ZERO VOC options to minimize odor and support indoor air quality.
- Ventilate using window fans and furnace fan recirculation; replace filters after completion.
- Contain dust with plastic walls and HEPA vacs when sanding or doing repairs.
For additional homeowner prep context and sequencing ideas, browse this recent home painting guide which mirrors many of the same site-protection routines we recommend before day one.
Tools and Resources Pros Actually Use
Professional painters rely on precise tools—angled sash brushes, microfiber rollers, HEPA vacuums, caulk guns, and high-solids primers. These choices speed up work, improve adhesion, and create smoother finishes while reducing dust and touch-ups that slow projects down.
Essential kit for quality results
- Brushes: 2–2.5 inch angled sash for cutting; stiff bristle for trim enamels.
- Rollers: 3/8–1/2 inch nap; microfiber sleeves for fine wall finishes; mini-rollers for tight spots.
- Surface gear: Pole sanders, sanding sponges, and shop vacs with HEPA filtration.
- Primers: Bonding and stain-block formulations matched to substrate challenges.
- Spray systems: HVLP for cabinets/doors; airless rigs for large ceilings or empty homes.
Safety and comfort items
- PPE: Nitrile gloves, eyewear, and respirators for spray work.
- Staging: Adjustable ladders and stabilizers for tall foyers with safe reach.
- Lighting: 400–800 lumen task lights to reveal misses before they dry.
When we service busy households, compact staging and dust control keep pathways clear. In our experience, this reduces dwell time in common areas and allows families to use most rooms during the project.
Case Studies and Local Examples
Mississauga- and Halton-area homes benefit from coordinated services: interior repainting, cabinet spraying, and sealing work. Pairing these tasks compresses project timelines, keeps dust in check, and leaves a cohesive, modern finish across rooms.
Mississauga family room refresh
A young family wanted low-odor repainting ahead of a new baby. We protected furniture, used ZERO VOC wall paint in a warm neutral, and enamelled baseboards in a scrubbable satin. The room was back in service the same evening, with full cure guidance for the following weeks.
Oakville kitchen cabinet transformation
To avoid a full renovation, we removed and labeled doors, degreased thoroughly, scuff-sanded, bonded with a specialty primer, and spray-applied two fine finish coats. The new satin sheen leveled beautifully under kitchen lighting and now wipes clean with a damp cloth.
Milton staircase, walls, and trim
In a two-story entry, we used stable ladders and careful masking to create crisp lines along stringers. A washable eggshell on walls and semi-gloss on handrails delivered the contrast and durability the homeowner requested.
Serving 316 Bergamot Ave and the Regional Municipality of Halton
Home Painter Services supports homeowners near 316 Bergamot Ave and across the Regional Municipality of Halton with organized scheduling, clean worksites, and ZERO VOC interior options. Local crews understand seasonal humidity swings and plan dry times and ventilation to keep projects on track year-round.
Local logistics matter. We plan around school schedules and weather patterns so families can keep daily routines. For nearby projects, we often stage cabinet spraying in a controlled area to reduce time in your kitchen and keep odors minimal during the cure window.
Local considerations for 316 Bergamot Ave
- When timing projects around community events near Walker Park, schedule high-traffic room painting midweek so spaces are ready for weekend gatherings.
- Humidity can swing with spring thaws and summer heat; keep indoor RH near 40–60% for even drying and consistent sheen.
- For homes along routes like Tremaine at Bergamot, plan deliveries and parking in advance so crews can protect floors and move materials safely.
How We Coordinate Related Services for Better Results
Pairing interior painting with complementary services—cabinet spraying, popcorn ceiling removal, power washing for exterior prep, and window re-caulking—reduces total disruption. A single, sequenced plan condenses setup time and ensures consistent finishes across surfaces.
- Popcorn ceiling removal + skim coat: Complete first, then ceiling paint for a modern, low-glare finish.
- Cabinet spray finishing: Stage off-site or in a sealed area; rehang hardware after walls and trim cure.
- Exterior window caulking: Improve comfort and drafts; align interior repaint with fresh interior caulk lines.
- Power washing (exterior): Use ahead of exterior painting; schedule interior tasks while exteriors dry.
- Deck sanding: If you’re planning stain, coordinate with interior work to share staging and cleanup resources.
This integrated approach reflects how our Mississauga crews operate—grouping tasks reduces masking time, keeps dust down, and helps you enjoy an “all-at-once” reveal when the final punch list is cleared.
Sheen and Finish Selection (Room-by-Room)
Choose sheens by traffic and cleaning needs: matte/eggshell for main walls, satin for baths and kitchens, and semi-gloss for trim and doors. Matching finish to use-case yields better durability, easier cleaning, and consistent visual texture.
| Area | Recommended Sheen | Why It Works |
|---|---|---|
| Living/Bedrooms | Matte or Eggshell | Hides minor defects; soft look |
| Hallways/Kids’ Rooms | Eggshell or Satin | Better stain resistance and washability |
| Kitchens/Baths | Satin | Moisture-tolerant; wipes clean |
| Trim/Doors | Satin or Semi-Gloss | Hard-wearing; crisp contrast |
| Ceilings | Flat | Minimizes glare and shadows |
You might be wondering if a darker color mandates a higher sheen. Not always. The right primer plus two balanced coats often achieves depth without extra gloss—especially when lighting is dialed in and walls are well-skimmed.
Homeowner Checklist: Getting Your Space Ready
A little prep goes a long way. Clear small items, identify touchy zones (nursery, office), and confirm colors and sheen before day one. Label doors for cabinet work, and plan ventilation. Good planning shortens project time and keeps rooms usable during the cure period.
- Confirm paint colors, sheen, and accent walls in writing.
- Clear counters and small decor; we’ll move and protect large furniture.
- Secure pets and plan safe paths for crews and ladders.
- Set thermostats to a steady 68–72°F and maintain 40–60% RH.
- For cabinets: empty top-shelf items; label special hinges if any.
Want a printable pre-project list? Use the structure in the “Pro Process” section above, then add room-specific notes so nothing gets missed during setup.
Need expert help planning your repaint?
Book a free color consultation and estimate. We’ll map your schedule, confirm finishes, and deliver a clean, on-time interior repaint with ZERO VOC options for family comfort.
Soft CTA: Tell us how you use each room. We’ll recommend sheens, a protection plan, and a sequencing schedule that keeps your home livable throughout.
Schedule your free consultation to get started.
Frequently Asked Questions
Homeowners ask about timing, odors, and what to do before day one. Here are clear, direct answers that keep projects smooth and stress-free.
How long should I wait between coats?
Most wall paints are recoat-ready in 2–4 hours under 50–77°F and 40–60% RH. Trim enamels may need longer. Always check the label and ensure surfaces feel dry and cool to the touch before proceeding.
Are ZERO VOC paints durable enough for busy rooms?
Yes. Modern ZERO VOC formulas in eggshell or satin hold up well to routine cleaning. Pair them with proper primer and two finish coats for balanced film build. Use satin in kitchens and baths for extra moisture tolerance and easy wipe-downs.
What prep should I do before painters arrive?
Clear small items, remove or secure wall art, and empty counters. We handle large furniture and site protection. If we’re spraying cabinets, label doors and set aside hardware in separate bags. Confirm colors and sheen choices beforehand to avoid delays.
Can you paint during winter or humid months?
Yes, with planning. We stabilize indoor temperature and humidity and use low-odor products. Good airflow and consistent climate control keep dry times predictable and prevent flashing or inconsistent sheen.
Conclusion and Key Takeaways
Interior home painting services deliver lasting beauty and protection when they follow a proven workflow—prep, prime, two finish coats, and joint QA. With ZERO VOC options and smart scheduling, you can refresh rooms while keeping the household running smoothly.
- Prep and primer quality drive adhesion and finish consistency.
- Choose sheens by room use: eggshell for walls, satin for moisture areas, semi-gloss for trim.
- Plan climate control: steady 50–77°F and 40–60% RH for uniform drying.
- Pair services (cabinet spray, skim coat) to compress timelines and dust.
- Finish with a thorough walkthrough and cure-care guidance.
If you’re in or near Milton, Mississauga, or Oakville, our local team aligns color, health, and durability into one clean, on-time project. Ready when you are.