

Epoxy flooring installation cost refers to the factors that shape the total investment in a professional epoxy floor, from surface prep to topcoat. For Milton homeowners, Home Painter Services installs epoxy after diamond grinding, moisture testing, and crack repair to ensure longevity. This guide explains what influences value so you can plan confidently—without pricing numbers.
By ZIKRIA MUJAHID — Home Painter Services
Last updated: 2026-06-11
Above-Fold: Epoxy Flooring Installation Cost at a Glance
Epoxy flooring value is determined by prep quality, slab condition, system thickness, and finish options. In Milton and the Regional Municipality of Halton, climate swings, salt, and winter moisture make professional prep essential. Home Painter Services focuses on diamond grinding, moisture control, and industrial topcoats to deliver durable, low-maintenance garage floors.
As a residential contractor serving Milton-area homeowners, we approach epoxy floors as a system, not a single product. The real drivers are the concrete’s condition, repair requirements, the coating build (primers, body coats, topcoats), and your usage expectations. Understanding those inputs prevents surprises and helps you get the performance you expect.
Summary
This guide explains the key drivers of epoxy flooring installation cost, the steps in a professional install, finish options, and mistakes to avoid. It’s written for Milton-area homeowners comparing epoxy for garages and utility spaces and want longevity without guesswork.
In this complete guide you’ll learn how a contractor-grade process works, what influences durability, and what to ask before you book an install. We’ll also connect epoxy planning to related services—like power washing and deck sanding—that protect your exterior envelope and boost curb appeal.
Local considerations for Milton
- Winter road salt and slush tracked from routes near Tremaine at Bergamot can accelerate wear; plan for a chemical-resistant topcoat and good floor drainage.
- Freeze–thaw cycles and spring runoff demand moisture testing before coating; schedule installs when the slab is dry and daytime temps are stable.
- Weekend traffic to Walker Park means more vehicle in–out cycles; a slip-resistant flake or quartz finish helps with wet tires.
What Is “Epoxy Flooring Installation Cost”?
Epoxy flooring installation cost is the total project effort behind a durable floor: slab evaluation, prep, repairs, resin build, and curing logistics. The better the prep and system match your space, the better the long-term value.
Epoxy is a thermoset resin system that bonds to concrete and cures into a hard, chemical-resistant surface. The “cost” concept isn’t just a product can—it’s the combined labor, tools, and materials to assess the slab, open its pores, repair defects, and build a multi-coat system tuned to your garage’s conditions.
At Home Painter Services, that means diamond grinding (not just etching), moisture evaluation, crack and spall repair, and a primer–body–topcoat stack for the traffic you expect. The result is a floor that resists hot-tire pickup, road salt, and seasonal temperature swings common in Halton.
Why Epoxy Floor Value Matters for Homeowners
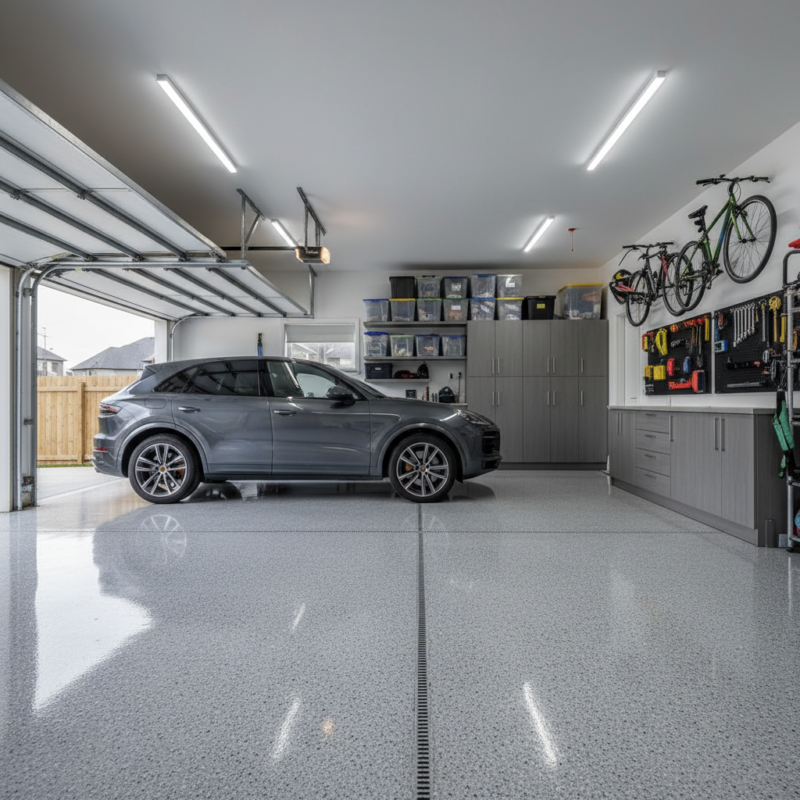
A well-installed epoxy floor protects concrete from salts, oils, and abrasion, while improving safety and appearance. Prioritizing prep and the right system prevents early failures and keeps maintenance low for years.
Garages carry real loads—vehicles, tools, and seasonal storage. Bare concrete dusts, stains, and can crack under thermal cycling. Epoxy seals the surface, boosts light reflectivity, and reduces cleanup time. You’ll also gain traction, especially if you opt for flake or quartz broadcasts that add micro-texture.
We’ve seen that garages that receive proper grinding and a compatible resin build stay brighter and easier to clean over many winters. Conversely, quick fixes that skip grinding often peel at tire paths. Choosing value over shortcuts is what ensures the investment pays you back in daily use.
How Epoxy Garage Floors Are Installed (Step-by-Step)
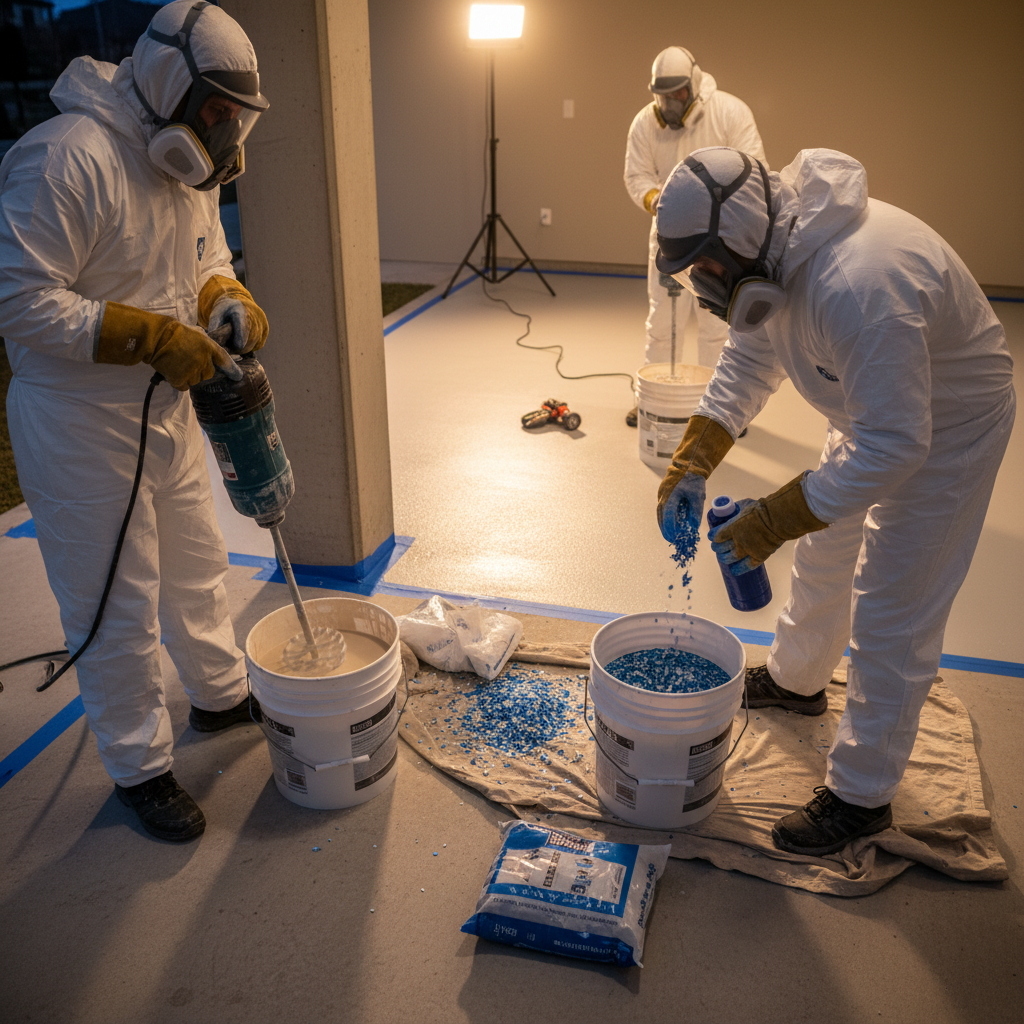
Successful epoxy installs follow a disciplined sequence: inspect, test moisture, diamond grind, repair defects, prime, apply body coats, broadcast flake or quartz (if chosen), then seal with a protective topcoat. Controlled cure windows lock in performance.
Here’s the process we follow for Milton garages. The order matters; each step sets the next one up for success. Skipping a step usually shows up later as peeling, bubbling, or staining.
| Step | Purpose | Our Practice | Common DIY Risk |
|---|---|---|---|
| 1) Assessment | Identify cracks, spalls, contaminants | Visual inspection; adhesion risk mapping | Miss hidden oil or sealers; adhesion fails |
| 2) Moisture test | Confirm slab vapor conditions | Calcium chloride or in-situ RH readings | Coat over damp slab; microblistering |
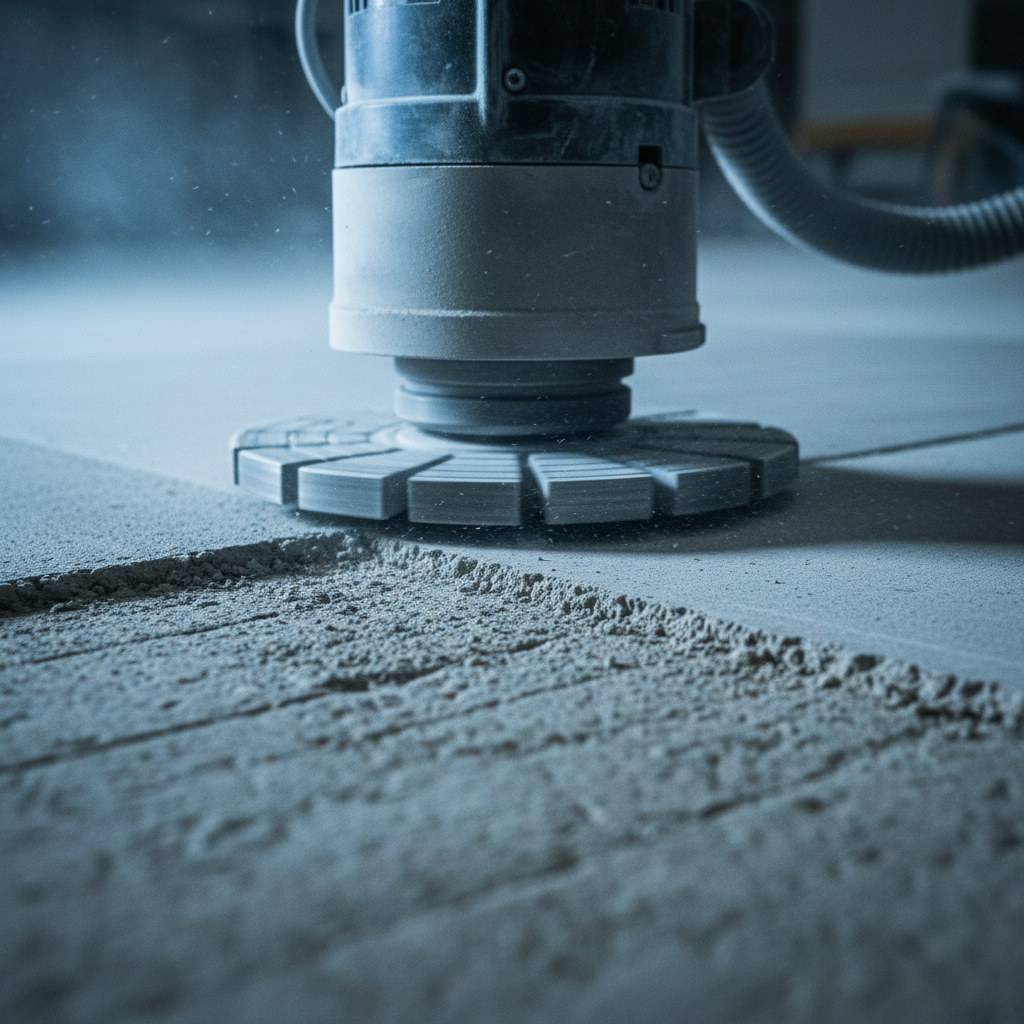
| 3) Diamond grind | Open pores; remove laitance/contaminants | Planetary grinder with proper diamonds | Acid etch only; weak, uneven profile |
| 4) Repair | Stabilize cracks and pits | Epoxy mortar or polyurea crack fill | Paint over defects; telegraphing |
| 5) Prime | Promote bond; seal porosity | Low-viscosity epoxy primer | Skip primer; variable absorption |
| 6) Body coat | Build thickness; color base | High-solids epoxy with broadcast | Thin coats; hot-tire pickup |
| 7) Broadcast | Slip resistance; hide flaws | Full or partial flake / quartz | Uneven spread; bald spots |
| 8) Topcoat | UV/chemical/abrasion shield | Polyaspartic or urethane seal | No topcoat; early yellowing |
| 9) Cure | Reach design hardness | Controlled return-to-service | Drive too soon; marks/imprints |
Each stage above is measured in outcomes—profile depth, moisture thresholds, and film builds. Consistency is what separates a showpiece floor from one that fails at the first winter thaw.
Types of Epoxy Systems and Finish Options
Choose among solid-color epoxy, flake systems, quartz broadcast, and metallic effects. The right choice balances looks, traction, UV stability, and cleanup needs. We match systems to your traffic and climate exposure.
Most Milton garages land on a flake or quartz broadcast for traction with salt and meltwater. Metallic looks stunning in gyms or utility rooms where wet tires aren’t a factor. Solid-color epoxy with a satin urethane topcoat suits low-traffic storage bays.
| System | Appearance | Traction | UV Hold | Typical Use |
|---|---|---|---|---|
| Solid Color Epoxy | Uniform color; sleek | Moderate (add grit) | Good with urethane | Storage garage, utility room |
| Flake Broadcast | Speckled; hides dust | High with full spread | Very good with polyaspartic | Family garage; wet tires |
| Quartz Broadcast | Granular; uniform | Very high | Excellent | Workshops; traction priority |
| Metallic Epoxy | Swirled, reflective | Moderate (add grit selectively) | Good indoors | Home gym, showroom bay |
If you’re unsure, we’ll bring samples during your Free Estimate Visit and Color Consultation. Seeing flakes and quartz blends in your own lighting makes selection easier and avoids second-guessing.
Pricing Factors for Epoxy Floors (No Numbers)
Epoxy flooring installation cost scales with slab prep, repair time, moisture mitigation, system thickness, and cure logistics. The best value comes from right-sizing prep and coats to your actual use and climate exposure.
Here are the big levers that influence epoxy flooring installation cost without quoting prices:
- Surface condition: Heavily stained or sealed concrete needs more grinding passes and degreasing.
- Moisture mitigation: Elevated readings require moisture-tolerant primers or mitigation coats.
- Repair scope: Cracks, spalls, and control joints add patching steps to stabilize the slab.
- System build: Primers, body coats, broadcast density, and topcoat type drive labor and material volume.
- Return-to-service: Faster curing chemistry increases coordination and monitoring.
- Access and logistics: Tight schedules, storage moves, and temperature control affect planning.
- Finish selection: Full flake or quartz adds traction and aesthetics with more steps than a simple solid-color floor.
Two garages with the same square footage can require very different project efforts. That’s why our Free Estimate Visit includes moisture testing where helpful, repair mapping, and a scope that ties each step to the performance you want—no guesswork.
Best Practices to Avoid Costly Mistakes
Avoid shortcuts. Grind, test moisture, repair defects, and finish with a UV-stable, chemical-resistant topcoat. Control temperature and cure windows, and add texture where vehicles track meltwater.
In our experience, the most expensive mistake is accepting weak prep. Acid etching leaves an unpredictable profile and often masks contamination. Diamond grinding creates an even, measurable surface that primers can wet out and lock onto. The difference shows up in seasons, not days.
- Grind, don’t etch: Reliable adhesion starts with the right profile across the entire slab.
- Respect moisture: High RH under coatings leads to microblisters and cloudy films.
- Repair first: Patching cracks and spalls prevents defects from telegraphing through the finish.
- Choose the right topcoat: Polyaspartic or urethane improves UV hold, salt resistance, and cleanability.
- Texture where it matters: Flake or quartz in vehicle lanes; smoother edges where you sweep.
- Stage your move-in: Light foot traffic before vehicles; protect point loads during early cure.
We apply these practices on every Milton project. The goal is simple: a floor that still looks bright and bonded after winters of salt and summers of hot-tire softening pressure.
Tools, Materials, and Resources We Trust
Professional outcomes come from pro tools and compatible chemistry: planetary grinders, HEPA vacuums, moisture meters, high-solids epoxies, and UV-stable topcoats. We spec systems for your use—garage, utility room, or workshop.
Our crews run dust-controlled grinding with matched diamonds, then profile-verify before priming. For resin builds, we choose high-solids epoxies that wet out flake or quartz evenly and top with polyaspartic or urethane for UV and chemical resistance. For readers exploring broader corrosion protection concepts in concrete and steel, you can review general epoxy-coated steel basics and a 2026-focused rebar coating guide for context on how coatings resist harsh environments.
While those resources discuss steel rather than garage floors, the takeaway is the same: surface preparation and the right coating system are the backbone of long-term performance.
Case Studies: Milton and GTA Homes
Mini case studies show how prep and system choices affect results. Similar square footage doesn’t mean similar project effort; slab history and moisture drive the game plan and value.
Case 1 — Winter-salted family garage, Milton: Two-car garage near Walker Park with heavy salt tracking and oil spots. We performed multi-pass diamond grinding, localized epoxy mortar patches, full flake broadcast, and a polyaspartic topcoat. The brighter, speckled finish hid dust, added traction for wet tires, and simplified winter cleanup.
Case 2 — Hobby workshop, Mississauga: The client wanted a smooth, light-reflective surface for woodworking. Moisture was stable, damage minimal. We ground, primed, and used a solid-color body coat with a satin urethane topcoat. The finish improved lighting and resisted glue drips and solvents used in the shop.
Case 3 — Utility bay with prior sealer, Oakville: The slab had a penetrating sealer that blocked adhesion. We ground to a consistent profile, performed adhesion spot checks, then selected a moisture-tolerant primer. A partial flake broadcast added texture only in traffic lanes, balancing traction and sweeping ease.
Want to cross-check local contractor availability or read general profiles? You can browse a local epoxy contractor directory for idea gathering—then come back to us for a thorough, Milton-specific scope.
How Epoxy Connects to the Rest of Your Home
Your garage floor is part of a larger home envelope. Pair epoxy planning with exterior maintenance—power washing, deck staining, caulking—to slow wear and protect curb appeal.
A durable floor reduces grit transfer into the house, and a lighter, reflective finish makes storage areas safer and easier to navigate. Outside, keeping contaminants off surfaces with power washing and sealing wood with UV-protective stain protects siding and walkways and reduces rework cycles. We coordinate these services so your home’s high-use areas age more slowly as a system.
Related services we provide include power washing for pre-paint cleaning, deck sanding and staining for UV defense, and exterior window caulking replacement to reduce drafts and moisture intrusion. Connecting these dots helps you plan projects in the right sequence for maximum value.
Frequently Asked Questions
These quick answers cover planning, durability, maintenance, and safety. For site-specific guidance, request a Free Estimate Visit in Milton.
How long does a professionally installed epoxy garage floor last?
With proper prep and a UV-stable topcoat, a garage epoxy system is designed for multi-year performance under daily vehicle use, salt exposure, and seasonal swings. Longevity depends on surface prep quality, moisture control, and following return-to-service guidelines.
What makes epoxy better than paint on concrete?
Epoxy is a thermoset coating that chemically bonds to a prepared slab and builds film thickness, delivering superior abrasion and chemical resistance. Paint is thinner and relies more on mechanical adhesion, so it’s more likely to stain, wear, or peel under hot tires.
Can you install epoxy over a sealed or previously coated floor?
Yes—if adhesion risks are addressed. We grind to remove sealers and weak layers, repair defects, and use a compatible primer. Adhesion spot checks guide the system choice, and moisture testing confirms the slab is ready.
Is a flake or quartz finish slippery when wet?
Properly broadcast flake or quartz adds micro-texture that improves traction, especially in vehicle lanes where meltwater accumulates. We can vary broadcast density and topcoat sheen to balance grip and cleanability for your use.
How should I maintain an epoxy garage floor?
Sweep grit, mop with a neutral cleaner, and avoid harsh abrasives. Place mats where salt and snow drop from vehicles. Inspect seasonally for joint movement or deep gouges so minor touch-ups prevent larger repairs.
Conclusion and Next Steps
Epoxy flooring installation cost is driven by prep and system choices tailored to your slab and climate. A measured process—grind, repair, prime, build, and protect—delivers the best long-term value for Milton homeowners.
Key takeaways
- Durability starts with diamond grinding, moisture testing, and proper repairs.
- System thickness, broadcasts, and topcoats should match usage and climate.
- Plan sequencing with related upkeep—power washing, deck staining, and caulking.
- Return-to-service timing preserves finish quality and adhesion.
Next steps
- Book a Free Estimate Visit in Milton for a scope tied to your slab and goals.
- Preview finish samples (flake, quartz, metallic) during your Color Consultation.
- Coordinate exterior maintenance to protect your curb appeal and reduce rework.
Friendly CTA: Ready to upgrade your garage? Request your on-site assessment with Home Painter Services—designed around Milton homes and our Halton climate.