


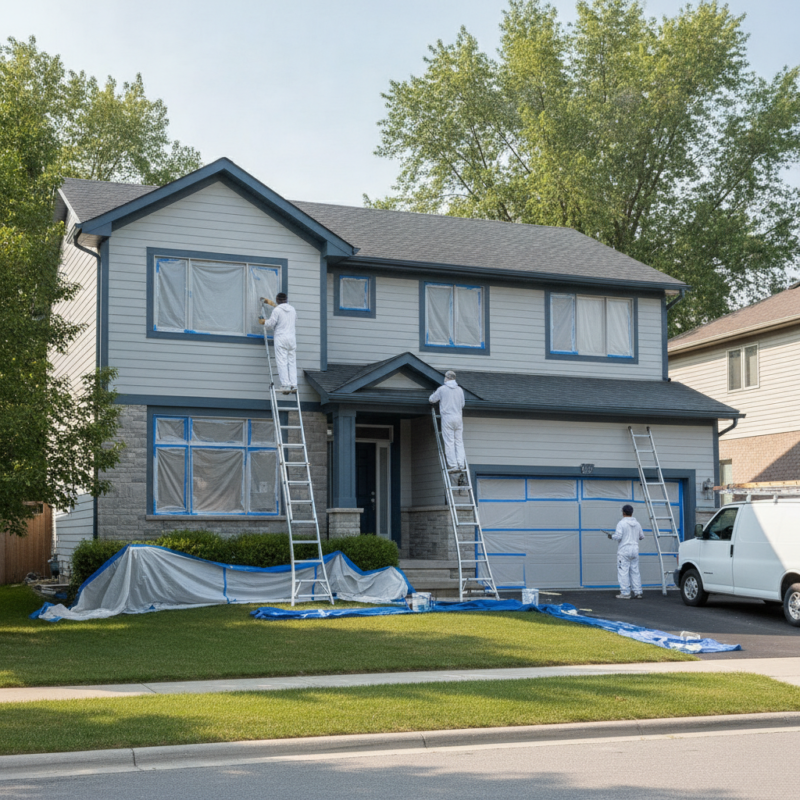
Exterior painting is the professional cleaning, repair, priming, and coating of a home’s outer surfaces to seal out weather and renew curb appeal. Around the 316 Bergamot Ave area in Milton and across Mississauga, success means planning for freeze–thaw, humidity, and UV. Done right, the finish lasts longer and looks sharp from the sidewalk.
By ZIKRIA MUJAHID · Last updated: 2026-07-10
| Service area | Mississauga, Milton (316 Bergamot Ave area), Oakville |
|---|---|
| Hours | Mon–Sat 7:00 AM–8:00 PM; Sun 7:00 AM–6:30 PM |
| Included prep | Surface prep, priming, sanding and repairs, furniture/floor protection |
| Add‑on services | Exterior window caulking replacement, power washing, deck & fence staining |
| Customer perks | Free Color Consultation · Free Estimate Visit · Guaranteed On‑Time Completion |
Milton/Mississauga field note
West‑to‑east winds near Walker Park pick up grit that can embed in wet paint. We stage washing early, then lay finish coats once the façade is in shade. Near the Tremaine at Bergamot stop, we also watch afternoon traffic dust—no opening fresh cans after 2 PM on wind‑exposed elevations.
Overview
Exterior work that lasts is 70% prep and 30% paint. Wash away chalk and mildew, fix wood, replace failed caulk, prime smart, then apply two even coats. In the GTA, timing and shade matter as much as product choice.
Homeowners don’t want surprises—scaffolding by rose bushes, flakes on walkways, or colors that shift in sun. Our process is designed to lower stress and raise results.
- Clarity up front: Free Color Consultation and a punch‑list of repairs before we start.
- Clean sites: Drop cloths, masked windows, and tidy staging every day.
- Weather‑smart timing: We schedule by sun path, wind, and dew so coats cure right.
What Makes Exterior Painting Different From Interior (and Why It Matters in the GTA)
Outside, coatings battle sun, rain, and movement. The GTA’s freeze–thaw and summer humidity expand, contract, and wet surfaces daily. That’s why flexible sealants, breathable acrylics, and bonded primers—not just “paint”—decide whether your finish peels in a year or holds for seasons.
Indoors you chase perfection under soft light. Outdoors the enemies are UV and water. If your 1990s wood trim has six paint layers, we’ll find it fast—and we’ll tell you before we scrape to bare grain so you understand the plan and timeline.
- Movement and gaps: Siding and trim move. Caulks must flex and stay paintable.
- Moisture paths: End‑grain, sills, and horizontal joints are where failure starts.
- Surface history: Glossy or chalky paint needs bonding primers to grip again.
We pair weather‑resistant exterior paint and UV‑protective stains with prep that fits each substrate—wood, fiber‑cement, masonry, or vinyl—so the system works as one.
Step-by-Step: How a Professional Exterior Paint Job Actually Works
Our field sequence is consistent: assess, wash, repair, re‑caulk, mask, prime, and apply two finish coats. Each step builds adhesion and weather defense. Skip one and you invite peeling, especially on south‑ and west‑facing walls.
- Assessment & color consult: We flag peeling, chalking, soft wood, and failed caulk; confirm colors, sheens, and accent placement.
- Power washing: We remove dirt, chalk, and mildew so primers actually bond. Gentle tips protect siding.
- Repairs & sanding: Scrape edges to a solid feather; patch; replace rotted trim; sand glossy areas to scuff.
- Full caulking replacement: Old beads out, new paintable exterior caulk in—don’t “top” dead caulk.
- Masking & protection: Windows, fixtures, shrubs, and hardscapes get covered to keep the site tidy.
- Priming: Spot‑prime bare wood and stains; use bonding/alkyd primers where needed.
- Finish coats: Two even acrylic coats, back‑brushed into texture at the correct spread rate.
We’ve learned to read the sky. On wind‑exposed lots near Walker Park, we paint the leeward side first and save the gusty wall for a calmer window. That small decision prevents dust nibs that ruin a fresh film.
Explore more timing and masking details in our exterior painting prep guide.
Choosing the Right Exterior Paint for Ontario Weather
Use 100% acrylic topcoats for most siding and trim, elastomeric where stucco has hairline cracks, and UV‑resistant stains for decks and fences. Prioritize breathable, flexible systems that survive Ontario’s moisture swings and temperature shocks.
Here’s our stance after many local repaints: premium acrylic lines from major manufacturers outperform bargain blends on adhesion and color hold. On bare wood, an alkyd or high‑adhesion primer locks fibers and blocks tannin bleed; then the acrylic topcoat provides the flexibility.
We’ve also seen what fails. Last fall we repainted a stucco bungalow on a wind‑exposed street in Milton. A prior crew used standard acrylic over hairline cracks; one winter later, it blistered. Elastomeric wasn’t extra—it was required. After surface repair and an elastomeric system, the wall now moves without breaking the film.
| Surface | Primer | Finish |
|---|---|---|
| Bare wood | Oil/alkyd or bonding | 100% acrylic exterior |
| Chalky siding | Bonding/adhesion | Acrylic exterior |
| Stucco (hairline) | Masonry sealer | Elastomeric or breathable acrylic |
| Deck boards | N/A | UV‑resistant stain |
Local considerations for 316 Bergamot Ave
- Paint south‑ and west‑facing walls in shade windows to avoid lap marks and roller drag.
- Spring and fall offer moderate temps and lower humidity for steadier curing across Milton and Mississauga.
- After high‑wind storms, recheck sills and end‑grain; grit can open micro‑gaps that need spot caulking.
The Services Most Homeowners Forget (Caulking, Power Washing, Priming)
Longevity hides in the “invisible” work—washing away chalk, replacing brittle caulk, and priming problem areas. These three steps control water and create a surface your topcoat can truly grip. Skipping them is why many repaints peel early.
If you’re walking your home, look closely at vertical joints and window perimeters. Press a thumbnail into the caulk. If it doesn’t spring back—or cracks—it’s dead. Topping a failed bead just buries the problem for a season; we cut it out and replace it.

- Power washing: Clears chalk and mildew that block adhesion. Our power washing tips explain nozzles and standoff technique.
- Back‑priming end‑grain: Most crews skip it; that’s where water wicks in. We seal cut ends on trim and fascia.
- Back‑brushing first coats: On textured siding, we work paint into grooves so it isn’t just sitting on top.
- Tannin and rust blockers: Spot‑prime knots, cedar bleed, and metal fasteners before finish coats.
- Deck refresh: Wash, sand, then stain. Start with our deck sanding guide and plan UV‑protective finishes.
- Masonry nuance: Considering painting brick? Read our note on painting brick homes so the wall can still breathe.
DIY vs. Hiring a Local Exterior Painter — Honest Breakdown
DIY suits small, safe, one‑story touchups. Full exteriors demand ladders, weather timing, and repair skills. If you’re short on time or equipment, a vetted local crew brings staging, prep discipline, and warranty‑friendly systems that survive Ontario weather.
Ask yourself two questions: Do you have safe access to every surface, and can you pause for weather without leaving the home half‑masked? If not, hire it out. We bring color support, on‑time scheduling, and a clean daily reset so your yard isn’t a worksite longer than needed.
- DIY fits: Fences, sheds, or a single easy wall.
- Hire for: Two‑story homes, failing caulk, rot repair, complex colors, or tight timelines.
- Finish the look: Pair repainting with driveway sealing for stronger curb appeal.
For third‑party perspective, see these general guides on exterior work and seasonal planning: exterior painting basics, common paint mistakes, and seasonal maintenance insights.
Key takeaways
- Prep determines lifespan—washing, repairs, caulking, and primers come first.
- Schedule by sun, wind, and humidity; paint shaded sides to avoid lap marks.
- Use flexible, breathable systems: acrylic topcoats, elastomeric on cracked stucco.
- Replace failed caulk; don’t top it. Back‑prime wood end‑grain.
- Two uniform coats at the right spread rate beat “one heavy coat” every time.
FAQ
Planning an exterior repaint? These quick answers cover longevity, prep, finishes, and vinyl color changes for Milton and Mississauga homes.
How long does exterior paint last in the GTA?
With proper washing, repairs, full re‑caulking, and quality acrylic topcoats, many homes enjoy several seasons before touchups. South‑ and west‑facing elevations weather fastest; shaded or sheltered walls typically hold longer.
Do I have to power wash before painting?
If you see chalky residue or mildew, yes. Washing removes contaminants that block adhesion. We wash a few days before priming so surfaces dry fully and primers can bond instead of trapping moisture.
Which sheen works best outside?
Satin on siding balances cleanability and subtle sheen; semi‑gloss on trim adds durability and crisp contrast. On older, rough siding, lower sheen hides imperfections better and reduces telegraphing.
Can I paint vinyl siding a darker color?
Yes—use vinyl‑safe, heat‑stable formulations and stay within recommended Light Reflectance Value ranges to prevent warping. We also consider exposure and ventilation on south and west elevations.

