


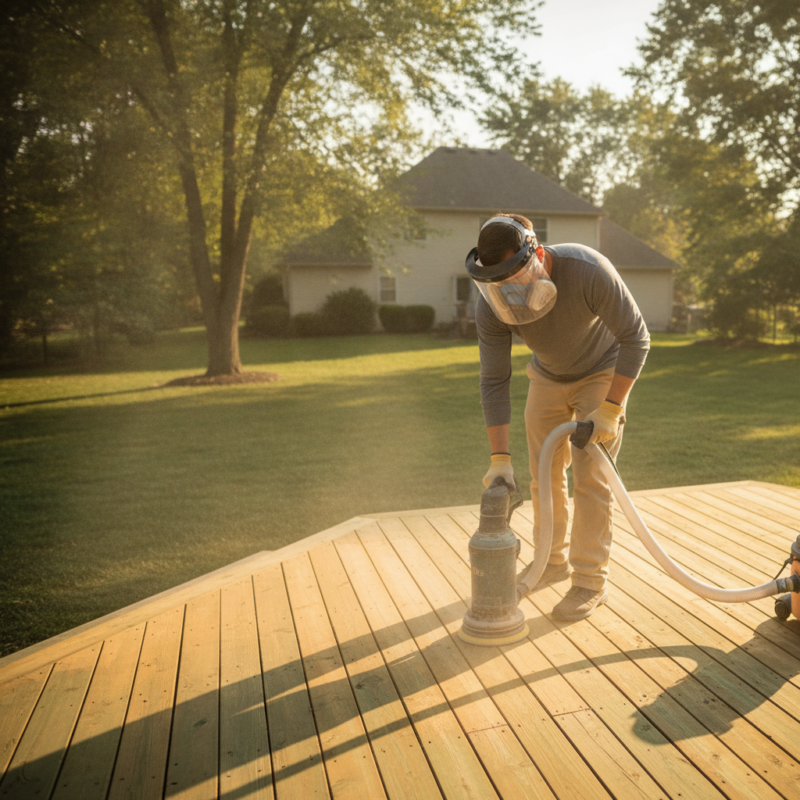
Sanding pressure treated wood is the controlled smoothing of preservative‑treated lumber to remove mill glaze, raised grain, and splinters so exterior stain can bond evenly. It should happen only after the wood dries to a safe range (generally 15–18% moisture). Done right, sanding improves adhesion, appearance, and safety on high‑traffic decks.
By ZIKRIA MUJAHID • Home Painter Services • Last updated: 2026-07-11
Milton & Mississauga timing tip our crews rely on
North‑facing decks near Walker Park and the crescents off Tremaine hold moisture longer. After the same rain, they can trail sun‑soaked yards by 4–5 days. We add a buffer day and re‑check moisture before sanding—especially where evening breeze off Tremaine at Bergamot brings heavy dew.
Should You Sand Pressure Treated Wood? The Short Answer
Sand pressure treated wood lightly once it’s dry (we look for ≤18% on a pin meter). The goal is to break mill glaze and knock back fuzz without polishing. Use 80–120 grit, collect dust, and stain promptly for even color and reliable adhesion.
We treat sanding as a prep move, not a makeover. You’re not grinding away the treatment or flattening boards; you’re creating a fresh, micro‑profiled surface that lets an exterior stain soak in instead of sitting on top.
Example from our week: a Mississauga client washed their new deck, skipped sanding, and spot‑tested stain. Shiny mill‑glaze patches flashed lighter. One controlled pass at 80–100 grit evened the surface, and the second test matched end‑to‑end.
Quick Summary
Dry first, sand second, clean thoroughly, then stain the same day if weather cooperates. Target ≤18% moisture, 80–120 grit, and dust‑free boards. This sequence prevents blotchy color and early peeling on pressure treated decks.
- Moisture target: We won’t stain above 19%. Most penetrating stains work best at 15–18%.
- Grit window: 80–100 for field boards; 100–120 where hands touch.
- Clean first: Wash, rinse, and let dry before sanding to avoid grinding in dirt.
- Dust control: Vacuum extraction and a tack‑wipe beat failure later.
- Lock it in: Stain soon after sanding to seal out new moisture.
- Pre‑wash help: See our power washing overview.
When Sanding Is Necessary (And When It Isn’t)
Sand when you see mill glaze, raised fibers, splinters, or blotchy absorption after cleaning. Don’t sand if the wood is wet, decayed, or you’re using a heavy‑build coating that tolerates minor texture. Always wash first and confirm dryness with a moisture meter.
Top 5 fixes for rough pressure‑treated boards
- Raised grain from weather: One pass at 80–100 grit knocks back fuzz fast.
- Mill glaze on new PT: Light, even sanding opens pores for stain penetration.
- Splintered edges: Hand‑sand corners; two or three strokes remove snags.
- End‑grain thirst: Hand‑sand 100–120, then seal end grain thoroughly.
- Blotchy test spot: If color ladders or flashes, a quick resand balances uptake.
Field note: We showed up to a job off Bergamot last May where the homeowner had already sanded—but boards still read 22% on the meter. The stain looked fine for two weeks, then edges began lifting. We washed, waited for 16–17% readings, resanded lightly, and recoated; the finish held through winter.
Our grit choices—and why
For deck fields, we stop at 100. Go finer and you can burnish the surface so stain sits on top. For handrails and seating edges, we finish at 120 because fingertips feel everything. We reserve 60‑grit for isolated scars only, then blend those spots back to 100 with a random orbital so the sheen stays consistent.
How to Sand Pressure Treated Wood Before Staining — Step by Step
Wash, dry, verify moisture (≤18%), sand 80–120 grit with a random orbital, vacuum and tack‑wipe, then stain the same day. This order protects penetration and keeps color even on pressure treated decks.
- Wash the deck with a deck cleaner and a controlled rinse. Let it dry 48–72 hours. Our power washing guide covers nozzle control so you don’t fuzz the fibers.
- Verify dryness with a pin‑type moisture meter on multiple boards and orientations. We green‑light sanding and stain around 15–18% and refuse anything above 19%.
- Set up dust control with a vacuum‑attached random orbital sander. Wear eye, ear, and respirator protection.
- Start at 80 grit to break glaze and knock down fuzz. Keep the pad flat and passes steady with the grain.
- Refine to 100–120 grit where hands touch. Avoid over‑polishing field boards.
- Vacuum and tack‑wipe to clear dust from boards, gaps, and railings. Dust is adhesion’s enemy.
- Stain the same day using an exterior stain suited to pressure treated lumber and local weather.
Need a refresher on cleaning gear and timing? Our power washing overview explains dwell‑time choices and sequencing. Planning a full refresh? Review our square‑footage basics in this power washing article before you book.

What Happens If You Skip Proper Prep
Skipping cleaning and light sanding leaves glaze and fibers that block stain, leading to blotchy color, early peeling, and a rough feel. Expect failure at board edges first, especially on steps and handrails with heavy contact.
- Adhesion loss: Glaze and dust act like a release film; flaking often begins within a season.
- Uneven color: Shiny spots reject finish while porous areas drink too much.
- Rough surface: Uncut fibers grab dirt and moisture and splinter bare feet.
- Rework pain: Fixing failure means deeper sanding, more cleaning, and another stain cycle.
For broader planning, compare wood options and behavior: a primer on deck wood selection and a local look at pressure treated vs composite decking can set expectations before you choose a stain system.
When to Call a Pro Instead of DIYing It
Call a pro when drying drags on, texture varies wildly, or you need repairs plus sanding and staining inside a tight weather window. A coordinated crew cleans, confirms moisture, sands, and stains without losing that ideal moment.
- Coordinated prep: This is the exact sequence we run before every Decks & Fences Staining job—deck wash, moisture checks, light sanding, then exterior stain selection applied at the right moment.
- Right tools: HEPA‑connected random orbitals for dust control; hand blocks to tune edges and posts.
- Local timing: We plan around Milton/Mississauga microclimates and freeze‑thaw cycles so finishes cure properly.
- Accountability: Our crews work under a stated on‑time completion commitment.
- Guidance: Free color consultation helps you pick tones that suit sun exposure and traffic.
We’ve also seen heavy‑build coatings hide minor texture but still fail where moisture is high. Light sanding plus strict moisture limits prevents that. If you want a sanity check, here’s a third‑party overview of staining services that mirrors the clean‑prep‑sand‑finish flow we trust.
Local considerations near 316 Bergamot Ave
- Shaded decks by Walker Park trail sunny yards by several days after rain—book sanding after back‑to‑back dry days.
- Spring freeze‑thaw frays PT fibers; plan a gentle 80–100 grit pass before stain to smooth fuzz.
- Evening dew along Tremaine at Bergamot adds overnight moisture; stain earlier in the day when readings are lowest.

Key Takeaways
Target ≤18% moisture, use 80–120 grit, and stain soon after sanding. Clean first, control dust, and plan around local microclimates. This is the simplest way to get even color and a finish that lasts.
- Moisture decides timing; we don’t stain above 19%.
- Stop at 100 on field boards; go to 120 where hands touch.
- Dust removal is non‑negotiable for adhesion.
- Shaded decks around Walker Park dry days later than sunny yards.
FAQ
Below are concise answers we give homeowners about sanding and staining pressure treated decks—focused on timing, moisture, and prep that keeps finishes from failing.
How long after installation can I sand and stain pressure treated wood?
Until it’s dry. Around Milton and Mississauga, new PT often needs several weeks to a few months depending on sun and airflow. Confirm with a pin meter; we proceed near 15–18% and hold off above 19%. Always wash first, let dry, then do a light sand before stain.
What grit should I use on deck boards and handrails?
Use 80–100 on field boards so stain can bite, and 100–120 on handrails or seating edges for comfort. Avoid ultra‑fine grits on walking surfaces; they can polish the surface and reduce penetration.
Is a belt sander better than a random orbital for a deck?
Keep a random orbital as your main tool—it’s safer, leaves fewer marks, and pairs with dust extraction. Use a belt sander only for isolated high spots or scars, then blend with the orbital to match surrounding texture.
Do I still need to sand if I’m using a solid color deck coating?
A light sand still helps. Removing glaze and fuzz improves adhesion even with heavier coatings. Focus on washing first, spot‑sand trouble areas, and follow the product’s prep directions closely.
