

Interior painting is the professional preparation, priming, and finishing of interior walls, ceilings, and trim to improve appearance and durability. It includes surface repairs, masking, and controlled application using brushes, rollers, or sprayers. For homeowners near 316 Bergamot Ave in Milton, a tight, low-odor process using ZERO VOC paints keeps families comfortable during the upgrade.
By ZIKRIA MUJAHID · Last updated: 2026-06-20
Overview and table of contents
This complete interior painting guide explains prep, primers, finishes, color selection, sheen choices, and pro techniques—plus scheduling, safety, cleanup, and post-care. Use it to plan a smooth, low-odor refresh, understand quality signals from contractors, and align painting with related home upgrades for long-lasting results.
Use this guide to quickly find what you need:
- What is interior painting?
- Why interior painting matters
- How the process works
- Types, methods, and approaches
- Best practices
- Tools and resources
- Case studies and examples
- Pricing factors and planning
- Local interior tips (Milton & Halton)
- FAQ
- Key takeaways
- Conclusion
What is interior painting?
Interior painting is a structured workflow that repairs, primes, and coats interior surfaces so they look better and last longer. It combines surface preparation, protection of furnishings, and controlled application of low-odor coatings to deliver a smooth, consistent finish that stands up to daily life.
Think of interior painting as both a cosmetic and protective upgrade. It corrects small flaws, refreshes color, and shields surfaces from wear.
- Surfaces covered: drywall, plaster, ceilings, baseboards, doors, trim, and built-ins.
- Core steps: assessment, color planning, protection, repairs, sanding and priming, application, and a clean handoff.
- Family-first choices: ZERO VOC interior paints reduce odor and support healthier indoor air.
At Home Painter Services, our interior work follows a start-to-finish approach—detailed consultation, careful prep, priming, and premium materials—to produce even, durable results you can live with right away.
Why interior painting matters
Fresh interior paint elevates mood, boosts perceived home value, and protects surfaces from scuffs and moisture. In family spaces, low-odor, ZERO VOC coatings help reduce disruption, while thoughtful color and sheen choices improve light, cleanability, and the day-to-day experience of each room.
Well-executed painting is more than color. It organizes light, sets tone, and improves maintenance.
- Comfort and health: low-odor, low-/ZERO-VOC options support sensitive households.
- Cleanability: satin or semi-gloss on trim and high-traffic walls wipes down without losing finish.
- Perceived value: crisp lines and modern palettes make spaces feel newer and more intentional.
- Protection: primers lock in stains and improve adhesion; topcoats resist scuffs and minor moisture.
Home Painter Services supports homeowners with a free Color Consultation and a Guaranteed On-Time Completion so you can plan life around the project—not the other way around.
How interior painting works: step-by-step
A reliable interior painting process moves in defined stages: assessment, protection, repairs, sanding, priming, first coat, detail work, second coat, and clean handoff. Each stage builds quality into the next, reducing touch-ups and ensuring a uniform, long-lasting finish.
- Walkthrough and planning: confirm colors, sheens, and sequence by room; note repairs.
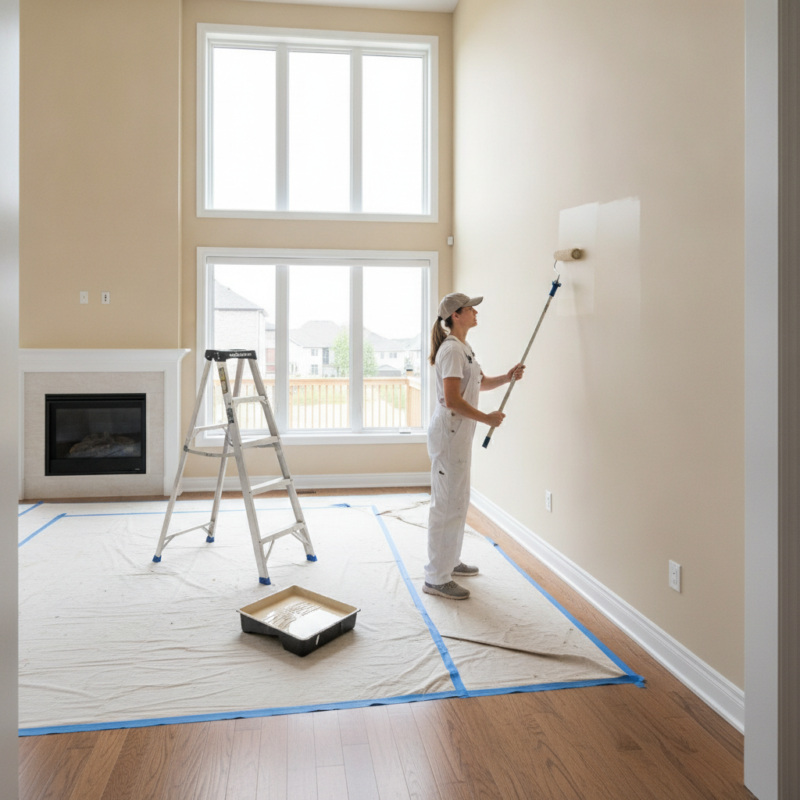
- Protection: cover floors and furniture; mask trim and fixtures for sharp lines.
- Repairs: fill holes, fix joints, and sand for a seamless surface.
- Priming: spot-prime repairs and stain areas; full prime when needed (new drywall, drastic color shifts).
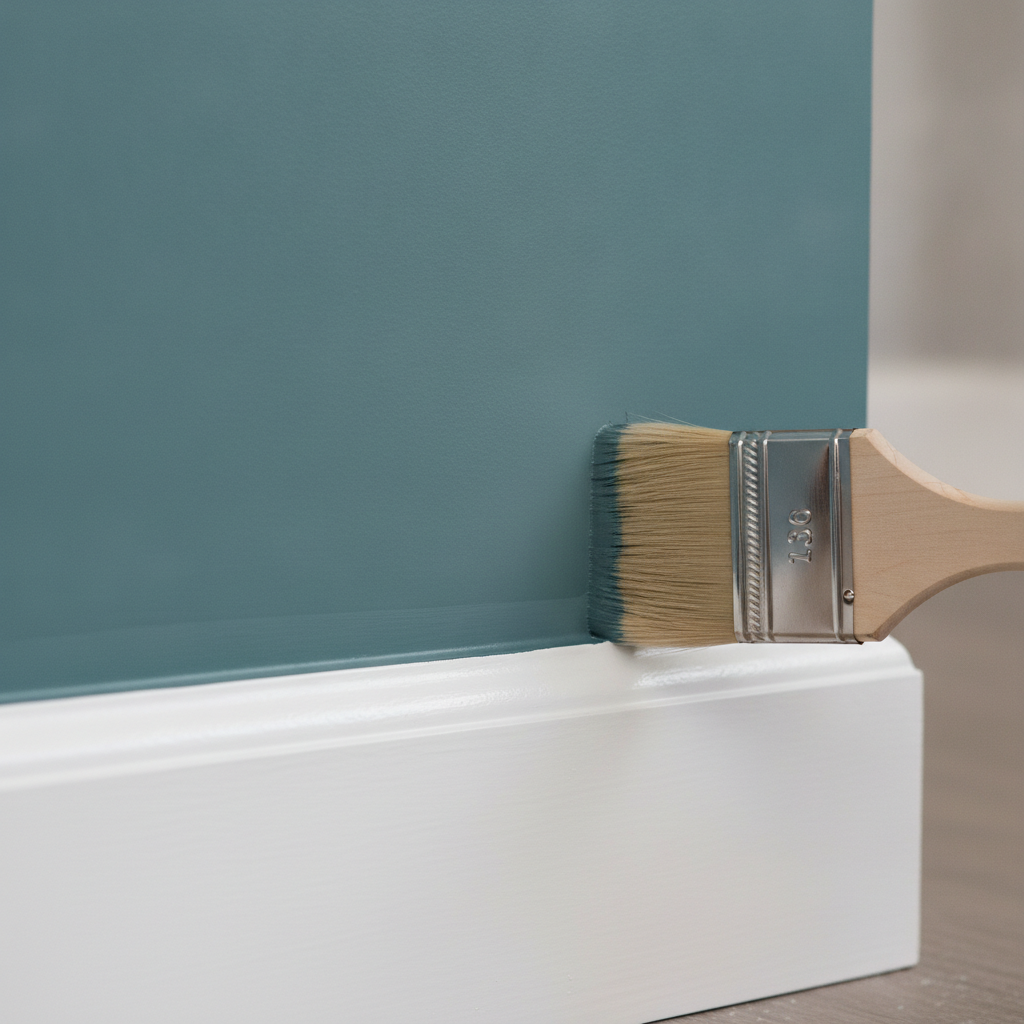
- Cutting-in: define edges with a sash brush at ceilings, corners, and trim.
- Rolling: load evenly and roll in overlapping “W” patterns to level paint.
- Drying and recoat: follow label guidance; many interior products recoat in a few hours in average conditions.
- Second coat and detailing: ensure uniform color and sheen; check light angles.
- Cleanup and handoff: remove masking, reinstall plates, and walk the space with you.
Pro tip: Keep a small labeled sample for later touch-ups. Good labeling avoids guessing sheen or shade down the line.
Types, methods, and approaches
Interior painting methods vary by surface and goal. Brush-and-roll handles walls and trim, while spraying excels for cabinets and doors. Choosing the right sheen and application method balances durability, cleanability, and light control for each room.
Common paint sheens and where they shine
| Sheen | Best for | Why choose it |
|---|---|---|
| Flat/Matte | Ceilings, low-traffic walls | Masks minor drywall flaws; low reflectance |
| Eggshell | Living rooms, bedrooms | Soft glow; cleans better than flat |
| Satin | Hallways, kids’ rooms | Higher durability and wipe-ability |
| Semigloss | Trim, doors, kitchens, baths | Resists moisture; easy to clean |
| High-gloss | Accent trim, furniture | Reflective, dramatic; shows prep quality |
Brush, roller, or spray?
- Brush: precise control for edges, trim, and profiles.
- Roller: efficient coverage on walls and ceilings; select nap to match texture.
- Spray: ultra-smooth finishes on doors and cabinets; demands thorough masking and ventilation.
For kitchen cabinet transformations, our factory-like spray process with lacquer or polyurethane creates a durable, consistent finish that outperforms brush-only methods on flat doors.
Color strategy that works
- Light science: cooler grays and blues recede; warm beiges and creams feel inviting.
- Flow between rooms: keep undertones compatible so transitions feel intentional.
- Test boards: view colors at different times of day before you commit.
Best practices for flawless results
Great interior painting is 70% preparation and 30% application. When surfaces are repaired, sanded, and primed correctly—and rooms are masked and sequenced—you get crisp lines, even sheen, and fewer callbacks. The payoff is a finish that looks great longer and cleans easily.
- Prep first: address nail pops, gaps, and stains; caulk trim where needed.
- Prime smart: spot-prime repairs and stains; full-prime new drywall and drastic color changes.
- Mask like a pro: clean, straight tape lines and proper draping save hours later.
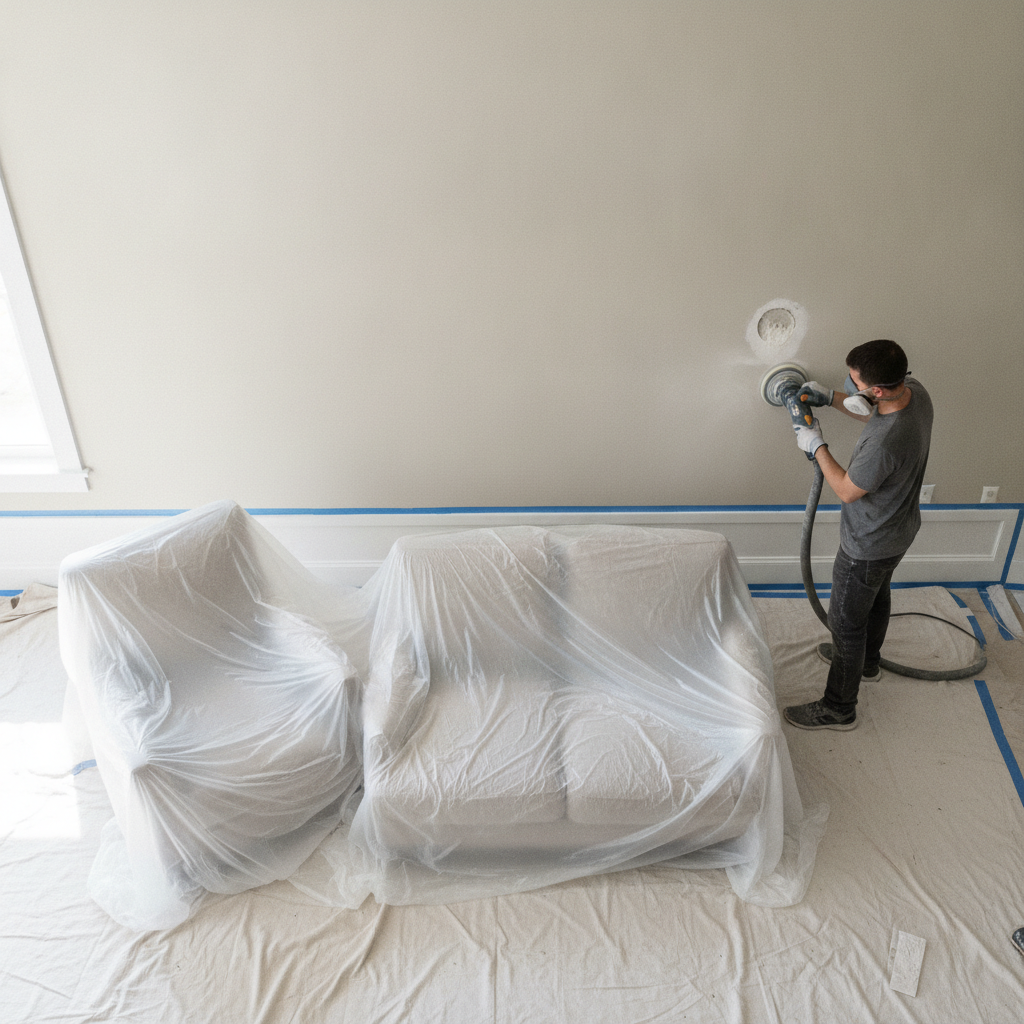
- Ventilation and safety: use fans, filter dust, and choose ZERO VOC paints for family rooms.
- Sequencing: ceilings → walls → trim; keep a wet edge to prevent lap marks.
- Lighting check: inspect from multiple angles; grazing light reveals misses.
We reinforce these habits on every project and back them with an On-Time Completion promise to reduce household disruption.
Tools and resources we trust
Professional results come from matched tools: quality brushes, the right roller nap, clean sprayer setups, and dust-controlled sanding. Add stain-blocking primers and ZERO VOC topcoats, and you get smooth application, fast cleanup, and finishes that stand up to real life.
- Brushes: angled sash brush for cutting-in; firm bristles for latex wall paints.
- Rollers: 3/8–1/2 inch nap for most walls; 1/4–3/8 inch for smoother trim and doors.
- Dust control: sanding with extraction keeps homes cleaner and improves adhesion.
- Primers: stain blockers for water marks; bonding primers over glossy areas.
- Coatings: ZERO VOC interior paints reduce odor during and after application.
For a deeper planning framework, see our internal guide on value-first planning in interior painting cost planning—we focus on scope, sequencing, and durability without listing specific prices.
Real-world examples from Milton, Mississauga, and Oakville
The best way to understand quality is to see it applied. These brief scenarios show how disciplined prep, ZERO VOC paints, and smart sequencing solve real homeowner challenges while keeping schedules and living spaces on track.
Milton family room refresh near 316 Bergamot Ave
- Challenge: scuffed walls and dated beige made the room feel dim.
- Approach: repairs, spot-priming, eggshell wall finish, semigloss trim.
- Outcome: brighter, easy-to-clean surfaces with crisp lines and no lingering odor.
Mississauga condo with tight schedule
- Challenge: weekend-only access and sensitive neighbors.
- Approach: ZERO VOC wall paint, low-dust sanding, staged masking to keep hallways clear.
- Outcome: full repaint completed on schedule; common areas stayed tidy.
Oakville kitchen cabinet transformation
- Challenge: dated oak cabinets; full renovation not desired.
- Approach: factory-like spray process with lacquer finish; thorough degrease and bonding.
- Outcome: modern, durable finish with a smooth feel that cleans easily.
Curious about cabinet-specific methods? Review this third-party overview of cabinet painting steps to see how process quality drives outcomes in specialty finishes, as summarized in this cabinet process overview.
Pricing factors and smart planning (no numbers)
Interior painting budgets are shaped by scope, repairs, color changes, access, and finish level. Plan with a clear room-by-room scope, defined repairs, chosen sheens, and scheduling constraints. Clarity reduces surprises and keeps timelines realistic—without needing to guess at exact costs here.
- Scope and size: more rooms and higher ceilings increase labor and material time.
- Repairs: drywall fixes, caulking, and stain blocking add steps but protect outcomes.
- Color shifts: going light-to-dark (or vice versa) often requires extra primer or coats.
- Details: doors, trim packages, built-ins, and accent walls add precision time.
- Access and sequencing: furnished homes, elevators, or limited hours require planning.
- Finish expectations: glass-smooth trim work demands more prep and sanding.
For homeowners who like to study options, some regional blogs discuss planning frameworks and common scope drivers for interiors, such as this general interior painting guide. For cabinets, you can compare approach details in Mississauga cabinet painting notes before deciding on a full kitchen refresh.
Local interior painting tips for Milton and Halton
In the Regional Municipality of Halton, plan interior painting around humidity swings and family schedules. Near 316 Bergamot Ave, prioritize ZERO VOC coatings and dust control, and stage rooms to keep daily life moving. Smart sequencing and ventilation speed drying and comfort.
Local considerations for 316 Bergamot Ave
- Use shoulder seasons or mild indoor humidity for smoother drying. If you’re near Walker Park, plan arrival windows that avoid school pickup traffic.
- Winter projects? Keep rooms ventilated and doors closed; ZERO VOC products reduce odor while fans manage moisture.
- For crews staging along Tremaine at Bergamot, reserve parking and elevator times early to streamline material flow.
When we work in Milton and the GTA, we also coordinate pre-paint power washing for exterior-entry touch-ups and schedule interior work to match family calendars. Our Guaranteed On-Time Completion keeps timelines clear.
Integrated upgrades that complement interior painting
Pair interior painting with select upgrades—cabinet spraying, popcorn ceiling removal, and window re-caulking—to stack benefits in comfort, durability, and style. Sequencing adjacent work reduces setup time and keeps your home cleaner from start to finish.
- Kitchen cabinets (spray): factory-like lacquer or polyurethane for a modern, durable finish.
- Popcorn ceiling removal + skim coat: smoother ceilings change light and feel throughout a floor.
- Exterior window caulking replacement: improves comfort and energy efficiency around living areas.
- Deck and fence staining: though an exterior task, tie it to interior color updates for seasonal cohesion; include deck sanding during prep for better stain performance.
Explore our internal perspective on aligning durability with scope in this interior paint planning piece, which focuses on quality signals rather than numeric prices.
Free Color Consultation + Free Estimate Visit
Ready to plan your update? We’ll walk your space, confirm colors and sheens, and map a clean, low-odor process. Ask about our On-Time Completion commitment.
Care and maintenance after painting
Protect your new finish with gentle cleaning, measured curing time, and simple touch-up habits. Light cleaning after a couple of weeks, felt pads on furniture, and labeled touch-up jars keep rooms looking freshly painted much longer.
- Cure time: surfaces can be dry-to-touch quickly, but full hardness takes longer; treat gently early on.
- Cleaning: use soft cloths and mild soap; avoid harsh scrub pads on walls.
- Humidity: maintain balanced indoor humidity to reduce flashing or streaking.
- Touch-ups: store a small labeled sample; feather edges for invisible blends.
Frequently asked questions
These quick answers address common homeowner questions about timelines, odor, surface prep, and whether to DIY or hire. They’re concise, practical, and shaped by what we see in Milton, Mississauga, and Oakville homes.
How long does interior painting usually take?
Simple rooms can be completed in a day, while multi-room projects take several days based on repairs, drying, and detail work. Planning the sequence—ceilings, then walls, then trim—keeps momentum and reduces touch-ups.
Will there be strong paint odors?
ZERO VOC interior paints and good ventilation keep odor minimal. We also use dust-controlled sanding and staged masking so family areas stay comfortable during the project.
Do I need to prime every wall?
Not always. Spot-prime repairs and stains, and full-prime new drywall or when making big color changes. Bonding primers help when painting over glossy or previously oil-based trim.
Should I DIY or hire a pro?
DIY can work for small, low-risk rooms. Hire a pro when repairs are extensive, schedules are tight, or you want factory-smooth trim or sprayed cabinets. Professional prep, primers, and sequencing deliver longer-lasting results.
Key takeaways
Plan scope, protect spaces, and choose ZERO VOC coatings. Sequence ceilings, walls, then trim; inspect under good light; and pair interior painting with targeted upgrades like cabinet spraying or ceiling refinishing to multiply benefits without extending timelines.
- Preparation, priming, and protection drive results more than any single tool.
- Match sheen to room use for cleanability and light control.
- ZERO VOC paints support comfort and faster re-occupancy.
- Integrate upgrades (e.g., cabinet spray, skim coat) while rooms are already staged.
Conclusion
Interior painting pays off when you plan the scope, protect your home, and apply with discipline. With clear color choices, ZERO VOC coatings, and pro sequencing, you’ll get a calm, clean update that lasts—and you can enjoy the space sooner.
Located near 316 Bergamot Ave in Milton and serving the GTA, we bring a consistent, low-odor approach to interior projects, plus complementary services like cabinet spraying, popcorn ceiling removal, exterior window caulking replacement, power washing, and seasonal staining—so your home feels complete inside and out.