

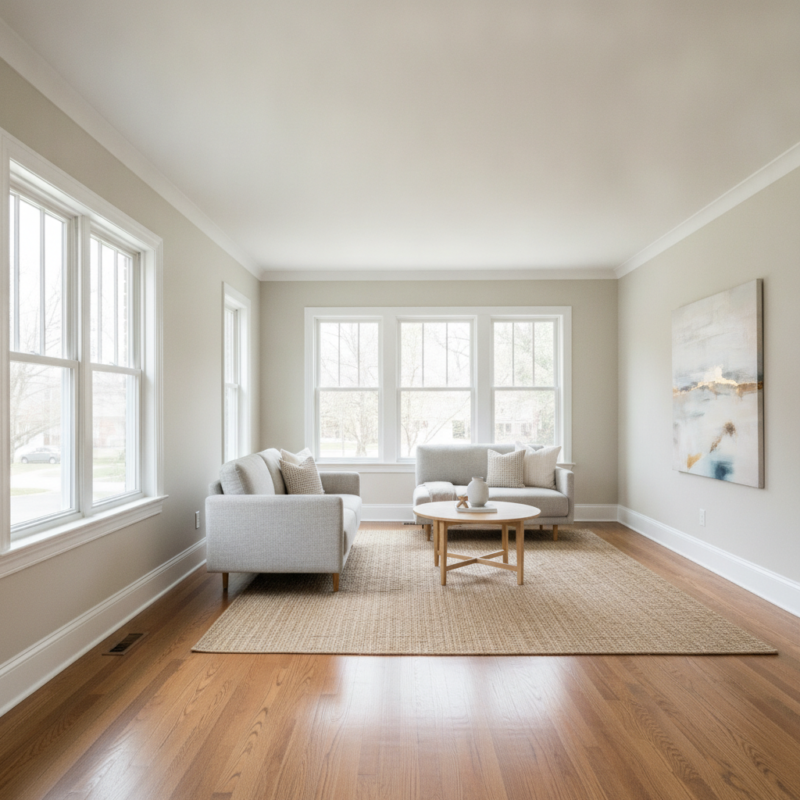
Interior paint is the protective, decorative coating applied to walls, ceilings, and trim inside a home. It refreshes rooms, seals porous surfaces, and influences light and mood within minutes. From our base at 316 Bergamot Ave in Milton, Home Painter Services uses low-odor, ZERO VOC options and meticulous prep to transform spaces quickly and cleanly.
By ZIKRIA MUJAHID — Home Painter Services
Last updated: 2026-06-21
Overview and Table of Contents
This complete guide explains interior paint types, finishes, prep, and pro methods homeowners can trust. You’ll learn how paint works, which sheen to choose, and the step-by-step process our crews follow to deliver smooth, durable finishes with low odor and minimal disruption.
Use this expert guide to plan a cleaner, faster, longer-lasting interior repaint. We built it for families in Mississauga, Oakville, Milton, and across the Regional Municipality of Halton who want healthy, great-looking results without the mess.
- What interior paint is and why it matters
- How professional prep protects your home and improves durability
- Choosing primers, paint chemistries, and sheens
- Our proven step-by-step interior painting workflow
- Local tips for Milton and Halton homes
- Cabinet spraying, popcorn ceiling removal, epoxy floors, and more
Quick Summary
Pick a low-odor, ZERO VOC interior paint; match sheen to room use; and follow a crisp sequence: protect, repair, sand, prime, and apply two even coats. Keep indoor temperature 60–77°F and humidity 40–60% for best flow, coverage, and curing.
- Health and comfort: ZERO VOC options cut odor and indoor emissions. Many lines contain <5 g/L VOCs.
- Coverage guidance: Expect roughly 350–450 sq ft per gallon per coat on smooth walls.
- Timing: Typical recoat windows are 2–4 hours; full cure is often 14–30 days.
- Durability: Satin and semi-gloss resist scrubbing better in high-traffic or moisture-prone rooms.
- Prep first: Clean, degloss, sand, and prime repairs to avoid telegraphing flaws through the finish.
What Is Interior Paint?
Interior paint is a water- or oil-modified coating engineered for indoor walls, ceilings, and trim. It delivers color, light reflectance, stain resistance, and a washable skin that protects drywall and wood from everyday wear.
Interior coatings combine resin (binder), pigment, additives, and solvent. Modern waterborne paints dominate for low odor, fast dry (often 30–60 minutes to touch), and easy soap-and-water cleanup. Advanced alkyd-modified acrylics bring oil-like leveling with water cleanup.
- Binders: 100% acrylic resins improve adhesion and scrub resistance; vinyl-acrylics are budget-friendly for low-wear spaces.
- Pigments: Titanium dioxide raises hiding power; colorants tune hue and light reflectance (LRV). Higher LRV (50–85) brightens rooms.
- Additives: Thickeners, defoamers, and mildewcides help flow, leveling, and film integrity.
- Solvent: Water is most common indoors for low odor and faster recoat windows (often 2–4 hours).
Here’s the thing: chemistry matters most when you want a finish that wipes clean after 100+ scrubs or resists fingerprints around light switches. That’s why our default interior paint systems lean on premium 100% acrylics with ZERO VOC tints.
Why Interior Paint Matters
The right interior paint improves air feel, reduces cleaning time, and raises home appeal. Low-VOC coatings cut odor during and after painting, while durable sheens save hours of scrubbing each month in kitchens, baths, and kids’ rooms.
Great paint affects comfort and value. A refreshed color scheme with higher LRV can bounce 10–30% more light, making small rooms feel bigger. Washable films resist stains from coffee, wine, and markers so you’re not repainting every season.
- Healthier projects: ZERO VOC options (commonly <5 g/L) help sensitive households and reduce lingering paint smell.
- Energy and light: Strategic color and LRV selection improve perceived brightness; mid-tone neutrals keep glare low while lifting mood.
- Resale impact: Fresh, neutral interiors photograph better for listings and open houses.
- Cleaning frequency: Satin or semi-gloss on trim can endure hundreds of wipe cycles before dulling.
In our experience across Mississauga and Oakville homes, families with toddlers favor low-odor paints and scrubbable eggshell or satin walls to reduce weekend touch-ups by dozens of minutes per room.
How Interior Painting Works (Our Step-by-Step)
A clean, durable finish follows a proven sequence: protect, repair, sand, prime, and apply two even coats with controlled film thickness. This order limits mess, speeds drying, and reduces callbacks.
We use a predictable, low-disruption workflow so rooms return to service fast—often within hours for light use and within 14–30 days for full cure. Here’s our process.
- Consult and plan: Confirm colors, sheen, and schedule. We note humidity, ventilation, and access.
- Site protection: Furniture wrapped; floors papered and poly’d; returns and fixtures masked.
- Surface cleaning: Deglossers and detergents remove oils; this boosts adhesion measurably.
- Repairs: Fill holes; set nails; tape cracks; sand flat (often 120–180 grit). Moisture-prone areas get stain-block primer.
- Priming: Spot-prime repairs or full-prime color jumps; dry-to-recoat commonly 1–3 hours.
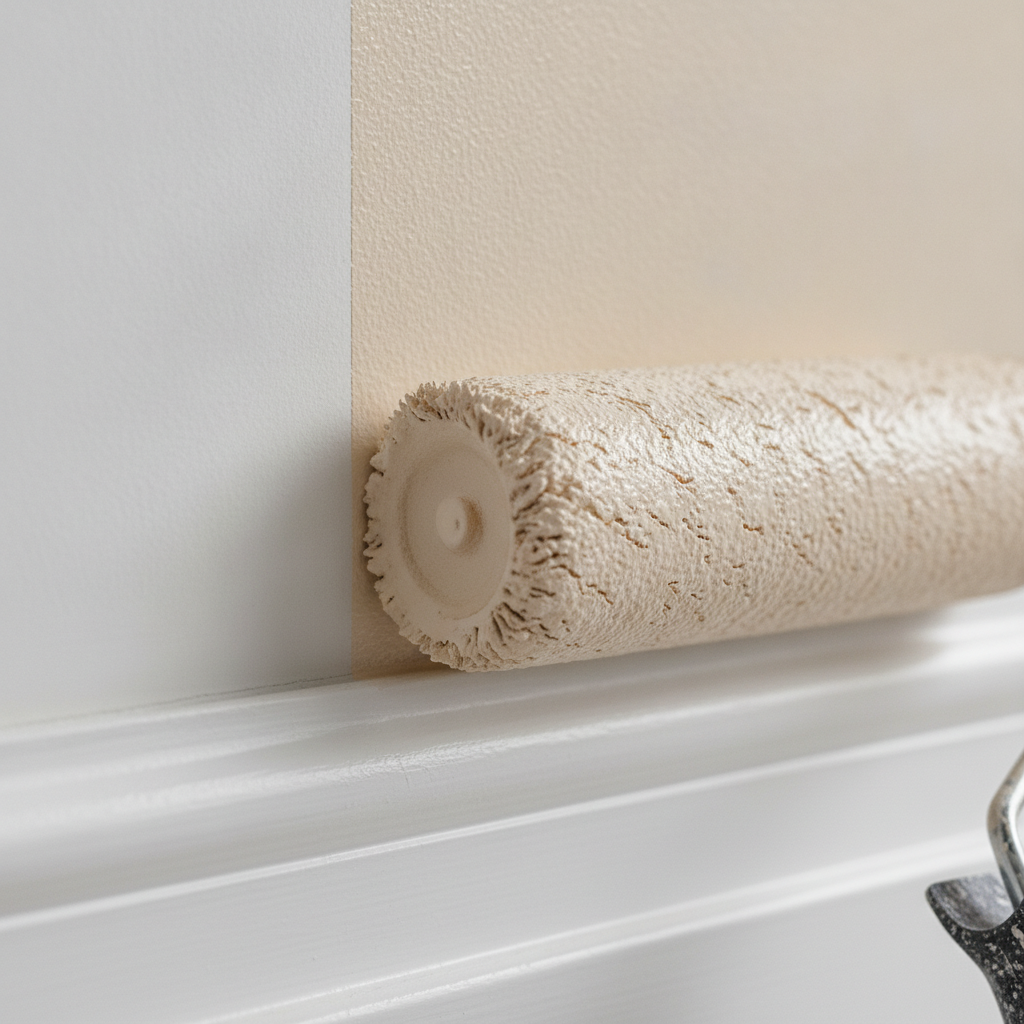
- Cut and roll (coat 1): 2–3 mil wet film; 3/8–1/2″ roller naps match wall texture for 350–450 sq ft per gallon.
- Inspect and sand: Knock down nibs with 220 grit; vacuum dust; check light lines.
- Cut and roll (coat 2): Maintain a wet edge; align roll direction; final coverage and uniformity lock in.
- Detailing: Caulk hairline trim gaps (paintable); reinstall plates; clean lines at 1–2 mm tolerance.
- Cleanup and handoff: HEPA vacuum; label touch-up jars; review care instructions.
Rooms are often dry to touch in 60–90 minutes, light-use ready in 4–6 hours, and furniture-safe overnight. Full hardness develops over weeks; avoid aggressive scrubbing until day 14 where possible.
Types, Sheens, and Primers (Choosing the Right System)
Match chemistry and sheen to room use: washable 100% acrylic for walls, waterborne alkyd for doors/trim, and moisture-tough satin or semi-gloss for baths and kitchens. Prime stains and patches for uniform color and adhesion.
Common interior paint chemistries
- 100% acrylic latex: Low odor, fast dry (often 1 hour), and excellent scrub resistance for most walls and ceilings.
- Waterborne alkyds: Oil-like leveling with water cleanup; great on doors, trims, and cabinets where hardness matters.
- Vinyl-acrylic blends: Economical for low-traffic areas; pair with a quality primer for best hide.
Sheen selection guide
| Sheen | Best For | Washability | Notes |
|---|---|---|---|
| Flat/Matte | Ceilings, low-traffic rooms | Low–Medium | Great at hiding minor drywall waves; less wipe-friendly. |
| Eggshell | Living rooms, bedrooms | Medium–High | Balanced LRV and cleanability; our default for most walls. |
| Satin | Hallways, kids’ rooms | High | Handles frequent touching and cleaning; slight glow. |
| Semi-Gloss | Trim, doors, baths, kitchens | Very High | Moisture and stain resistant; highlights surface prep. |
Primers and when to use them
- Stain-blocking: Locks in water stains, markers, and tannins; recoat windows often 45–90 minutes.
- Bonding primers: Improve adhesion over glossy paints or cabinets; scuff-sanding (220 grit) increases mechanical key.
- Drywall primers: Seal fresh mud to even porosity; target 1–2 coats before topcoats in new builds.
Color changes of 3+ shades benefit from a transition primer tinted toward the new hue. This can trim one full topcoat in dramatic color jumps.
Best Practices for Smooth, Durable Results
Protect first, then perfect surfaces. Control climate (60–77°F; 40–60% RH), use the right nap and brush, maintain a wet edge, and sand lightly between coats. These habits boost finish quality and reduce touch-ups by 50% or more.
Prep that pays off
- Clean and degloss: Kitchens often need TSP-alternative degreasers; rinsing lowers adhesion failures dramatically.
- Fill and feather: Wide knife passes (6–10″) prevent proud patches; sand to a 12–18″ halo for invisibility.
- Caulk smart: Use paintable acrylic-silicone; tool to a 1/8″ bead; allow recommended skin time before coating.
Application discipline
- Brushes: Angled 2–2.5″ nylon/poly blends for clean cut lines at 1–2 mm from ceilings.
- Rollers: 3/8″ naps for smooth walls; 1/2″ for light orange peel; pre-damp for even loading.
- Edges: Roll into cuts within 2–3 minutes to eliminate picture-framing.
- Film build: Target 2–3 mil wet per coat; excessive build slows cure and scuffs easier in week one.
Climate and curing
- Temperature: Aim 60–77°F; below 50°F slows coalescence and can weaken film.
- Humidity: Keep between 40–60%; high RH extends dry times and can dull sheen.
- Air movement: Gentle airflow (not blasting fans) improves solvent evaporation without skinning.
We label each room with re-entry and light-use times to simplify family routines. Most homeowners can rehang pictures in 24–48 hours and perform gentle cleanups with damp microfiber after day 7.
Tools and Resources We Trust
Pro-grade tools and materials create consistent outcomes: HEPA vacuums, low-dust sanders, high-build primers, and premium 100% acrylics with ZERO VOC tints. The right kit speeds projects and reduces callbacks.
- Surface prep: Festool- or similar dust-extraction sanders; 120–220 grit sheets; carbide scrapers for flaking spots.
- Protection: Heavy paper floors + poly on furniture; clean edges at thresholds and vents.
- Application: Quality brushes and shed-resistant rollers; extension poles reduce lap marks by keeping pressure even.
- Primers: Stain blockers for smoke or water; bonding primers for glossy trim and cabinets.
- Paints: ZERO VOC interior paint lines with washable finishes; waterborne alkyds for doors and cabinets.
- Safety: Ventilation fans, respirators when needed, and moisture meters targeting <12% before coating bare wood.
Need help choosing a system? Our crew will map a room-by-room plan and share a labeled touch-up kit at handoff so maintenance stays simple for years.
Local Interior Paint Tips for Milton and Halton Homes
In 316 Bergamot Ave and the broader Regional Municipality of Halton, indoor humidity swings and winter ventilation affect paint flow and cure. Plan projects for stable 40–60% RH and consider scrubbable sheens in high-traffic mudrooms typical of our area’s layouts.
Local housing stock often mixes newer drywall with builder-grade trim enamels. We test adhesion on glossy areas, scuff-sand, and use bonding primers on doors and casings for a smoother, harder finish that stands up to seasonal gear and pet traffic.
Local considerations for 316 Bergamot Ave
- Schedule painting outside of peak furnace or AC loads so indoor temps hold steady (60–77°F) for even flow and dry.
- Plan family room work around school calendars; quick-dry ZERO VOC lines keep spaces usable even during busy weeks near Walker Park.
- When loading supplies near Tremaine at Bergamot, we protect entry floors with heavy paper to prevent grit telegraphing through fresh coatings.
Common Mistakes and How to Avoid Them
Most interior paint problems trace to missed prep, wrong tools, or climate control. Clean, sand, and prime; choose the right nap and sheen; and keep humidity 40–60%. These steps eliminate flashing, peeling, and roller lines in the first place.
- Skipping degloss: Oils and cleaners kill adhesion; always rinse after degreasers.
- Wrong sheen: Flat in a hallway scuffs fast; eggshell or satin lasts longer and cleans easier.
- Overworking paint: Excess back-rolling lifts partially set paint; keep a wet edge and move.
- Ignoring RH and temp: High humidity or cold rooms can add 1–3 hours to recoat times and dull sheen.
- Thin build: Starved coats under 1 mil dry often won’t reach listed scrub ratings.
We use light raking and spot LEDs to catch imperfections at 2–3 feet—long before they show up in daylight.
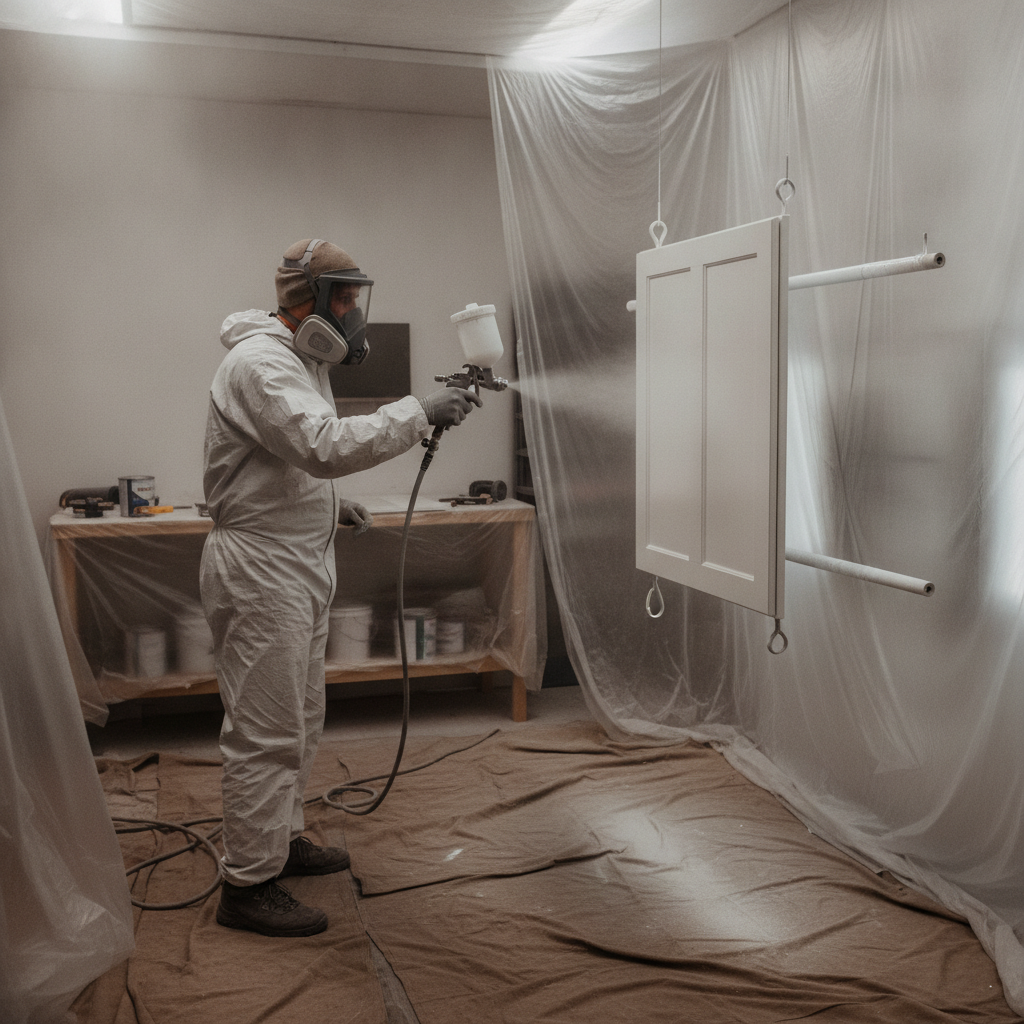
Beyond Walls: Cabinets, Ceilings, and More
Factory-like cabinet spraying, clean popcorn ceiling removal with skim coat, and hard-wearing epoxy floors elevate interiors fast. Each service relies on dust control, bonding primers, and controlled film builds for professional results.
Kitchen cabinet spray painting uses a dedicated HVLP setup, bonding primers, and durable lacquer or polyurethane topcoats. Doors are labeled, hardware bagged, and sprayed in a controlled zone; boxes are masked and finished in place with fine-filtered air movement.
- Cabinet coatings: Waterborne lacquers cure hard, often within days; target 2–3 coats for uniform sheen.
- Popcorn removal: Low-dust extraction; skim 1–2 passes; prime and finish with flat ceiling paint for flawless light scatter.
- Garage epoxy floors: Diamond grinding, moisture check, 2-part epoxy, and optional flakes; foot traffic typically in 24–48 hours.
- Caulking replacement: Weatherproof, paintable sealants close drafts around frames and trim.
If your deck needs love too, our team handles prep like deck sanding before staining—so your inside and outside refresh feel cohesive when guests arrive.
Case Studies and Real-World Examples
Small planning choices deliver big results. See how ZERO VOC walls, bonding primers, and correct sheens solved real homeowner pain points across Mississauga, Oakville, and Milton.
Mississauga family room refresh
- Problem: Scuffed builder paint and dark corners.
- Plan: Eggshell 100% acrylic at LRV ~68 to lift light by double digits; satin on trim.
- Outcome: Two coats at 350–400 sq ft per gallon; room reassembled same evening; weekly wipe-downs now take minutes.
Oakville kitchen cabinet makeover
- Problem: Yellowed varnish and sticky doors.
- Plan: Degloss + bonding primer + waterborne lacquer; HVLP spray, 2–3 mil wet per pass.
- Outcome: Hard, even film within days; improved reflectance made the eat-in area feel larger.
Milton basement media room
- Problem: Glare on walls during movie nights.
- Plan: Matte on front wall at LRV ~20; eggshell elsewhere; careful cut-and-roll to avoid flashing.
- Outcome: Reduced hotspotting; faster dry times (around 60–90 minutes) kept family schedules intact.
DIY Readiness and Pro Partnership Checklist
If you’re tackling a room yourself, prepare surfaces, control climate, and test a 2×2 ft sample area. Partner with pros for high-visibility spaces, cabinets, stairwells, or when bonding, stain-blocking, or dust control are critical.
- Inspect walls at 2–3 ft with angled light; circle dings; fill and feather wide.
- Confirm RH 40–60% and 60–77°F; raise or lower as needed with dehumidifiers or gentle heat/AC.
- Prime patches and stains; tint primer toward new color if jumping 3+ shades.
- Roll test swatches; judge in morning and evening light; wait 24 hours before final call.
- Use 3/8″ nap on smooth walls; switch to 1/2″ for light texture; keep a wet edge.
When you want guaranteed scheduling, low odor, and factory-like cabinet or trim finishes, our crews bring the tools and repeatable systems that keep projects on time—every time.
Primer vs. Paint-and-Primer: When to Use What
Dedicated primers win for repairs, stains, color jumps, and glossy surfaces. Paint-and-primer works on clean, previously painted walls of similar color. Choose the system that matches your surface and time window.
| Scenario | Use Dedicated Primer | Use Paint-and-Primer | Notes |
|---|---|---|---|
| Stains/Water marks | Yes | No | Stain-blockers seal tannins and smoke before topcoats. |
| Dark-to-light color jump | Yes (tinted) | Possible | Primer reduces extra topcoats by 1+ layer. |
| Glossy existing paint | Yes (bonding) | No | Scuff-sand 220 grit first. |
| Clean, similar color | No | Yes | Great for speed on sound, low-wear walls. |
Frequently Asked Questions
Homeowners ask about dry times, odor, sheen choices, and room readiness. Here are clear answers to keep your project smooth and stress-free.
How long should I wait between coats?
Most interior paints recoat in 2–4 hours at 60–77°F and 40–60% humidity. Cooler or more humid rooms can add 1–3 hours. When in doubt, do a gentle finger rub in an inconspicuous area—if it doesn’t drag, it’s ready.
Which sheen is best for busy hallways?
Eggshell or satin balances cleanability with a soft look. Satin handles frequent wiping and fingerprints better, while eggshell hides minor wall waves a bit more. Trim typically gets semi-gloss for extra durability.
Are ZERO VOC paints really low odor?
Yes. Many zero-VOC lines use formulas with under 5 g/L VOCs, which keeps odor low even during application. Ventilating gently helps freshen rooms within hours so spaces can be used the same day.
When can I clean painted walls?
Light dusting is fine after paint dries to the touch, often 1–2 hours. For wiping with a damp microfiber, wait 7 days. Aggressive scrubbing is best after full cure—typically 14–30 days depending on product and climate.
Free Color Consult and On-Time Completion
We pair low-odor, ZERO VOC interior paint with a guaranteed On-Time Completion. Schedule a free color consultation and in-home estimate to map an efficient, clean project plan.
Ready to plan? Explore our interior paint cost guide for scope factors, timelines, and quality checkpoints. Then book your free visit and get a labeled touch-up kit on handoff.
Key Takeaways
Healthy, long-wearing interiors come from low-odor paint, the right sheen, strong prep, and climate control. Two even coats over the right primer deliver the uniform look and durability homeowners expect.
- ZERO VOC paints and controlled climate (60–77°F; 40–60% RH) keep projects comfortable.
- Eggshell for most walls; satin/semi-gloss where scrubbing or moisture is common.
- Repairs and primers prevent flashing and save extra coats on big color jumps.
- Cabinet spraying, ceiling smoothing, and epoxy floors upgrade function and feel.
- Plan re-entry: light use in hours, furniture overnight, full cure in 14–30 days.
Next Steps for a Cleaner, Faster Repaint
Set your color and sheen, then schedule a free in-home estimate. We’ll protect, prep, and paint with ZERO VOC systems so rooms feel fresh the same day and stay durable for years.
- Walk your spaces and list repairs, traffic levels, and cleaning needs.
- Pick two sample colors and decide after 24 hours of changing light.
- Book your Free Color Consultation and estimate with our Milton-based team.
- Get your project plan and On-Time Completion date in writing.
- Enjoy rooms that look brighter, clean easier, and photograph beautifully.
We’d love to help. Book a discovery visit near 316 Bergamot Ave and across Halton today—your rooms can look brand-new by the weekend.
Want a second perspective on planning? This practical interior painting guide breaks down room order and prep flow. For more prep reminders, skim these common painting mistakes. If cabinets are on your list, compare process notes from a cabinet spraying overview as well.